So I recently had occasion to change my rear brake shoes. There wasn’t a whole lot of information out there so I stuffed it up. Second time round it went much better with a fair bit of help from the Geek. Geek and I refined our technique as we went and got pretty good at it by the end. So, having had some success and gathered a whole lot of information, I thought I might stick it all in one thread.
Caveats etc
Now keep in mind that I am not a mechanic. Not a brake specialist. Not a parts interpreter. Not a Mitsubishi tech. While all care has been taken with this thread brakes are a serious business and doing them yourself involves some risk. I won’t be taking responsibility or held liable for things going wrong – this is just a helpful guide based on my own personal experiences. If you want to read more into this thread than that then please re-think before proceeding further. If you don’t have at least some mechanical aptitude consider getting a mate to help – or consulting an expert. Brakes are serious business and if they go wrong they can go wrong in a bad way...
Many of the images will require you to click on them for a full view. I could have re-sized them but I took the view the more detail the better so left them large.
Some of the images in this thread have been ‘borrowed’ with thanks to Mitsubishi. I acknowledge that Mitsubishi owns those images and reproduce them here only for educational purposes. Okay, down to business.
Parts
Before you start you may want to think about the parts you might need. First off, the main consumables – the brake shoes.
OEM rear shoes - 4600A106
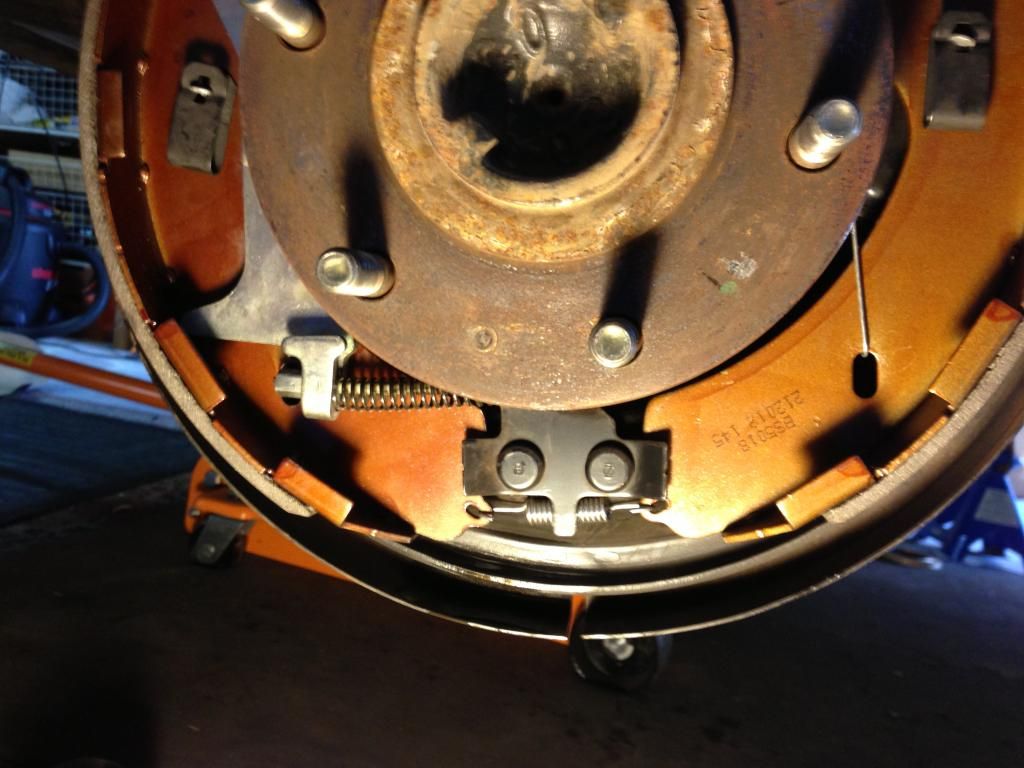
Bendix rear shoes - BS5018
Repco re-branded Bendix shoes RBS5018
Protex rear shoes - N3093
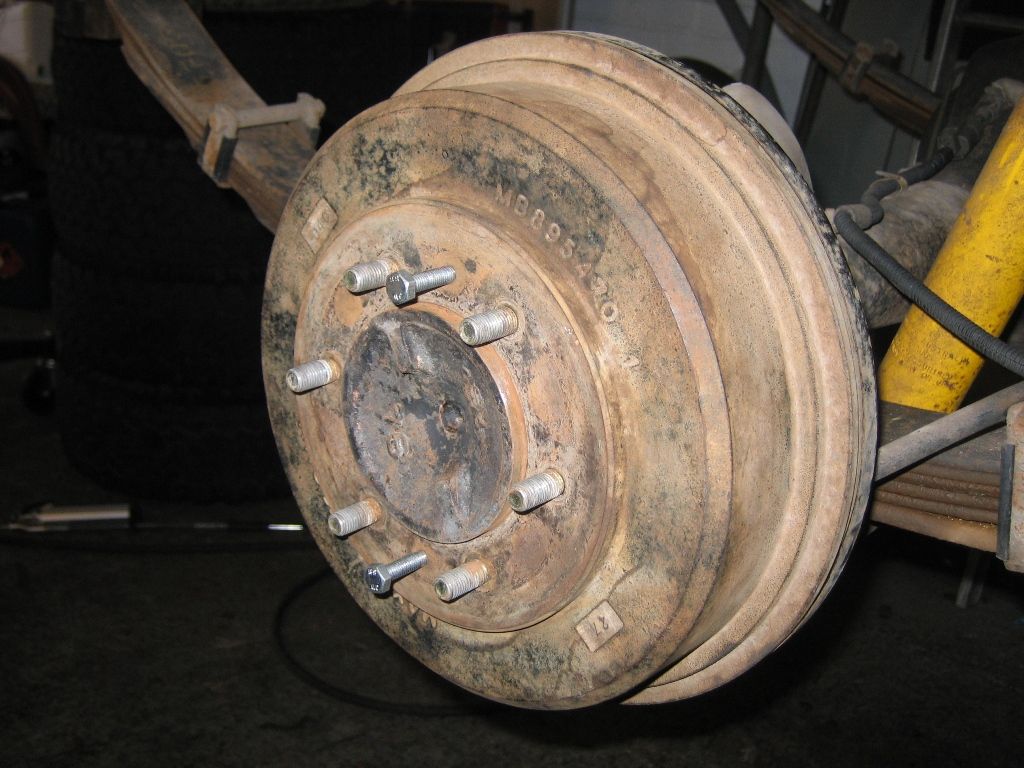
Then there’s the drums.
OEM rear drums – I could use a part number here. I had one I thought was right but now wonder if that was for the MK. If someone could get me the right number I’ll edit this later.
Protex rear drum - DRUM4111
How to measure whether you need new drums:
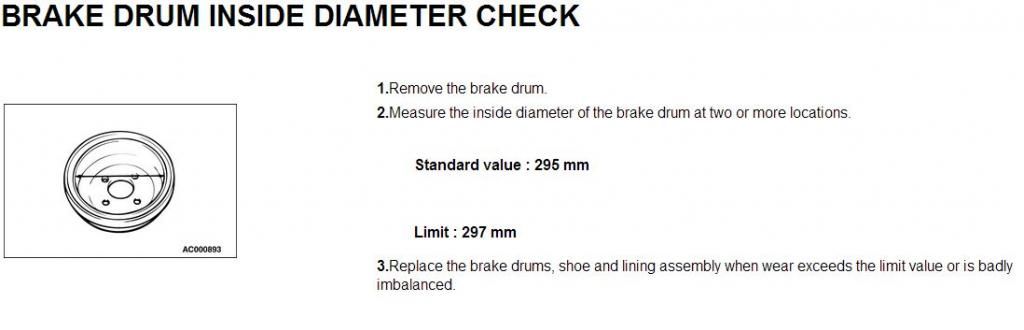
If you’re not sure whether your shoes are worn to the point of needing replacement, there is a small inspection hole in the backing plate. If you get under the vehicle and look out towards your rear wheel at about the 9 o’clock point on the driver’s side and 3 o’clock point on the passenger side you should be able to see a small rubber plug maybe 15mm long sitting vertically. If you remove that and get a good line of sight and light you can look at the side view of your front brake shoe. I found this pretty useless but your results might be better. While you’re under there looking at rubber covers, there is another at the top, horizontally. This covers the adjuster wheel to tighten up the brakes – more on this later.
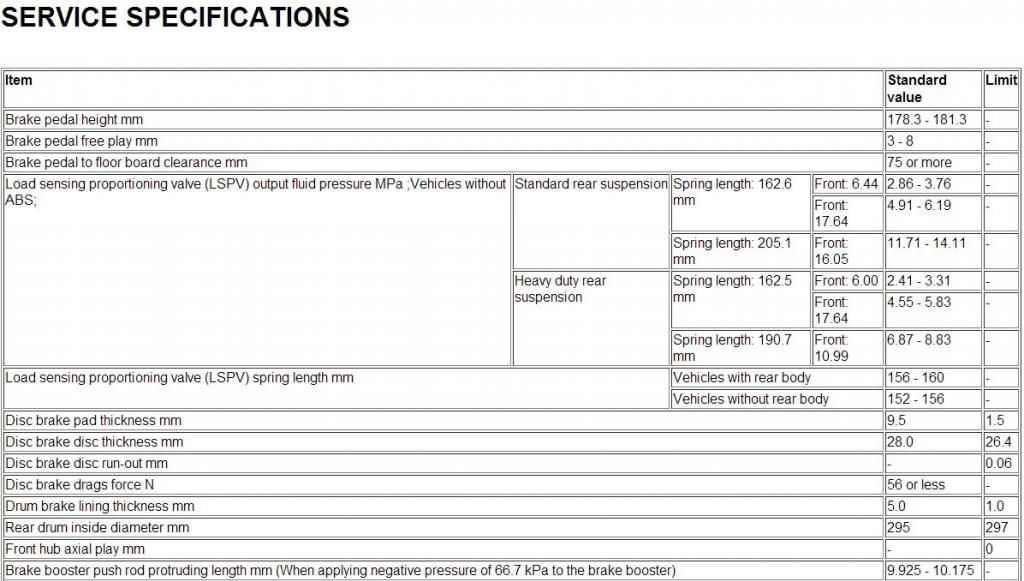
Since we’re measuring and all, here’s the other specifications:
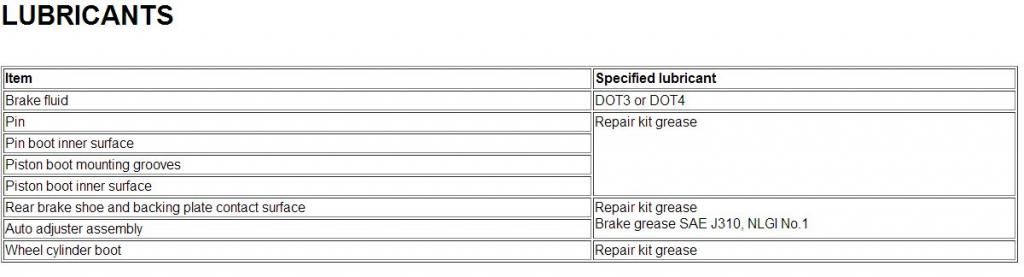
Now, while we’re talking parts, let’s look at the rest of the assembly.
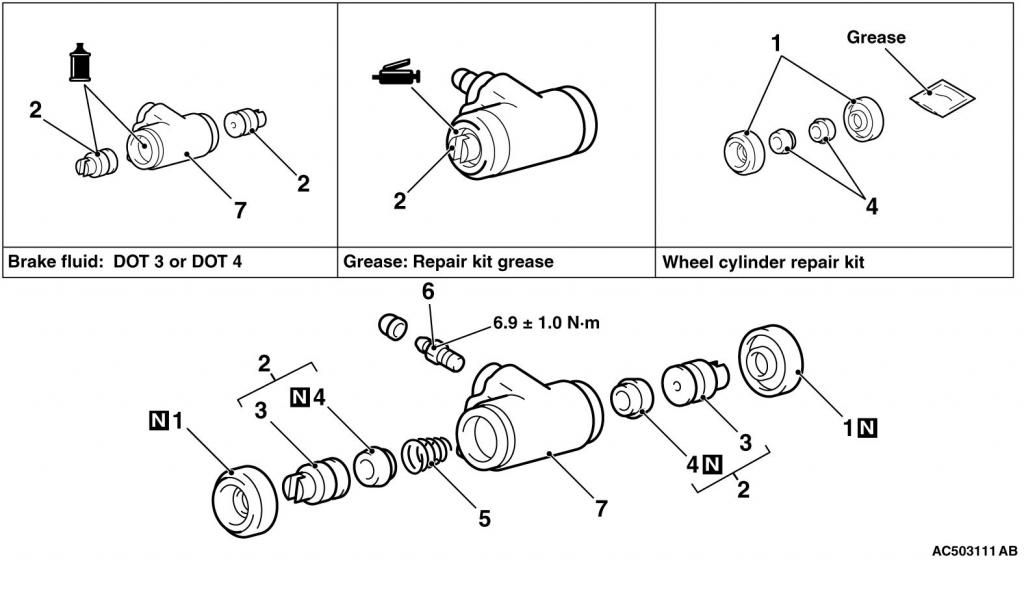
First, the exploded diagram (note this is the passenger side view):
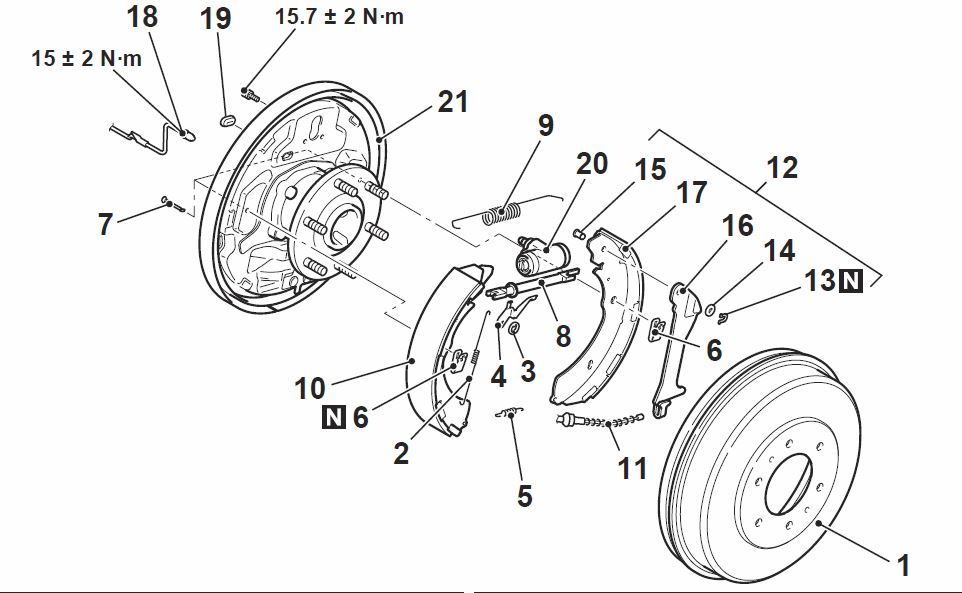
Now the part names to match the numbers in that diagram:
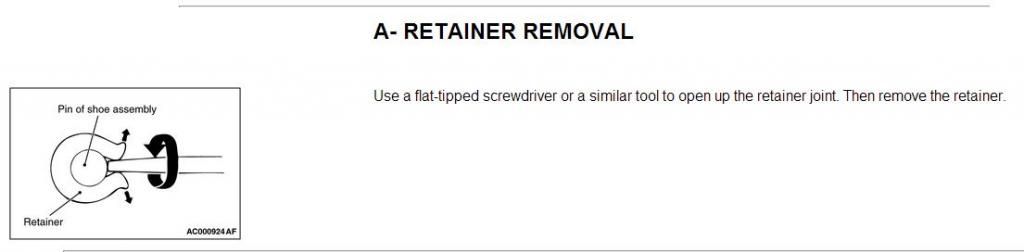
I’ll try to use those proper names in what follows, but no guarantees on that. The retainer clip at item 12 I will call the horseshoe clip for reasons that will later become obvious.
Now just to confuse things, this is a list of Mitsubishi part numbers for the parts in that diagram. It’s a snip/capture from a quote where I was buying parts. Unfortunately the names don’t match from the invoice to the workshop manual so I’ll try and interpret that a little for you.

So:
2 Shoe lever spring = 145 and 146 (maybe)
3 Clip – this is a tiny circlip thing and I think it’s the 104 snap ring
4 Auto adjuster lever = 143 LH and 144 RH
5 Anchor spring = hmm, not sure this one is on that list?
6 Shoe hold down spring = 148 shoe hold down
7 Shoe hold down pin = 147
8 Adjuster assembly = 139 LH and 140 RH – note that passenger side is black and driver’s side silver
9 Piston spring = 141
10 Brake shoes = see part numbers further up the page for these
13 Horseshoe clip = 138
14 Wave washer = 137
Having done all of that I’m not at all sure I was successful marrying up the part numbers. It doesn’t help that the numbers used in the manual don’t all seem to line up correctly with the numbers in the diagram. Colour me confused. If there’s a Mitsubishi tech out there or a helpful dealer who wants to give me a better version of my attempt that matches the part numbers to the diagram that would be most helpful.
Equipment/Tools
Okay so that was exciting. Not. So you’re all ready to go right? Not so fast. Here’s a list of handy items to have on hand before you start:
Parts – as above
Jack and axle stands or a hoist
Chocks for front wheels
Rubber mallet
Brake adjusting tool or suitable lever or flat screwdriver
Brake bleeder (more on this later)
8 and 10mm ring spanners (I can never remember which size is front and which rear but if you have one no doubt you’ll have the other too)
2 longish M8 high tensile bolts (optional)
Multigrips or pliers
Needle nose pliers
Flat bladed screwdriver
Shifter/aka shifting spanner (also optional)
Low tack masking tape (optional)
Rags or cleaning wipes
Brake fluid (dot 3 or dot 4)
High temperature bearing grease and something to apply it with (I used paddle pop sticks)
Can of brake cleaner
Emery paper or flexible sanding block
Small hammer and punch
Wheel brace/rattle gun – yeah obvious I know, but since I’m trying to be thorough…
A clear/clean flat surface or work bench (I used an esky, I think Geek used my tailgate)
A bucket or container for parts
Preparation
Right, so clear your workspace. Park the vehicle on flat ground. You want it stable with the handbrake off so use park for an auto and I guess first for a manual. Chock your front wheels. The handbrake is off right? Loosen the rear wheel nuts with your wheel brace unless using a rattle gun.
Now jack up the rear of the vehicle. You can do one side at a time but I prefer a trolley jack under the diff lifting the whole rear end as that saves time. Place axle stands under axles or maybe chassis rails if that suits. Never work under a vehicle which is only supported by a jack.
Remove a rear wheel - I'm going to work off the driver's side first so if you're using these instructions it might be best if you do too. Place the wheel under the sill/chassis rail as a further safety precaution in case the vehicle drops.
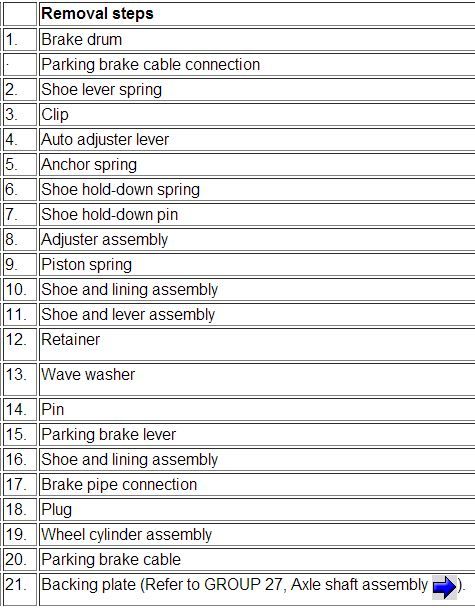
Drum removal
The next step depends on how far gone your brakes are. If they are really loose or really worn you can probably skip this step. If not, read on.
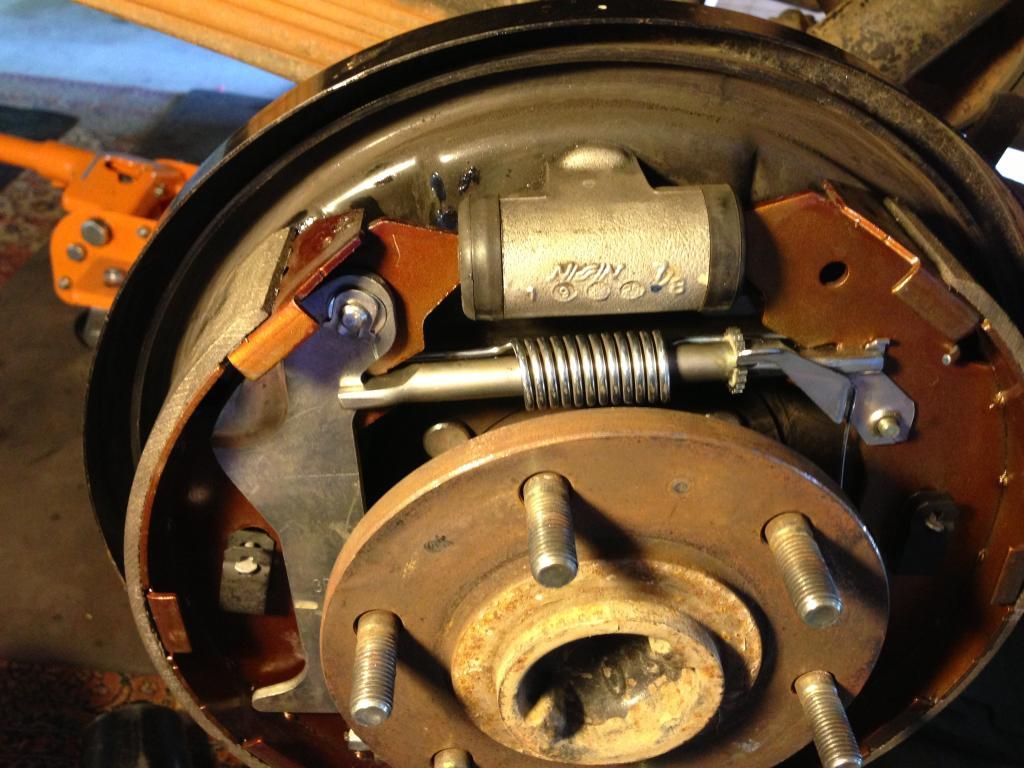
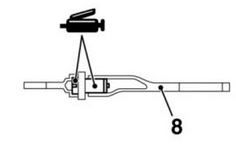
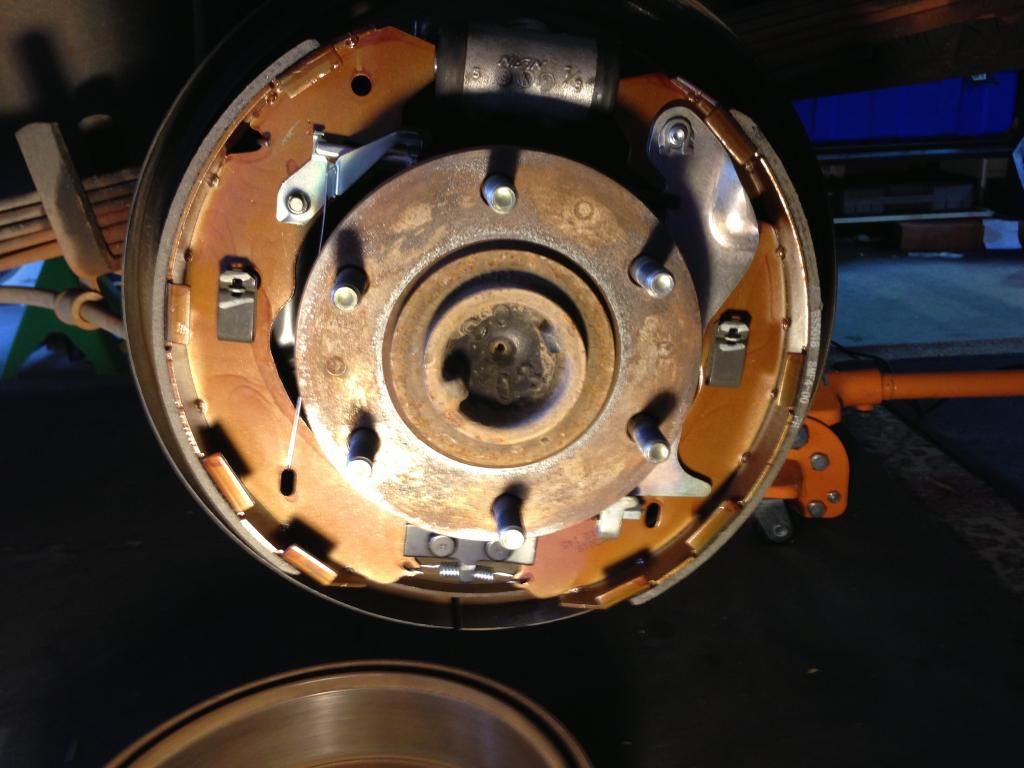
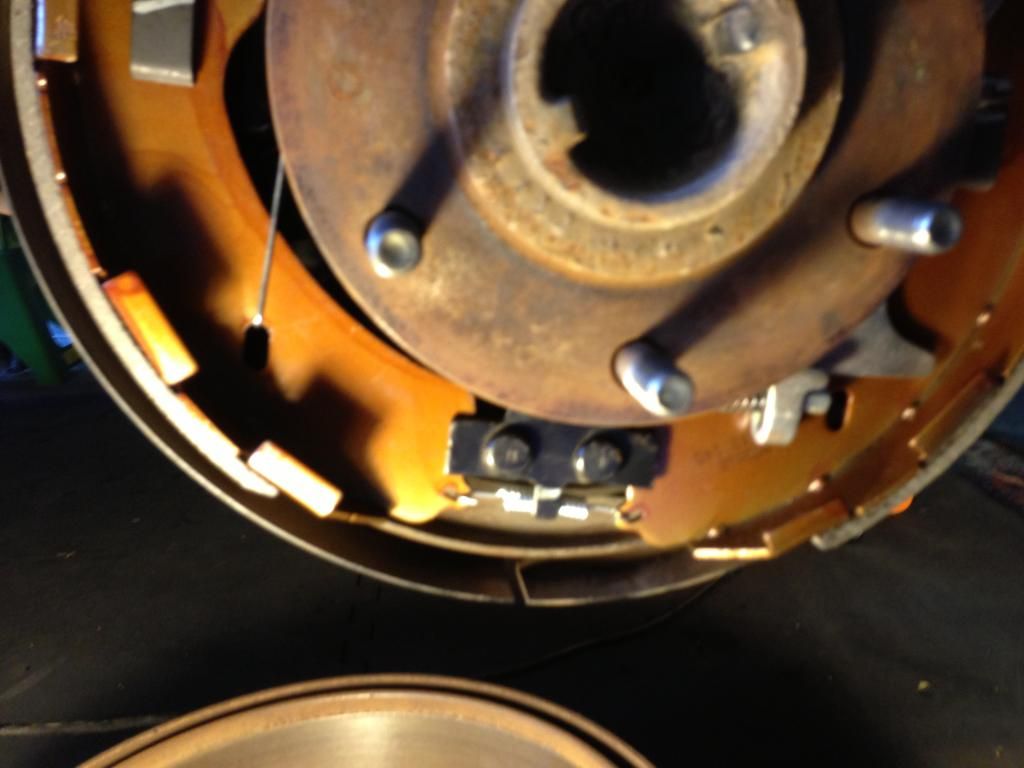
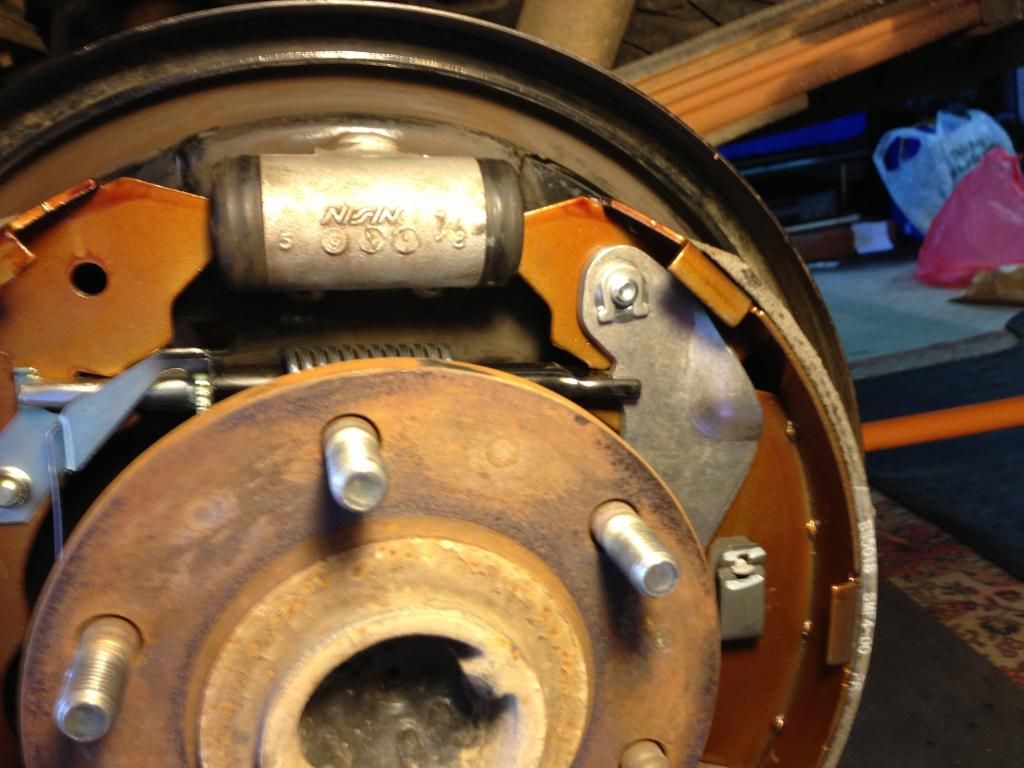
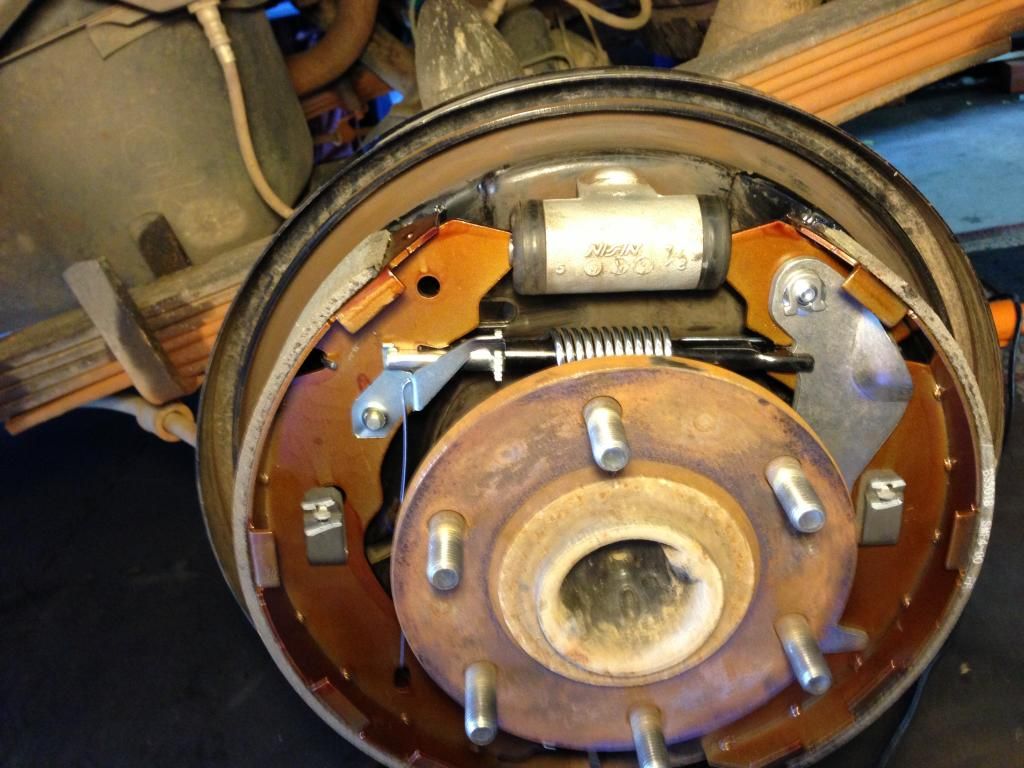
Now, reach around to the rear of the brake drum to the backing plate. At 12 o’clock there is a rubber plug – item 19 in the exploded diagram. Remove the plug. If you then feel around inside with your brake adjusting tool you should be able to find the toothed adjusting wheel (the round bit on item 8 in the diagram).
Here’s a closer picture of the wheel you’re after – to the right of the big silver spring: