Gauci204s Triton and Tray build up - Finally

Want to show off what you've done to your rig? or have a custom project to show? Post it up here!

Gauci204s Triton and Tray build up - Finally

Postby gauci204 on Mon Apr 01, 2013 8:51 pm

HI Guys,

Well it has been a long time coming with a lot of time planning, researching, Designing, then redesigning, then more redesigning, then some more researching then some more redesigning :oops: to finally get me here.

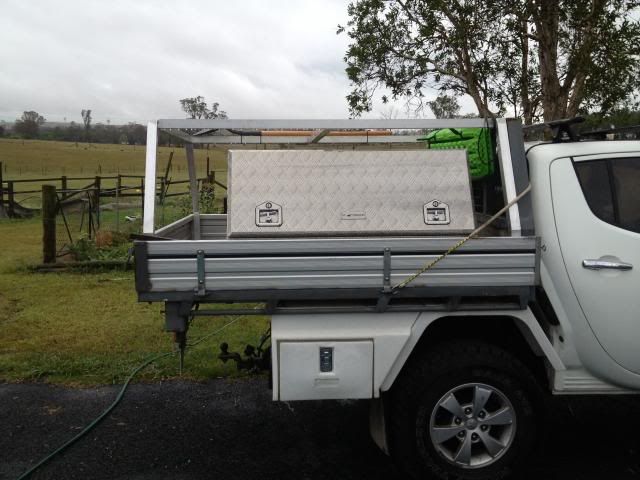
I first bought the ute in sept 2010 and it was bog standard with 56000kms on it. i loved it from the start, thought it looked nice and sleek with the factory hard cover and roll bar, but soon found that the hard lid was very impractical for me as a day to day work ute, carrying all sorts of crap to and from the job sites.

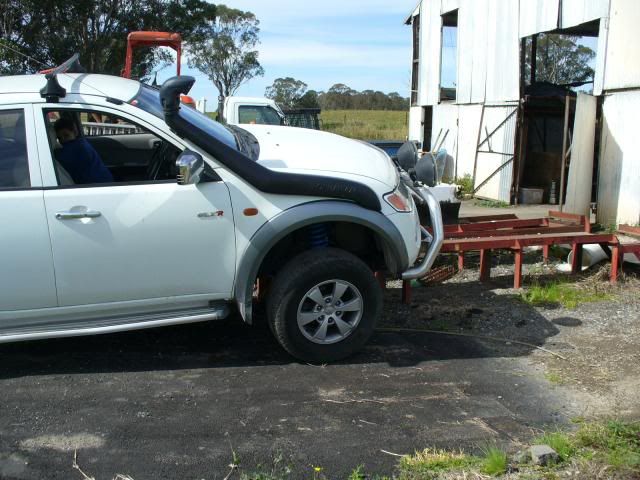
first mod was an Ironman Snorkel, along with the accompanying incorrect template. so a few extra holes are hidden underneath the snorkel.

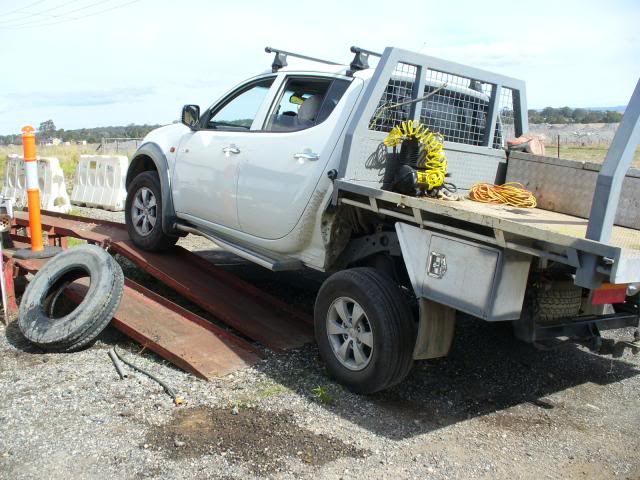
being short on funds, i headed back to Ebay to look for a steel tray and found a Landcrusier tray cheap not far from here which would be the basis for my first tray.

I cant find the photo of when i first put it on the ute as its full length (just to drive it over to the shed), but i do have one of its massive headboard.
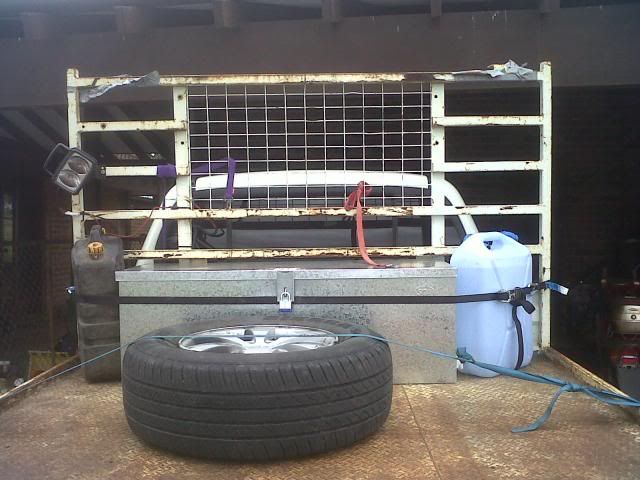
Click to view larger picture

i had the tray like this for a few months until i got myself stuck in a carpark in strathfield that i thought was just an open top carpark, but ended up being a multi storey carpark that i had to go down 3 floors to get out. ended up with 8psi in my tyres to get out of there. :oops:

anyway, after that incident i got off my ass and bought some 75*75*2mm shs and built myself a new headboard with water tank inbuilt, as well as a rear removable hoop so i could carry timbers etc.
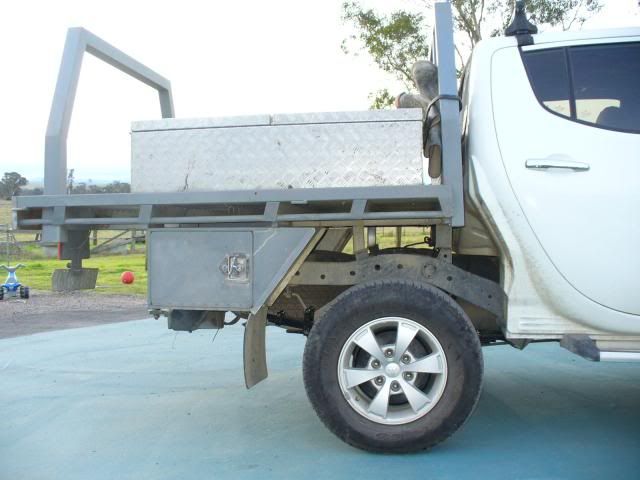
Click to view larger picture

i put tie down points everywhere, 3 across the headboard, and 1 in each corner of the tray. they came in very handy when carrying all the bits an pieces that i was at the time.

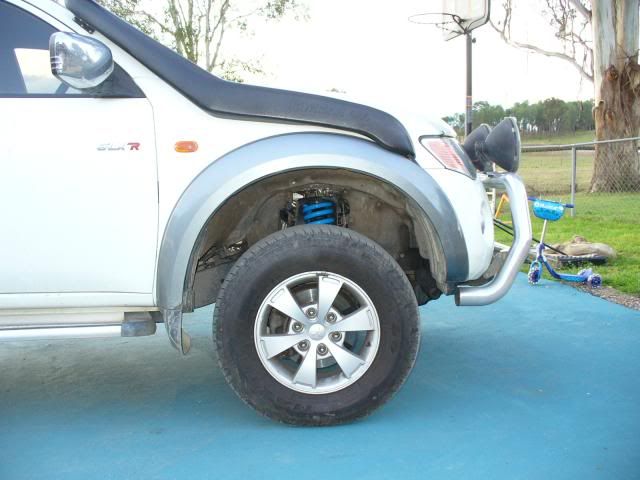
about the same time I realised that my suspension was becoming inverted on a constant basis. my standard weight was 2.7t before carrying anything extra, and it wasnt uncommon for me to have 20-30 lengths of 150*50 oregon timbers on the roof as well, so a quick couple of visits to Brendan at Ultimate (the second visit was because i lost a spring pack off the back of the ute on the way home :oops: :oops: :oops: when i had to stop in at a job, and i can remeber Fraz asking me if it would be ok just sitting on the back . "yeah no worries, i dont have to go far" :evil: :evil:

new lift installed
Click to view larger picture

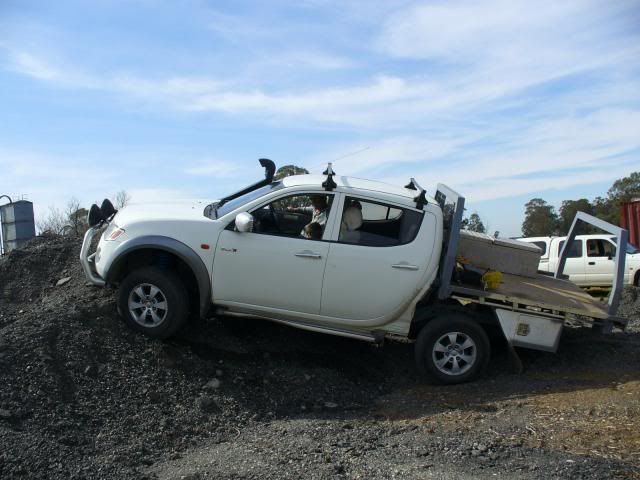
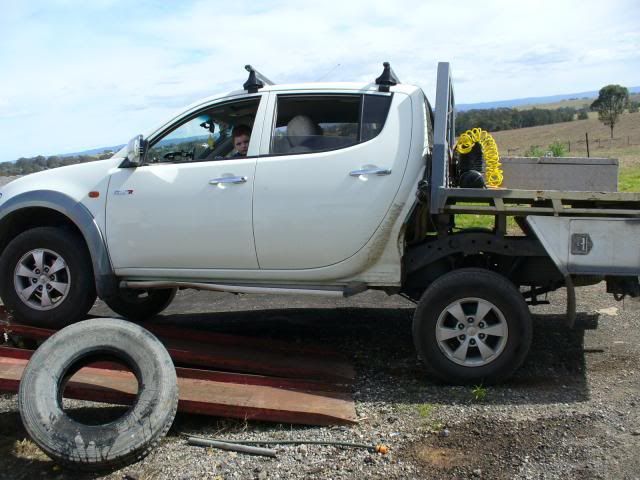
took it straight up the back of the shed on a pile and on the ramps to test the flex. very happy with the result, but the highway terrain tyres on it looked ridiculously small with the lift.

i cant remember which mod was next but I upgraded to 265/75/16 Mickey Thompson ATZ 4 Ribs, ECUTEK tune, :twisted: changed the toolboxes and rear wheel arches from the old heavy steel items, to some nice sturdy Poly items. reason i went with the poly was 1: weight (they are about on par with a set of aluminium ones 2: if they take a hit, they are more likely to flex and bounce back to shape where as aluminium/steel boxes when hit will just stay hit. (still dont want to test my theory though).

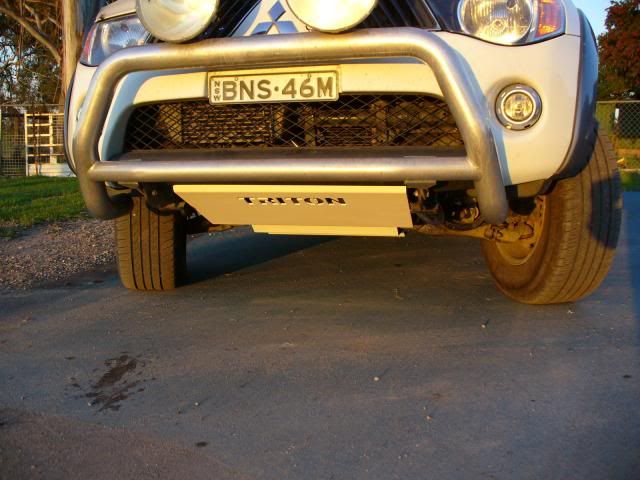
Colour coded and fitted bash plates off the forum
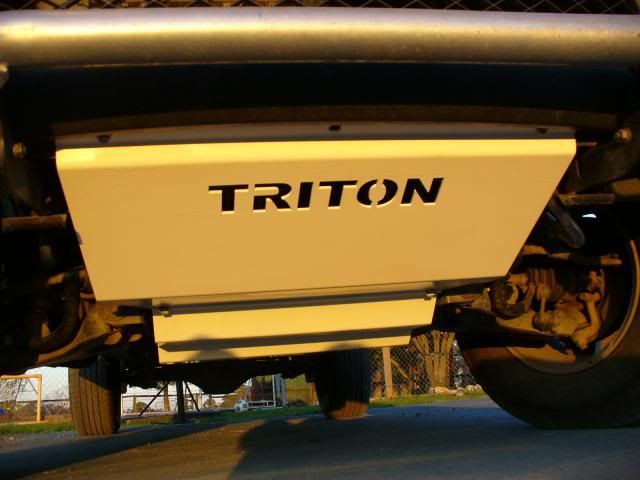
Click to view larger picture

also, ended up with a ARB Deluxe winch bar along with Aldi Winch, all installed at ARB Moorebank for a steal of a price thanks to a fellow forum member. Next In line was a 3" Scotts rods system then back to MRT to have the tune updated and gave it another run on the dyno to be sure.
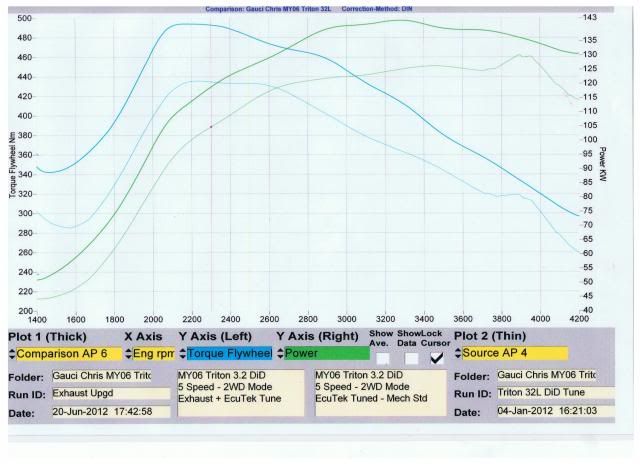
Click to view larger picture

very happy with the results. although i am very tempted to go down the turbo upgrade path, but that can wait until i get back from the cape in august.


Also, after bending my factory sidesteps whilst out hunting, last christmas i bought a set of sidesteps/scrub rails that were supposed to be for my model triton, which ended up fitting against the body, but the mounting brackets were way too short for the chassis rails. they have stayed in the garage until last month when i finally cut the ends off and Welded up some new brackets to go around the chassis rails, along with some 16mm high tensile bolts.
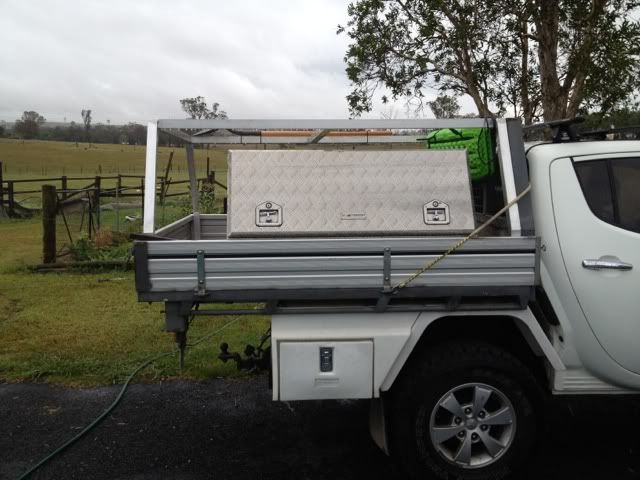
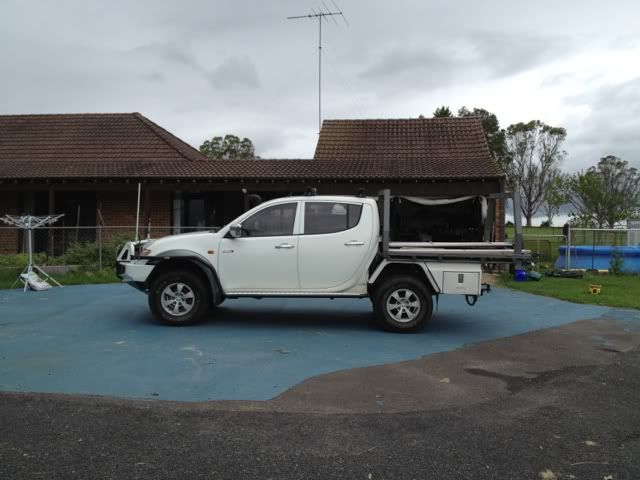
Click to view larger picture

Changed the winch cable over to winch rope and fitted an alloy fairlead from Precision alloy that takes up the whole space in the Deluxe bar. I got them to make some spacers to make the fairlead finish flush with the bar, so that the rope would not touch any sharp edges when being used on an uphill/downhill slope.
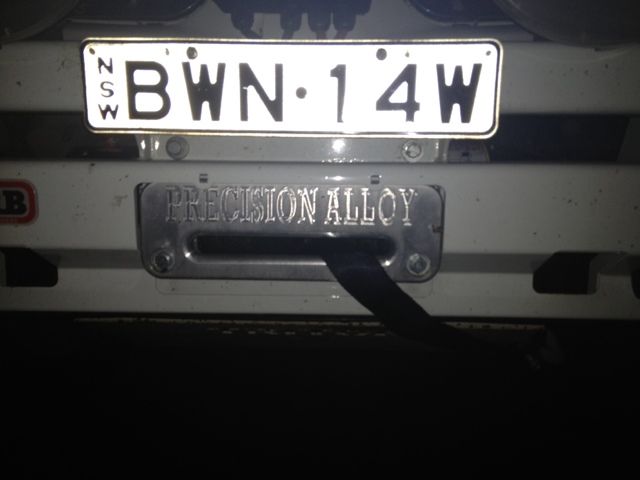
Click to view larger picture


so now with all the barwork, suspension, tyres, toolboxes etc sorted, it was time to finally start building the canopy/cage that i had been asking people questions about for a few months.

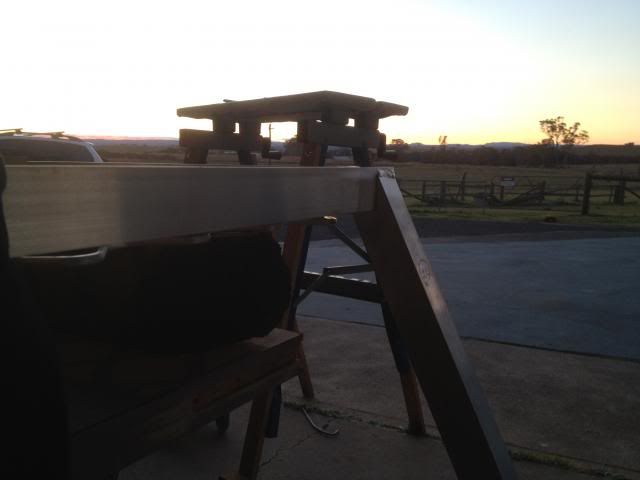
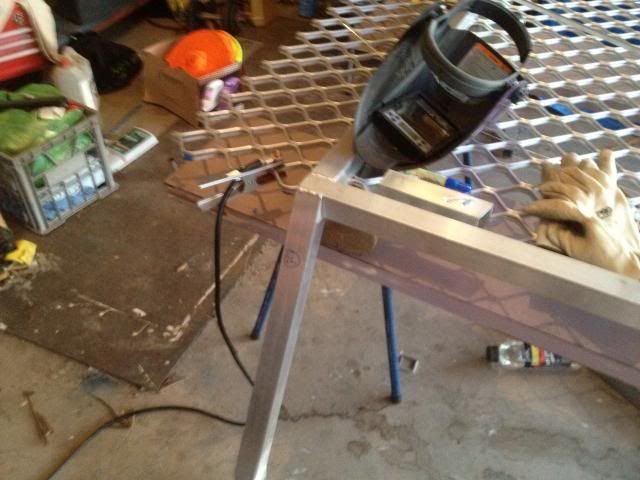
here are a few pics of my first go at Tig Welding Aluminium. 1.6mm wall 45*45 shs tube.
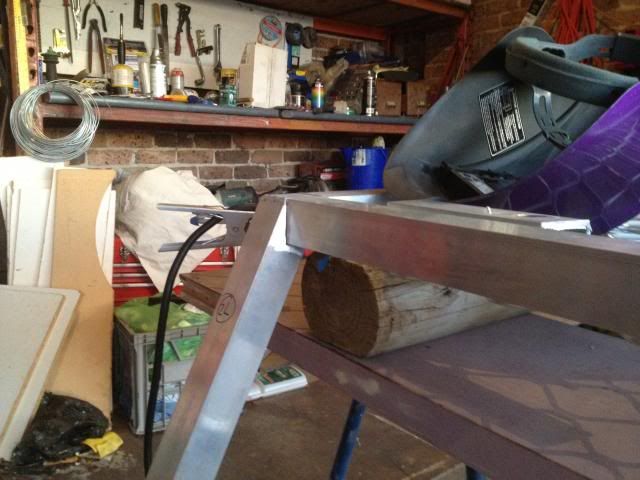
Click to view larger picture

i was pretty proud of myself that i didnt blow through it anywhere and it was actually to the shape that i wanted.

i still needed to put the mesh doors on and mesh on the roof, but i wasnt quite happy with it. I got a call from the mine next door to me and went down to see him. i Parked on his weighbridge and noticed that with me in the car, my half empty toolbox and nothing else, i was still at 2650kgs which wasnt going to leave me much room to fit the kids, the mrs, a couple of fridges and some clothes in it for the trip to the cape in june/july this year.

so i decided i needed to build a whole new tray, and it had to be alloy to keep the weight down, but I wanted it to be strong, not like the pissweak alloy trays that clip together.

this is where the researching, desiging, researching, re desiging etc came into play, and it kept me up late every night for 3-4 months. first learning how to use a CAD program, then trying to draw my design, working over it to see any issues with it, re drawing it etc until finally coming up with the final design.

I decided that if i was going to spend money on a new custom tray, it was going to be everything i ever wanted in a tray, and whilst I really didnt want to go overboard with the costs, if the difference between getting exactly what i wanted and almost what i wanted was a matter of $1000, i was going to spend it, as i can take this tray with me to the next ute if i ever get rid of the Triton.

so the wish list for the tray was: Minimum of 50ltrs water on board (preferably in the headboard), Min 80-100 ltrs diesel Aux tank, Strong Chassis for tray, 3mm treadplate floor, "C" channel side rails as i dont like the look of tie rails, and i can never find ratchet straps that fit around most tie rails without having to loop on themselves.

also wanted a Canvas canopy with inbuilt awnings on both sides, so i dont have to have one strapped to the roof of the car.

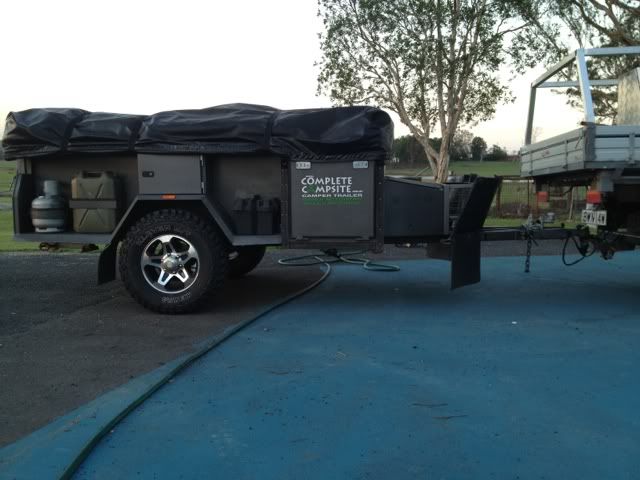
i got prices from a few places, and when i took my Camper trailer up to Exclusive Trailers at Bilpin to have the axle extended, install new calipers to fit my new 265/75/16 muddies. The camper sits perfectly level with my ute now that it has the bigger rubber on it. also give me two extra spares that will fit my ute, so i will have 3 spares in total.
Click to view larger picture


i remebered that he builds custom alloy trailers and seeing as though i know the quality of his work (he built a very heavy duty plant trailer for me a few years ago), i would leave the job with him.

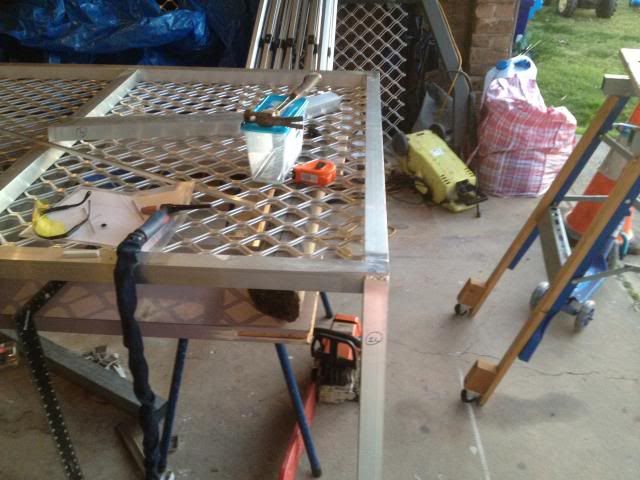
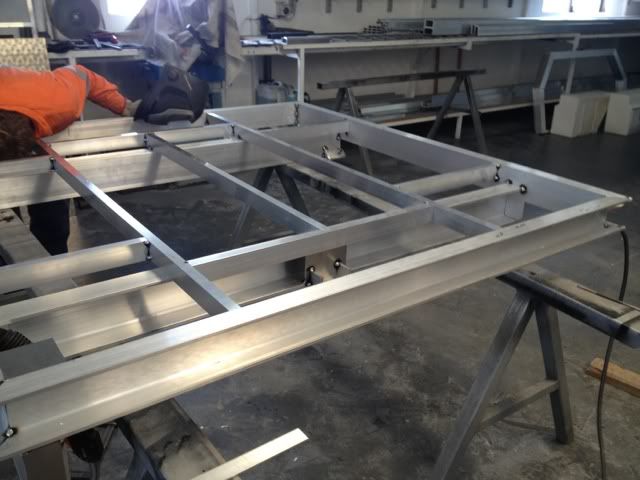
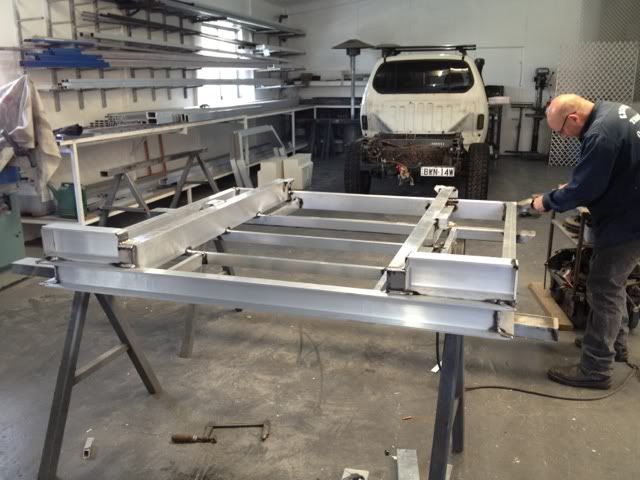
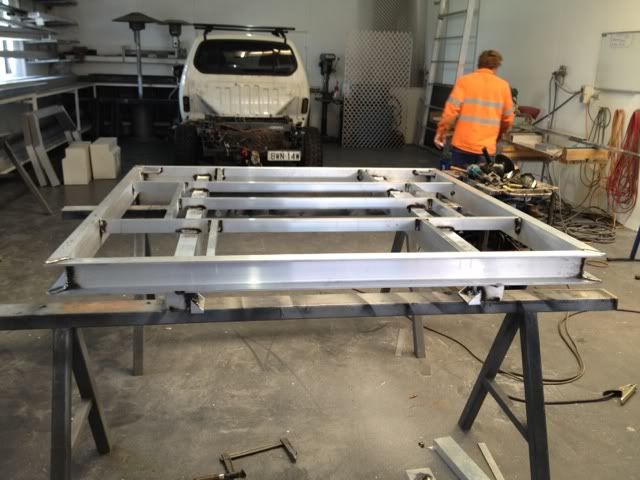
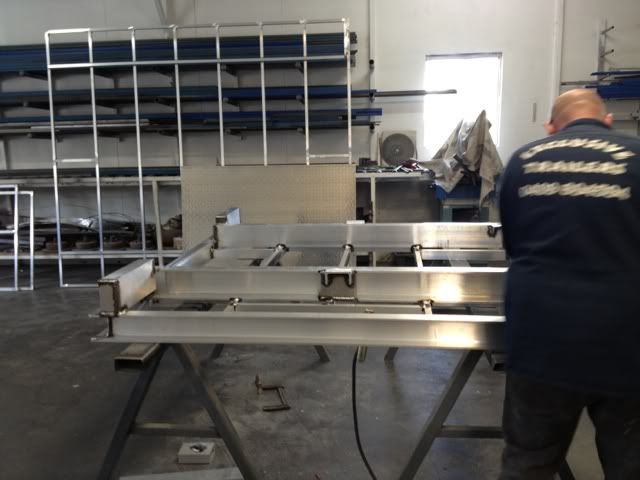
starting off with the C channel frame and cross braces
Click to view larger picture
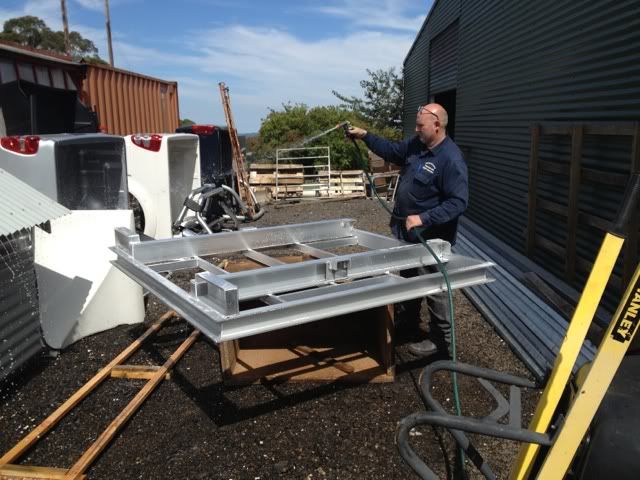
all the main welding was done with a double pulse mig 8-) with the smaller stuff using a single pulse mig. both pretty cool machines.

a quick little acid bath to get rid of the mig smoke marks
Click to view larger picture

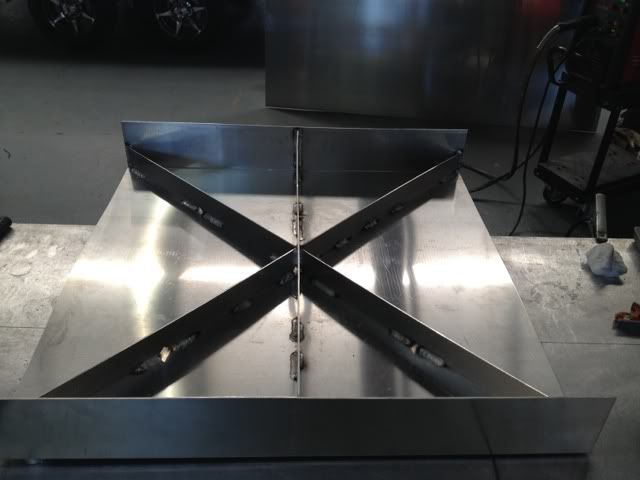
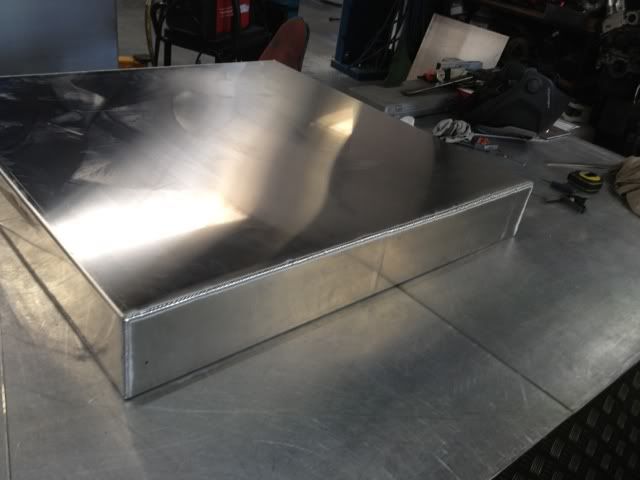
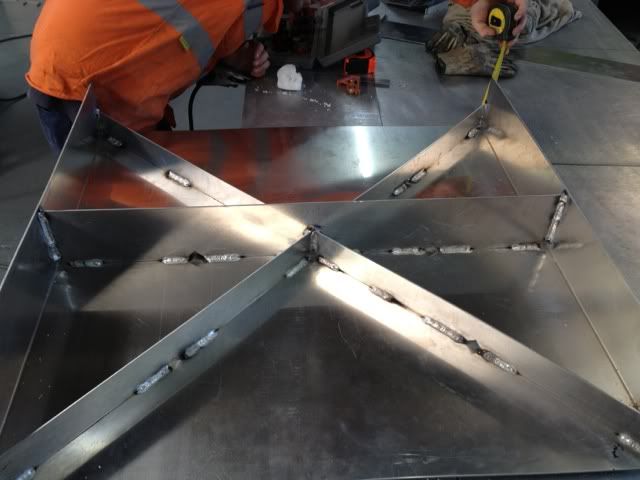
next step was the aux diesel tank fully baffled.
Click to view larger picture
Internal baffles mig welded, with the outside seams fully TIG welded. very neat welding too i might add.
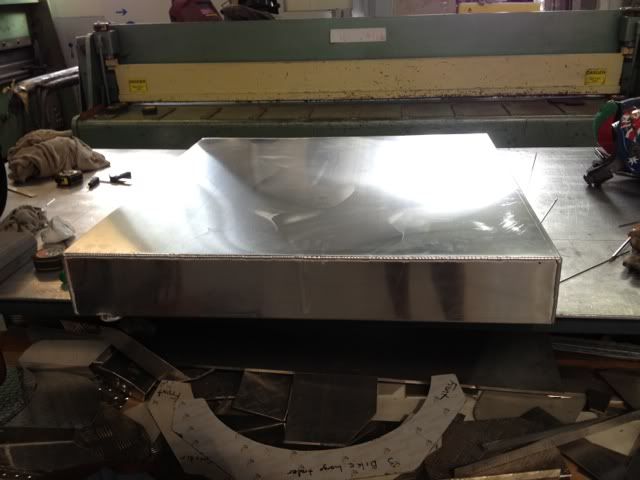
Click to view larger picture

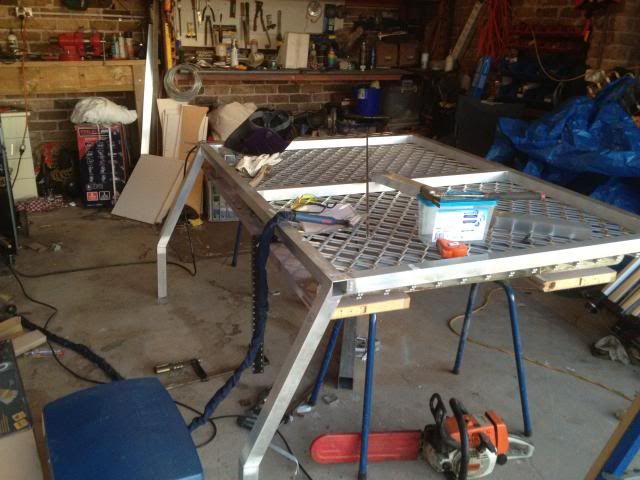
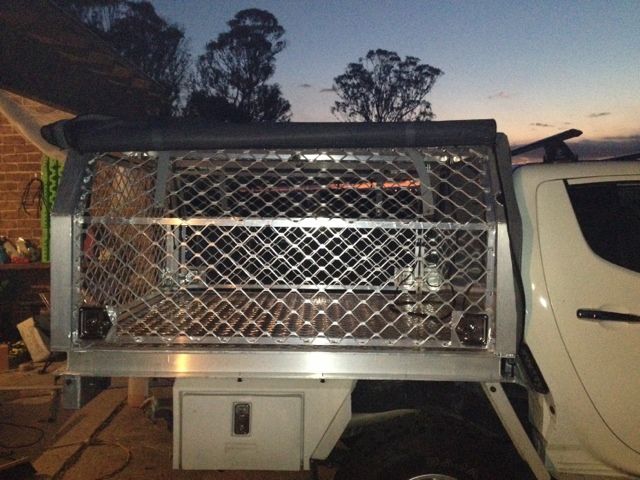
i dont have any more photos of the tray during its build, just waiting on Kriss to email the to me, but this was the final product as i picked it up , with full mesh cage, including doors.
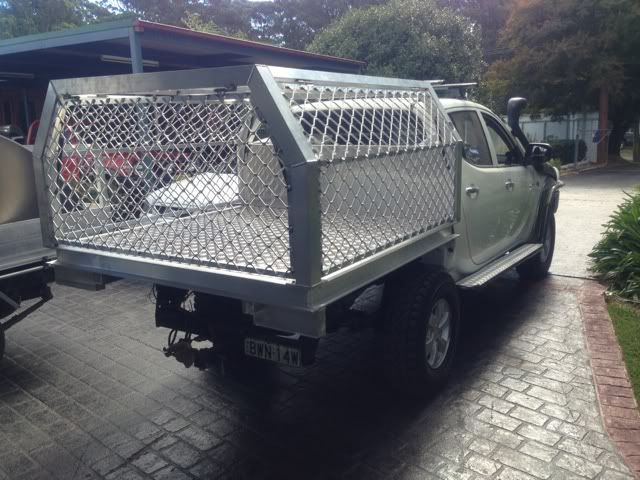
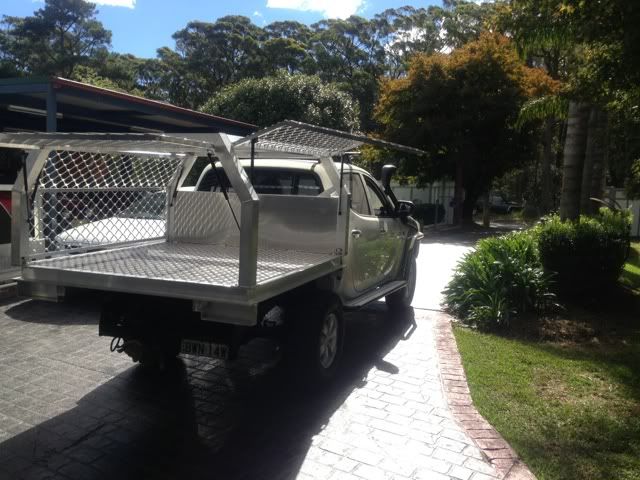
Click to view larger picture

i was a very happy lad when i finally got to pick it up as it had been so long in the planning etc.

here are a few more shots of the tray

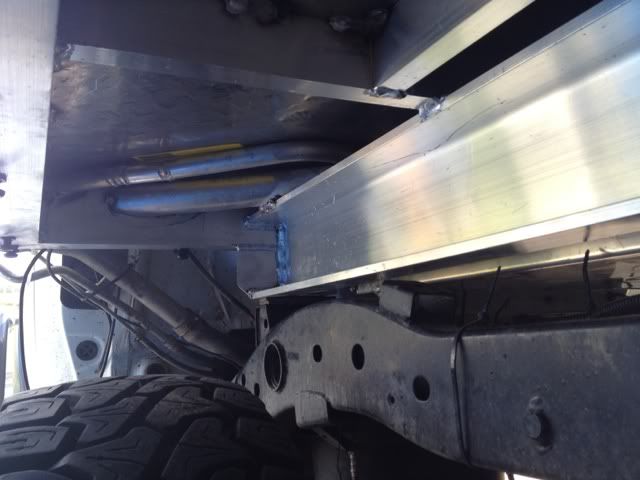
the main chassis rails of the tray are a 127mm transport C section with 12mm main wall and 9mm legs
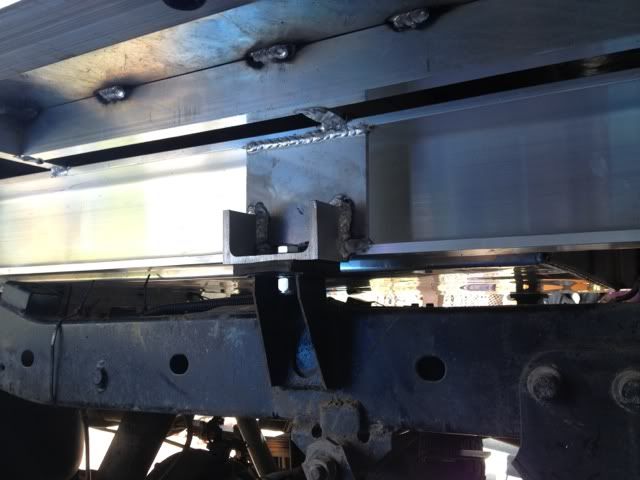
Click to view larger picture

only thing i wasnt happy with is that we had to weld the tank in, instead of bolting it in. the reason for this is that there was no way to get the filler neck in a position to be able to use flexible hose and still have it drain down. as it is it is a very flat grade to the top of the tank. this part took the best part of a day to get sorted as it was very tight and fiddly and required a lot of lifting and turning of the tray to be able to weld all the way around the inlet pipe
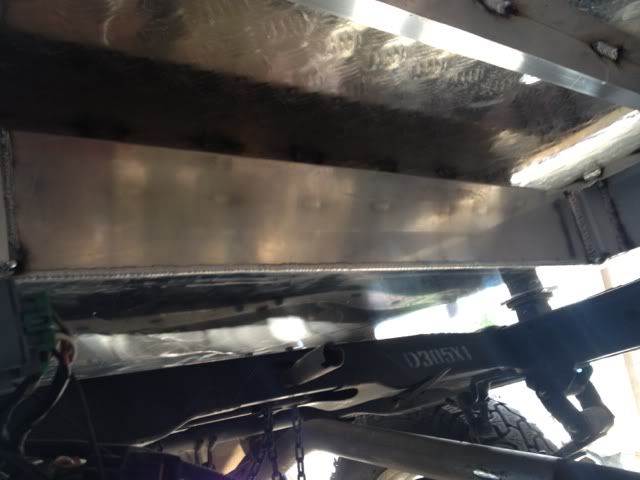
Click to view larger picture

here you can see the water tank that is part of the headboard. it should hold approx 70lts when full to the brim.
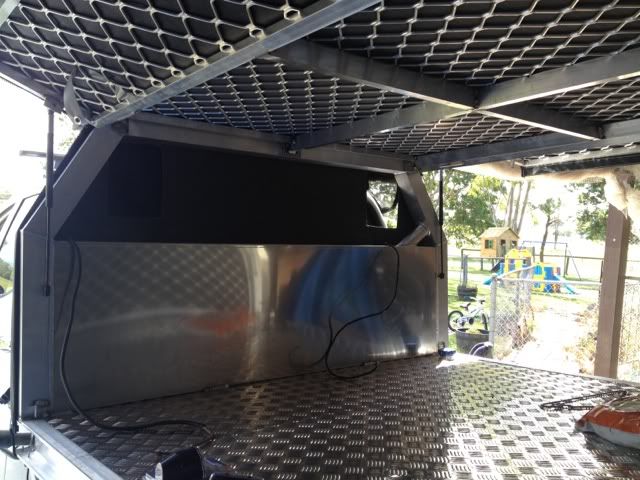
Click to view larger picture
the dogs love the new tray. now they can come with me where ever i go.
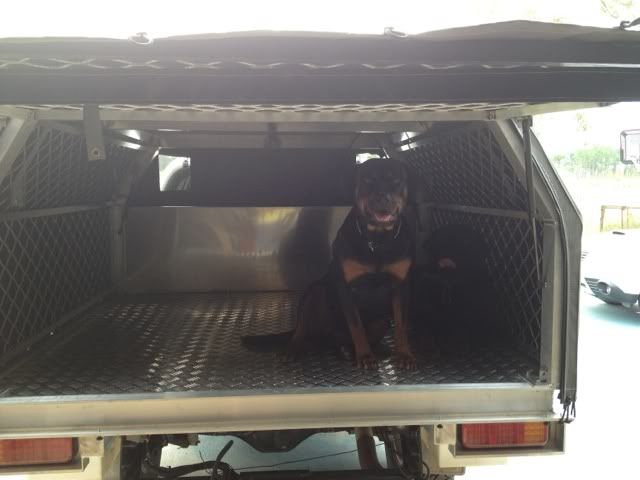
Click to view larger picture

I still have a few little jobs to do with the tray like install handles/locks for the mesh doors (did that today, but will post pics a little later), fab up a new electrical box to go on top of the water tank to put all my fuses/relays/electrical connections etc, drill and weld in solid dowel in the outside C channel for tie points, install side and rear clearance lights, weld in mesh to the headboard and finish the main filler cap/neck for the factory tank so that it matches the new Aux tank. hopefully will be able to get this done by the end of next weekend.

next thing done was the Canvas Canopy. this was another thing that i researched for ever, spoke to so many manufacturers etc but I ended up going with "Wallaby Track Canvas" at Springwood. funnily enough his name was chris also. lol.

after talking with him a few times, I felt confident that he knew what he was doing and knew exactly what i wanted, and i wasnt dissapointed when i went to pick it up from him. As we came around the corner and i saw it parked in the street in all is dark grey canvas glory i was absolutely stoked.
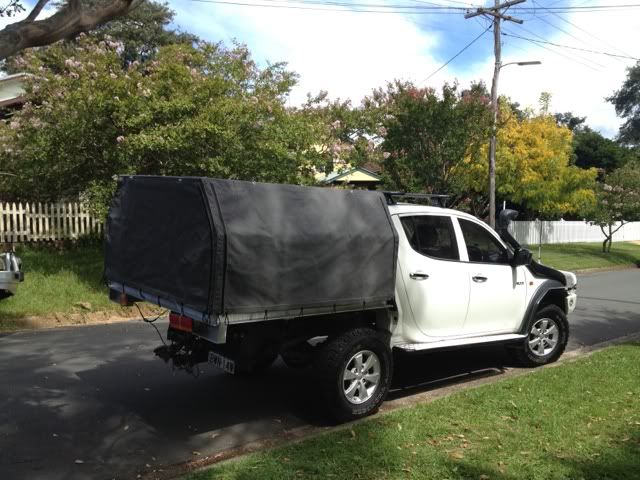
Click to view larger picture

it doesnt look like much there as it hasnt got the bungs attached. I had to drill and tap them so i could use screws rather than rivets, as the bungs are on the underside of the outside C channel, and you would see the tops of the rivets which i didnt want, so i told him to leave them off and i will do it when i got home.

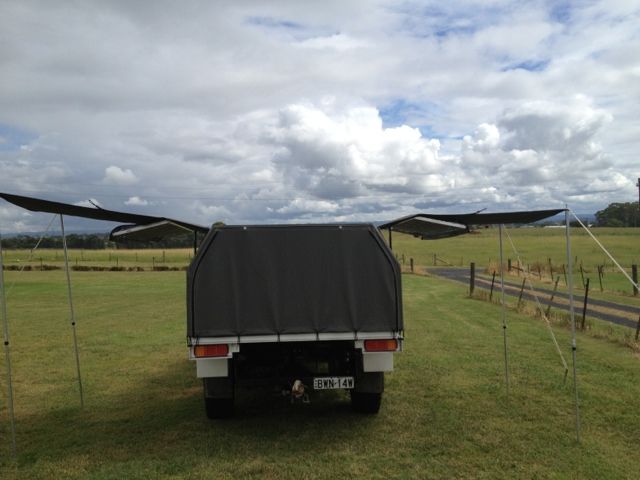
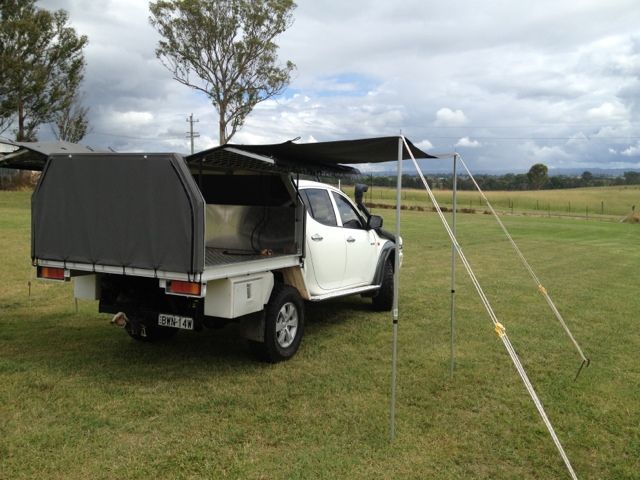
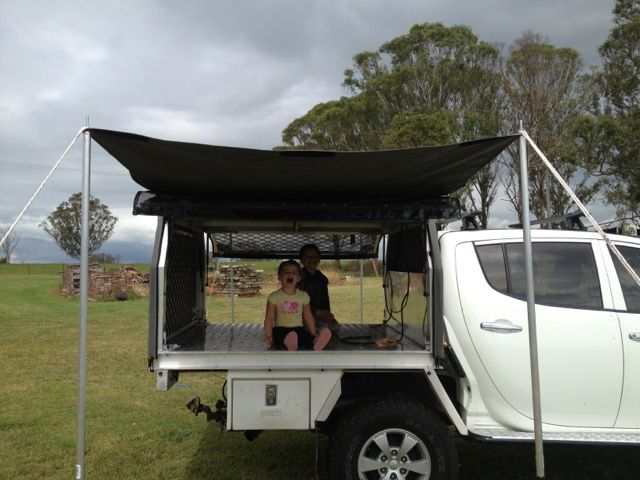
the Canvas canopy has a full bug mesh interior which is also zipped, so i can sleep inside the canopy with the awnings open, doors closed and not get eaten by mozzies. there is an awning on both sides of the tray that is folded up underneath the main door and held up by velcro so it isnt in the way at all during normal day to day use.

i dont have any photos of the canvas all set up yet as i have been too busy working on the little odds and ends of the tray. i will get some good photos this week and update this thread as i think there is enough to digest for now.

cheers

chris
gauci204
 
Posts: 530
Joined: Wed Feb 16, 2011 7:49 pm


Re: Gauci204s Triton and Tray build up - Finally

Postby hvac guy on Mon Apr 01, 2013 9:35 pm

now thats a tray very very good job.
I AM THE ONE WHO KNOCKS.
User avatar
hvac guy
Platinum Subscriber
 
Posts: 2440
Joined: Mon Jan 03, 2011 3:21 pm
Location: greenbank,qld

Re: Gauci204s Triton and Tray build up - Finally

Postby TUFF TROOP on Mon Apr 01, 2013 9:37 pm

That is awesome mate!
User avatar
TUFF TROOP
 
Posts: 982
Joined: Wed Apr 06, 2011 6:41 pm

Re: Gauci204s Triton and Tray build up - Finally

Postby mattz on Tue Apr 02, 2013 5:51 am

Nice work. 8-)
That's pretty funny about getting stuck in the car park. :lol: :lol: if only you had an angle grinder with you......it would have been removed then and there.
Have you put it back on a weigh bridge yet? It will be interesting how much lighter it is.
THE ONLY DIFFERENCE BETWEEN A MAN AND A BOY IS
THE PRICE OF HIS TOYS
User avatar
mattz
 
Posts: 7101
Joined: Thu Mar 11, 2010 6:26 pm
Location: Mornington Peninsula vic

Re: Gauci204s Triton and Tray build up - Finally

Postby gauci204 on Tue Apr 02, 2013 6:03 am

mattz wrote:Nice work. 8-)
That's pretty funny about getting stuck in the car park. :lol: :lol: if only you had an angle grinder with you......it would have been removed then and there.
Have you put it back on a weigh bridge yet? It will be interesting how much lighter it is.


I had the battery grinder, but both battery's were flat from work that day. Was so embarrassed but what can you do? We used to call it the farmer joe tray. I even had a straw hat to suit. Lol

I haven't weighed it again as yet, but just going off the measurements between the ground and the underside of the towbar, it has risen by 18mm. To show the weight of the old tray, when I took it off the difference was over 40mm :shock: Which means my 2" lift has turned into a 4" lift from what it was before I lifted it.
gauci204
 
Posts: 530
Joined: Wed Feb 16, 2011 7:49 pm

Re: Gauci204s Triton and Tray build up - Finally

Postby gibberplain1 on Tue Apr 02, 2013 5:02 pm

He has done some very nice ally welding on that tray. Most ally welding you see is shite compared to that.
gibberplain1
 
Posts: 14
Joined: Sat Sep 26, 2009 4:06 pm

Re: Gauci204s Triton and Tray build up - Finally

Postby gauci204 on Tue Apr 02, 2013 7:00 pm

got some locks/handles welded onto it yesterday. geez it is hard work welding that mesh. the anodizing really plays havoc with the Tig welder, not to mention the wind. thank god it will stay covered in cavas 99% of the time, so it can hide dodgy welding job.

Click to view larger picture
gauci204
 
Posts: 530
Joined: Wed Feb 16, 2011 7:49 pm

Re: Gauci204s Triton and Tray build up - Finally

Postby Duck on Wed Apr 03, 2013 12:37 pm

Looks great & different, nice being an individual build, great build :)
Life is what happens while you are busy making plans........
User avatar
Duck
 
Posts: 2001
Joined: Tue Feb 14, 2012 3:48 pm
Location: North Side Of Brisbane

Re: Gauci204s Triton and Tray build up - Finally

Postby ultimate on Wed Apr 03, 2013 12:48 pm

Looks awesome Gauci! Your vehicle has come so far since I first saw it. Well done 8-)
The Team at
Australian Ultimate Suspension Pty. Ltd
Phone: +612 9618 7674
http://www.ultimatesuspension.com.au YouTube Facebook
Designers, Manufacturers and Installers of performance aftermarket suspension for Cars, Trucks and 4wds
User avatar
ultimate
 
Posts: 2380
Joined: Tue Oct 06, 2009 12:43 pm

Re: Gauci204s Triton and Tray build up - Finally

Postby Evo_Triton on Thu Apr 04, 2013 7:05 pm

Awesome tray mate.
Any idea of the weight of it? And please tell me u have the plans to it?
Mitsubishi Service Skills National Finals 2011/2012 Equal 2nd Technician.
Evo_Triton
 
Posts: 37
Joined: Mon Jan 17, 2011 6:51 pm
Location: Melbourne, Victoria.

Re: Gauci204s Triton and Tray build up - Finally

Postby gauci204 on Thu Apr 04, 2013 7:16 pm

Evo_Triton wrote:Awesome tray mate.
Any idea of the weight of it? And please tell me u have the plans to it?


Mate I don't have an exact measured weight as I didn't get time to weigh my ute without the tray on, but according to my calcs using the info from the alloy manufacturers, it should be around the 120kg mark. It is easy for two blokes to lift it on and off according to the welder.

And yes I have the plans as I designed it myself. Let me know if you want a copy. Ill just need your credit card and pin numbers :lol: Just kidding, if you want them I'm happy to share, I even have the material list somewhere.

FYI, the tray measures 1770mm wide x 1750mm long.
gauci204
 
Posts: 530
Joined: Wed Feb 16, 2011 7:49 pm

Re: Gauci204s Triton and Tray build up - Finally

Postby Evo_Triton on Thu Apr 04, 2013 7:25 pm

Lol nice work mate. Im looking into a tray right now. And was leaning towards alloy. I'll pm u my details. Cheers mate
Mitsubishi Service Skills National Finals 2011/2012 Equal 2nd Technician.
Evo_Triton
 
Posts: 37
Joined: Mon Jan 17, 2011 6:51 pm
Location: Melbourne, Victoria.

Re: Gauci204s Triton and Tray build up - Finally

Postby gauci204 on Thu Apr 04, 2013 7:44 pm

I've tried to reply via pm but there seem to be a few mp's in my outbox that haven't cleared
gauci204
 
Posts: 530
Joined: Wed Feb 16, 2011 7:49 pm

Re: Gauci204s Triton and Tray build up - Finally

Postby har05l on Thu Apr 04, 2013 11:32 pm

gauci204 wrote:I've tried to reply via pm but there seem to be a few mp's in my outbox that haven't cleared


When there opened by whoever you have sent them to they'll clear ;)

BTW, 8-) tray ;)
[censored]
User avatar
har05l
Platinum Subscriber
 
Posts: 5575
Joined: Wed Sep 08, 2010 5:01 pm
Location: Cambridge Park

Re: Gauci204s Triton and Tray build up - Finally

Postby gauci204 on Sat Apr 06, 2013 5:58 pm

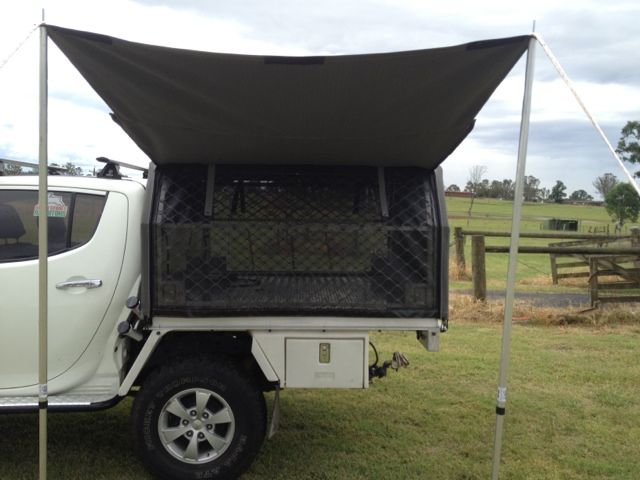
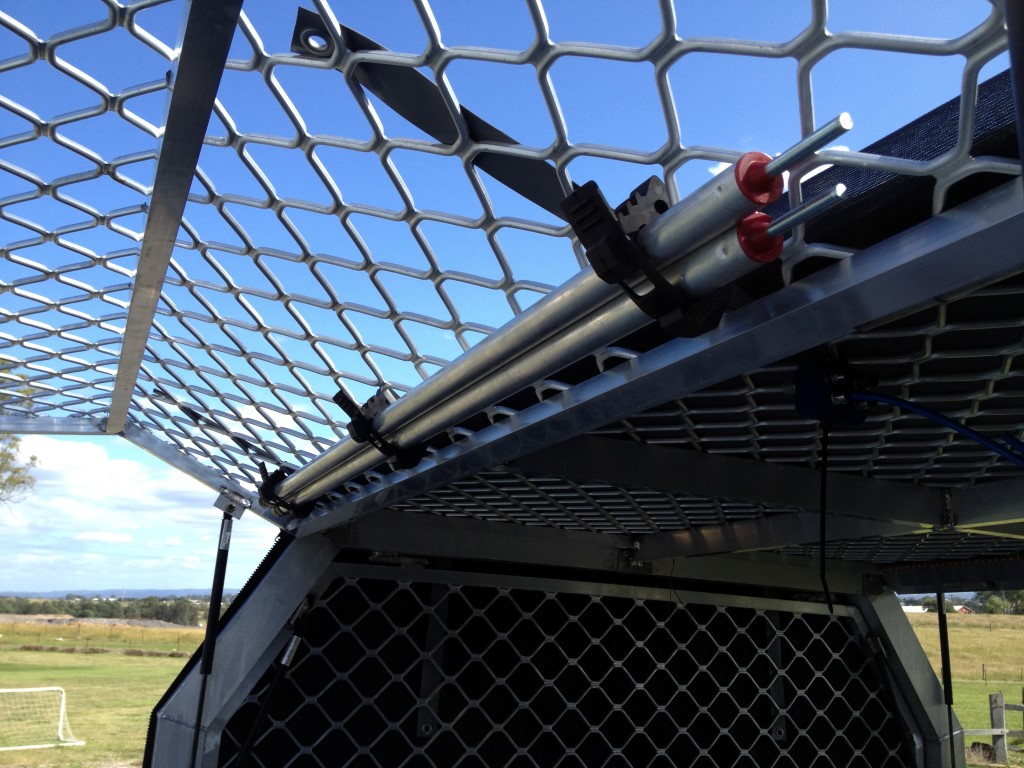
set the awnings up for the first time today. gives plenty enough room for what i wanted. extends approx 1.7m from the outside edge of the car, which is fine with me. will fit my swag under it if i dont want to sleep inside, and will give enough shade for us to sit underneath when we pull over for a break.

Click to view larger picture

i will be making a small bracket for the poles so they can be permanently mounted on the inside of the doors as they fit perfectly behind the mesh without sticking out past the edge of the door frame :)

i can walk underneath the doors easily when they are up, but i will need to swap the gas struts from 100n to 200n so they stay up at full height when i have the awing out.

this one shows the bug mesh over the doors which is right the way around.

Click to view larger picture

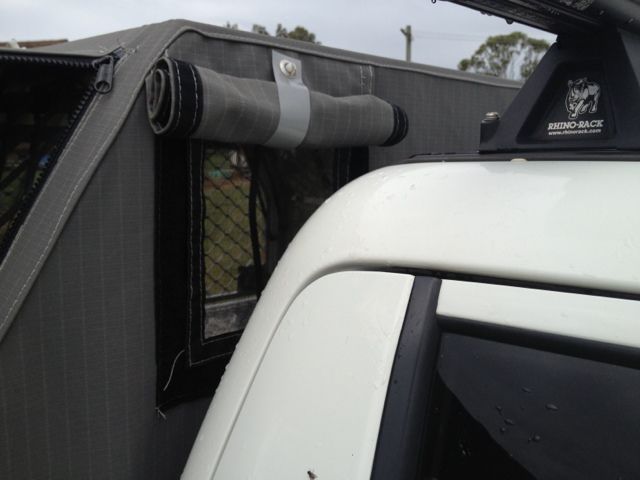
I got a pressure flap put on both sides of the ute, which are velcroed down normally, but can be rolled up whilst travelling. these also have bug mesh on the inside of them which is velcroed in place so that you can access through the hole if you want to without having to open the doors.

Click to view larger picture

the idea of these vents is to pressurise the inside of the canopy to try to keep the dust from sucking in from the back and side flaps. it is also perfect for keeping the inside a bit cooler when carrying heat sensitive stuff (eg a deer carcass when hunting etc) and gives good airflow for the dogs when travelling, when i have the rear canvas rolled up or unzipped slightly.

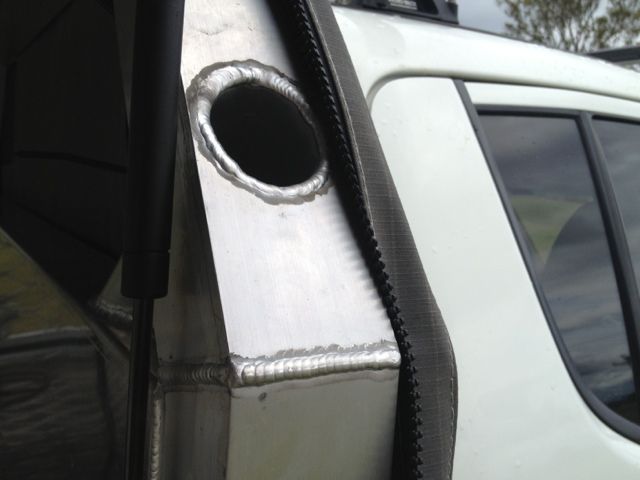
this is the filler point for the water tank, which holds a measured 69L. i need to find a cork or some kind of rubber plug i can put in it, but that is next weeks job.
Click to view larger picture

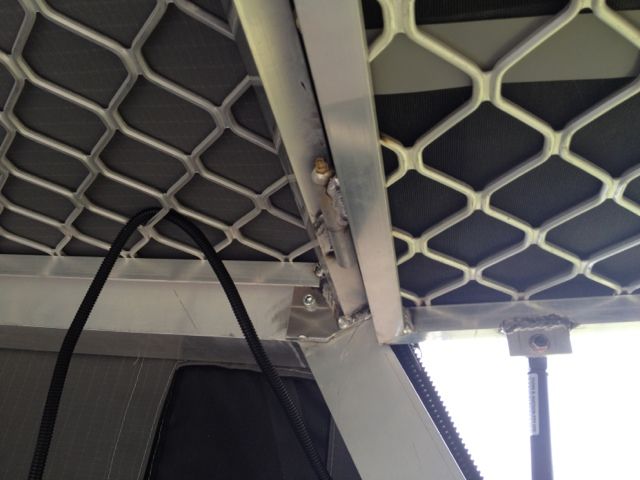
to try and help keep the rattles down, i used greasable hinges on the mesh doors.
Click to view larger picture

i need to make some more room for myself on photobucket so ill leave it at that for now.
gauci204
 
Posts: 530
Joined: Wed Feb 16, 2011 7:49 pm

Re: Gauci204s Triton and Tray build up - Finally

Postby Cowboy Dave on Sat Apr 06, 2013 6:21 pm

I reckon you'd get a plug or a bung of some sort from clark rubber. You've obviously put a lot of time and thought into the canopy, it's definitely impressive. 8-)
The Hitchhiker's guide to the the Triton universe and NTN.

A how to on finding your own way - search me.

The two threads I wish people would use more: thing 1 and thing 2.
User avatar
Cowboy Dave
Moderator
 
Posts: 18098
Joined: Tue Dec 29, 2009 9:46 am
Location: Sydney

Re: Gauci204s Triton and Tray build up - Finally

Postby Dunga71 on Sat Apr 06, 2013 6:28 pm

Nice job mate looks great
Believe all ya see and half what ya hear
User avatar
Dunga71
 
Posts: 1255
Joined: Fri Jul 22, 2011 11:25 am
Location: Sale victoria

Re: Gauci204s Triton and Tray build up - Finally

Postby jab461 on Sat Apr 06, 2013 7:38 pm

Mate that is a top notch tray ya built there!... I'm very VERY impressed! Would I be able to "borrow" your plans, as with you, I'm sick of the hard cover...... I need more space when I go camping! :D
jab461
 
Posts: 330
Joined: Mon Mar 07, 2011 7:18 pm

Re: Gauci204s Triton and Tray build up - Finally

Postby gauci204 on Sat Apr 06, 2013 7:40 pm

Jab461, just pm me your email address and ill email some stuff to you.
gauci204
 
Posts: 530
Joined: Wed Feb 16, 2011 7:49 pm

Re: Gauci204s Triton and Tray build up - Finally

Postby dan.batto on Sat Apr 06, 2013 8:40 pm

Looks awesome mate! Just an idea for the awning poles, a pair of the quick fist clamps? 4wd26 mentioned them in the DIY thread. Just a thought if it makes life easier ;)
User avatar
dan.batto
 
Posts: 3269
Joined: Wed Apr 06, 2011 10:34 pm
Location: Rowville, Melbourne

Re: Gauci204s Triton and Tray build up - Finally

Postby gauci204 on Sat Apr 06, 2013 9:04 pm

hi dan,

those quick fist clamps look pretty bloody good. they will probably save me having to weld anything on the inside.

i was going to just put a small tab on the inside of the frame at the bottom of the door, and stack the two poles ontop of each other. i will put a rubber cap on the spiggot end and then just extend them so they touch the inside edges of the frame and lock them up, that way they hold themselves in and the tab just makes sure they dont fall off, but the quick fists look like a good idea.

another thing im not sure which way to go on is where to mount my water pump. I have a spot above the circular tube cross member but am worried it will get damaged when i go through water crossings etc. what do you guys reckon?

i can mount it inside the canopy on top of my water tank, but it means running hoses between the canvas and the tray which i would really like to avoid where possible.
gauci204
 
Posts: 530
Joined: Wed Feb 16, 2011 7:49 pm

Re: Gauci204s Triton and Tray build up - Finally

Postby Crash486 on Fri Apr 12, 2013 7:38 am

I reckon a trip through a Lion park in the back would be some fun :-) Leave the canvas off though.
User avatar
Crash486
 
Posts: 1591
Joined: Tue Jan 11, 2011 7:19 pm
Location: Blue Mountains, NSW

Re: Gauci204s Triton and Tray build up - Finally

Postby nads triton on Fri May 03, 2013 3:30 pm

awesome tray mate, good to see something different. Im looking at doing something like that myself, and i know how u feel ive been looking for about 6month, just want to get it right. would be awesome to get the plans
nads triton
 
Posts: 21
Joined: Sat Jan 15, 2011 5:53 pm

Re: Gauci204s Triton and Tray build up - Finally

Postby stackator on Sun May 05, 2013 7:18 am

Nice work, looks the goods and very thought out
User avatar
stackator
 
Posts: 260
Joined: Sun Aug 26, 2012 6:45 pm
Location: Sydney's northshore

Re: Gauci204s Triton and Tray build up - Finally

Postby gauci204 on Sun May 05, 2013 6:48 pm

bit of an update.

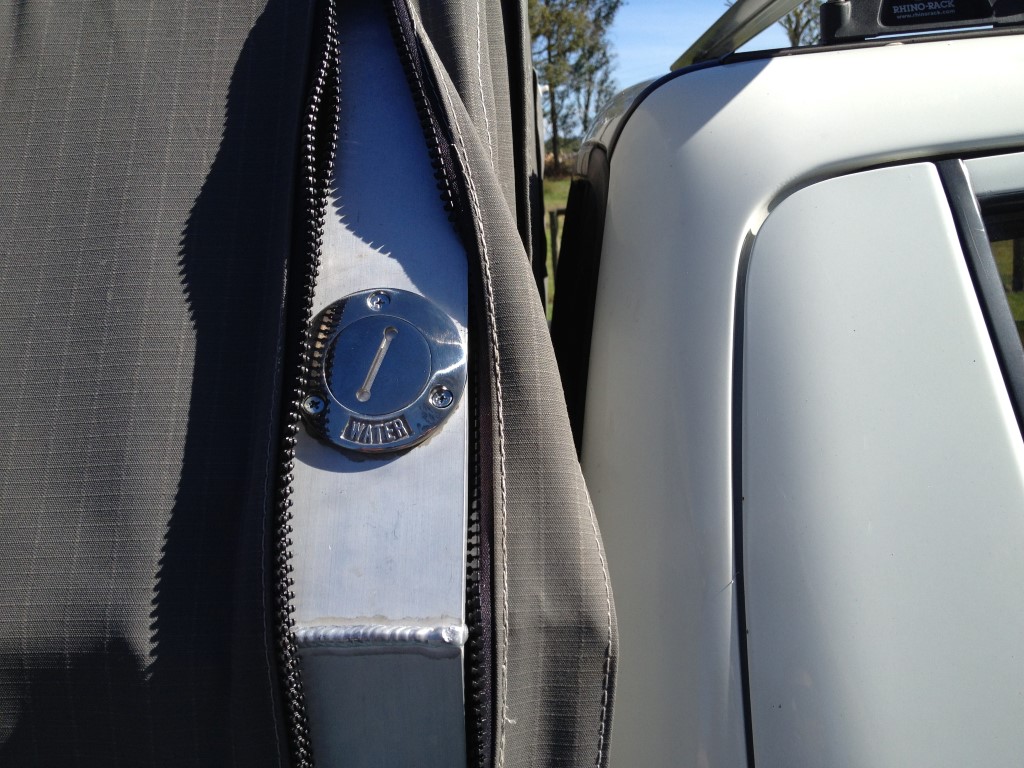
since i last posted i have fitted a nice flush fitting water cap to the water tank inlet. i have also plumbed up the water pump and tap but forgot to take photos of it. ill post them up later.
Click to view larger picture

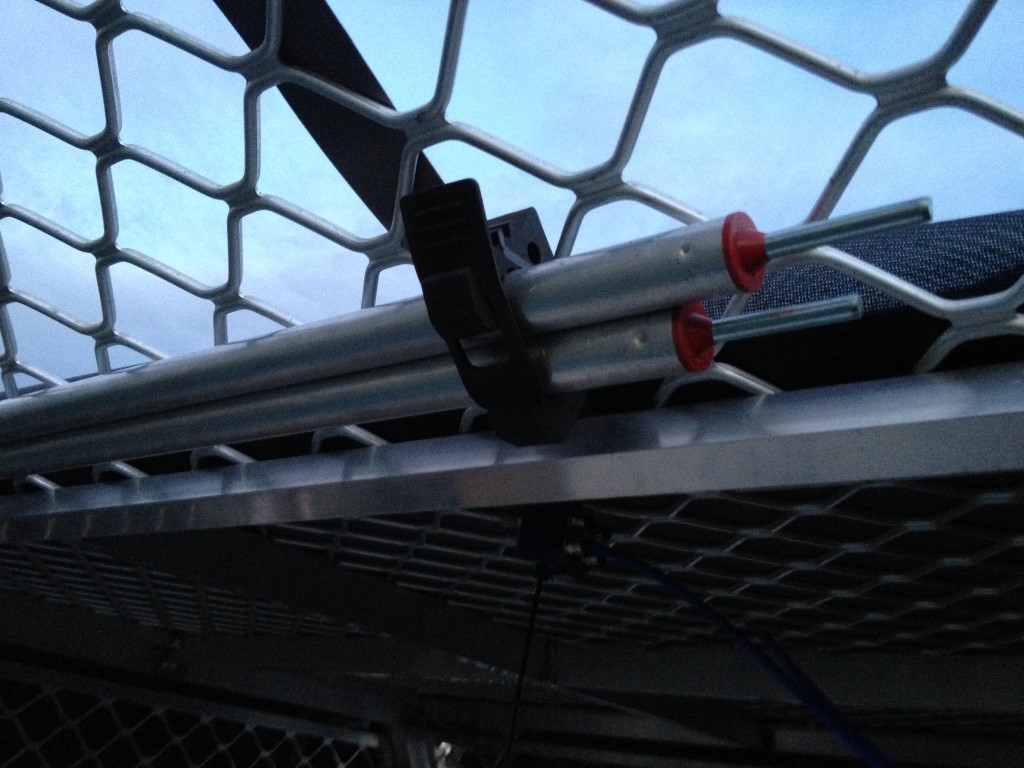
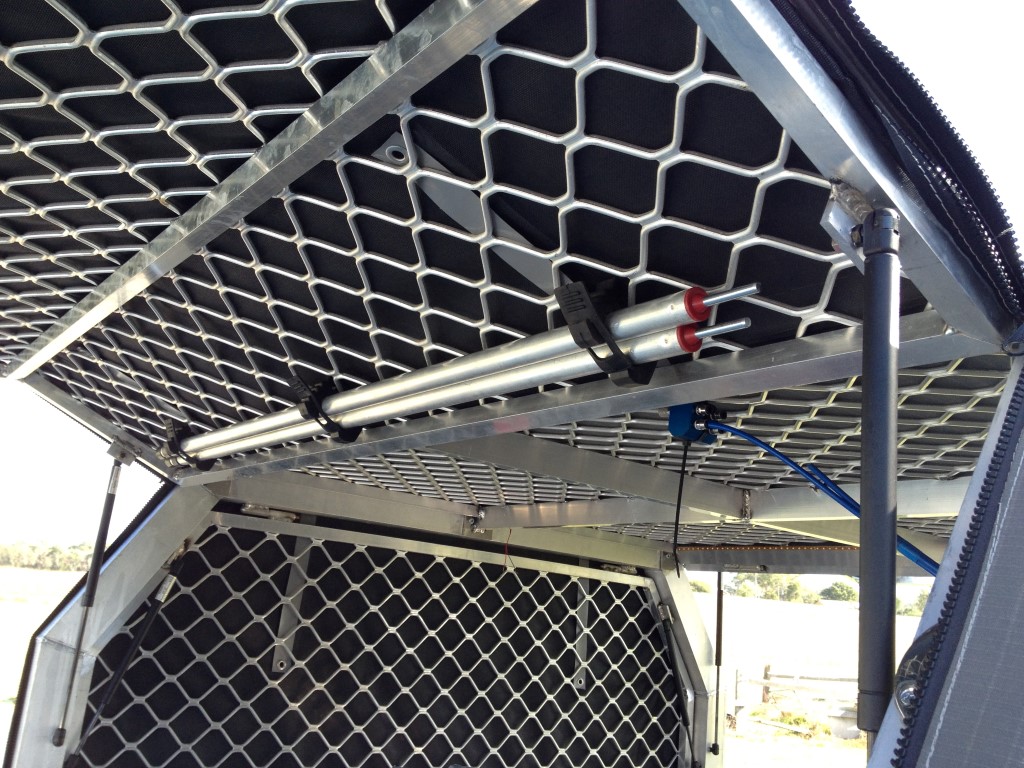
I also needed to fit the awning poles somewhere, and thought that the door would be the best place as it would stay out of the way and would always be there when i need them.

After Dan.batto put me onto the rubber "quickfist" brand fittings i went nuts on ebay a week or so ago buying different types and sizes of their products and they really do look the goods. the standard quickfist fittings i used for these work really well and keep the poles from moving and rattling. i probably could have got away with just using two but i effing hate rattles so the extra $8.00 is worth the piece of mind.

Click to view larger picture

Click to view larger picture

Click to view larger picture

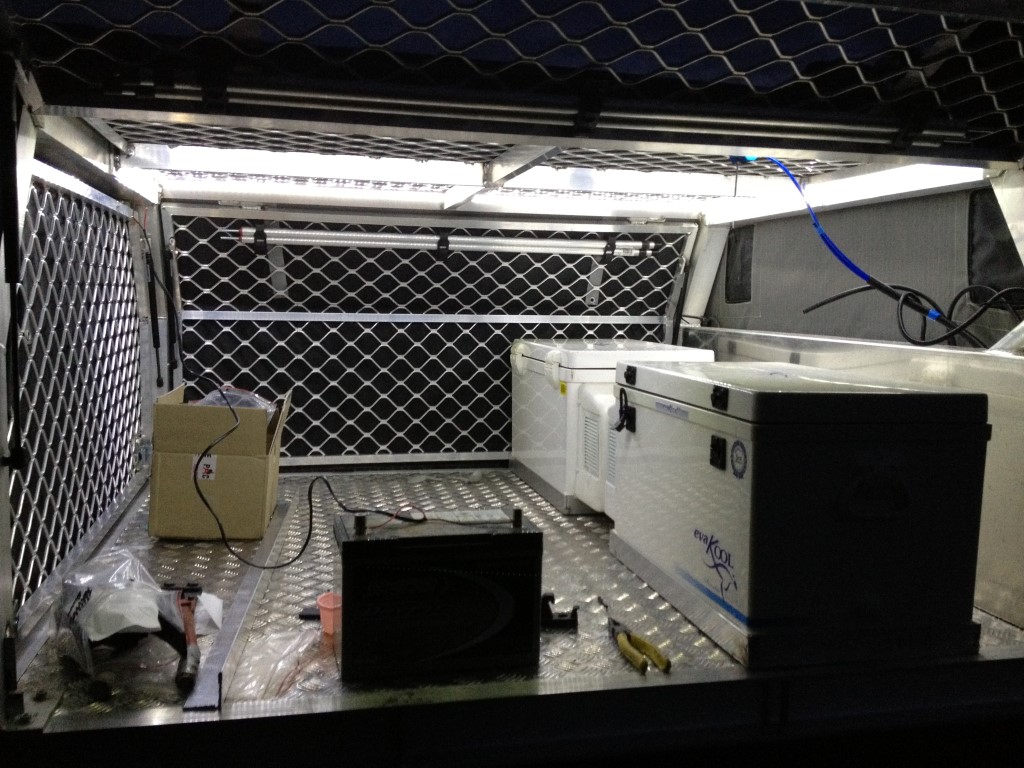
Next was a bit of lighting for the inside of the tray. I purchased a heap of LED strip lighting off ebay last year for "just in case" and it just so happened that i now had "a case" :rofl:

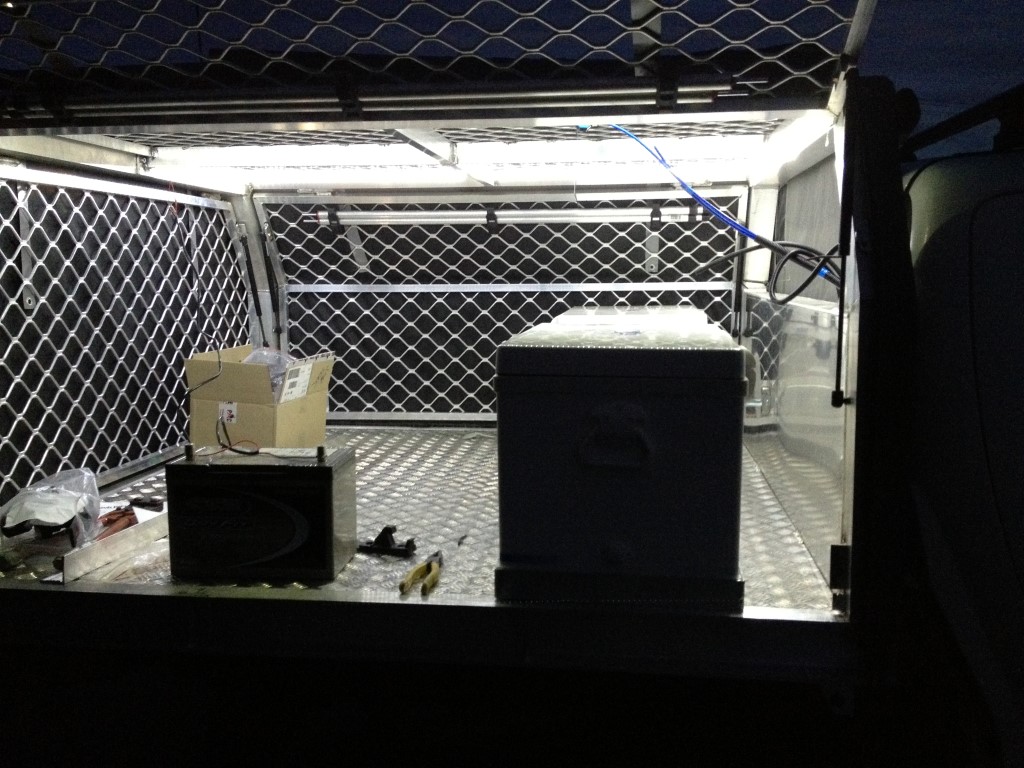
the strip i used had an adhesive backing so i just stuck it on all around the inside of the rail ended up using the whole 5m roll and i think it ended up pretty good. it throws heaps of light, and with the little dimmer i can turn it down if need be. i havent finished the wiring yet but it will be run off a switch from inside the cab to give it power, and then i can turn it on/off from inside. that way i wont leave the light on by accident as with the canvas down you cant see any light out.

Click to view larger picture

excuse the battery in the middle of the pic, its just the easiest way to connect it atm to test it until i get all the wiring done.

Click to view larger picture

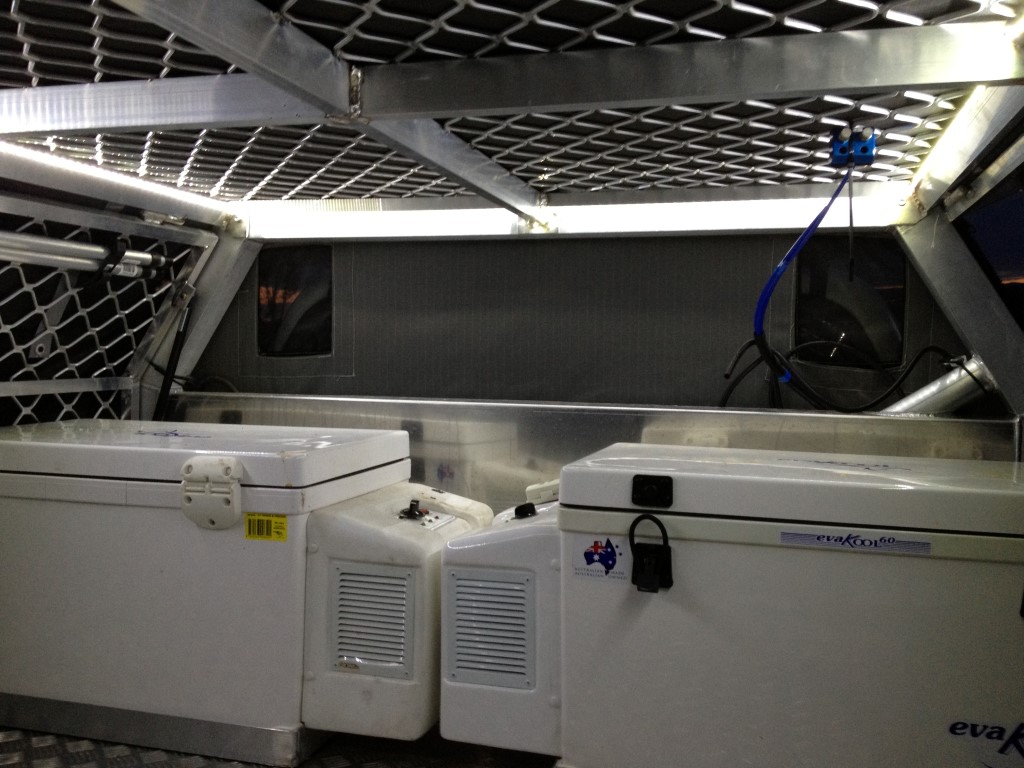
in the back ground of this pic you can see the blue air lines for my extended diff breathers and my fridges ready for to bolt the fridge slides to the floor. the fridge spacing has ended up a little tighter than i planned as we ended up using wider rhs tube for the door frame than in the original plan so the fridges now touch in the middle on the handles but they should be fine.

I just have to check each fridge to see which side it vents and which side it sucks air in as i dont want one to be throwing hot air straight at the others intake. if they end up venting towards each other i will put a barricade between them and possibly a small pc fan to help get rid of the hot air.

The diff breather wont stay up on the roof but it will be vented into the canopy probablymounted on the inside of the hoop just near the pressure vent intake.

Click to view larger picture


now because of the locks on the doors sticking out further than the door frame, i have had to move the fridges rearward approx 120mm which i didnt want to have to do, but now i think i will box that area in and use it for a gun locker/tool cabinet.
gauci204
 
Posts: 530
Joined: Wed Feb 16, 2011 7:49 pm

Next

Return to Member Build Ups

Who is online

Users browsing this forum: No registered users and 91 guests