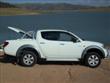
The vehicle was bought to replace another Mitsubishi (delica) that I thought I might have troubles getting the parts for if I was on a long trip.
The swap over came after the thought of doing a long trip, from the far south coast of NSW to Western Australia.
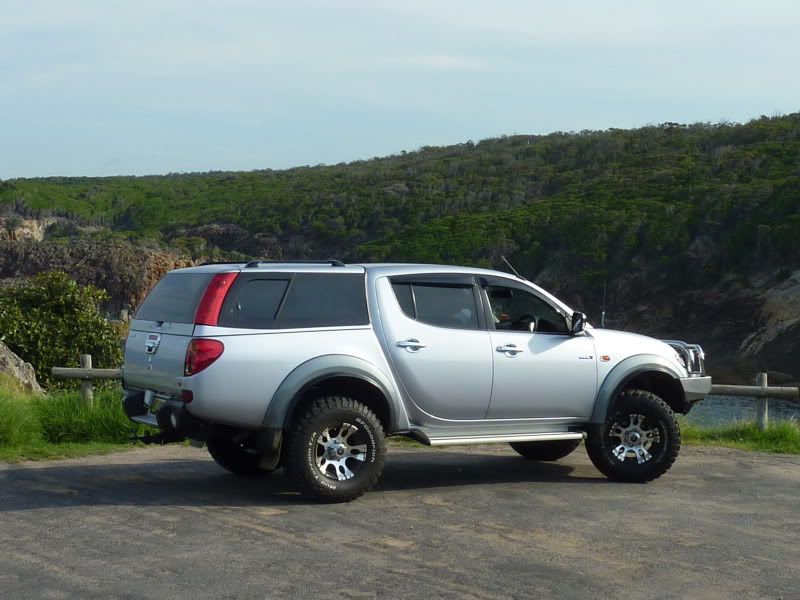
After looking at a few Tritons at a local dealer, and not being happy with what was on offer I decided to look at what was on offer in the second hand market.
Of all things I found what I wanted on Ebay and after a few phone calls and lots of photos I set off for Rockhamton.
The Triton had already had a few things added that made the deal a bit sweeter.
I couldn’t resist it!!
Already done was…………
Foam cell shocks
Spot lights (lightforce)
Tub liner
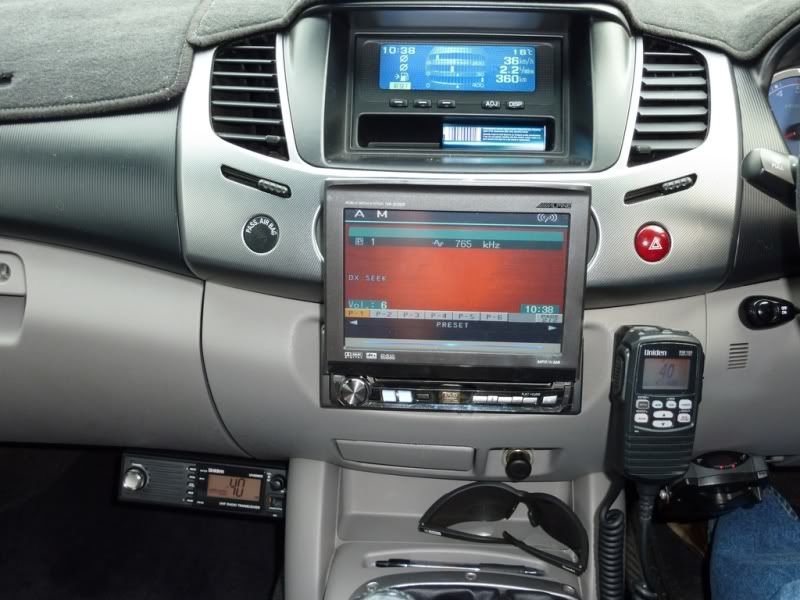
Alpine sound system
Seat covers (neoprene GLX-R)
Reversing camera
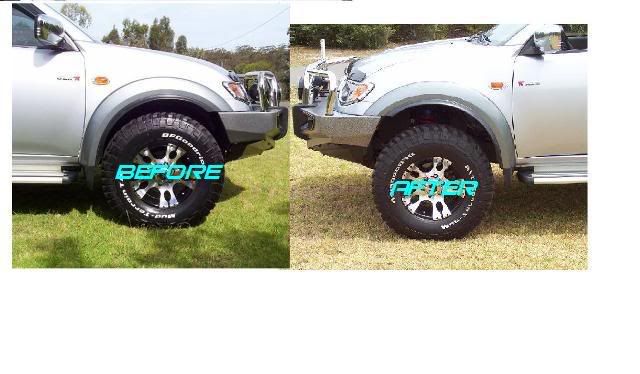
Wheels/tires/flairs
Stainless exhaust (snake racing)
Tow bar
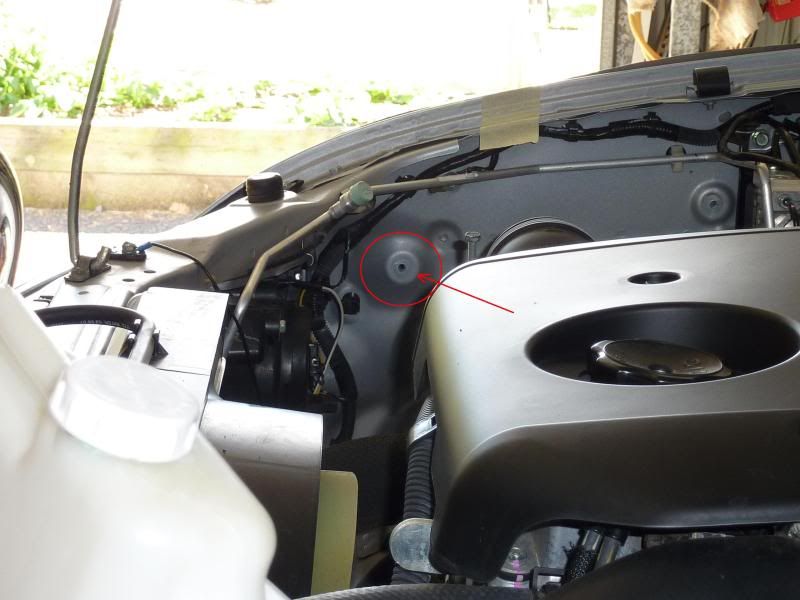
Washable air filter (finer)
And quite a few “bling “bits
Low mileage good condition log books (except for a few scratches) serviced the day I picked it up…how could I resist!!
For what I wanted it to do, I would have to add a few things before any big trips.
The first thing that I added was an electric brake controller for towing the caravan.
After a bit of checking I decided on a “prodigy” by Tekonsha.
An easy unit to fit and to use.
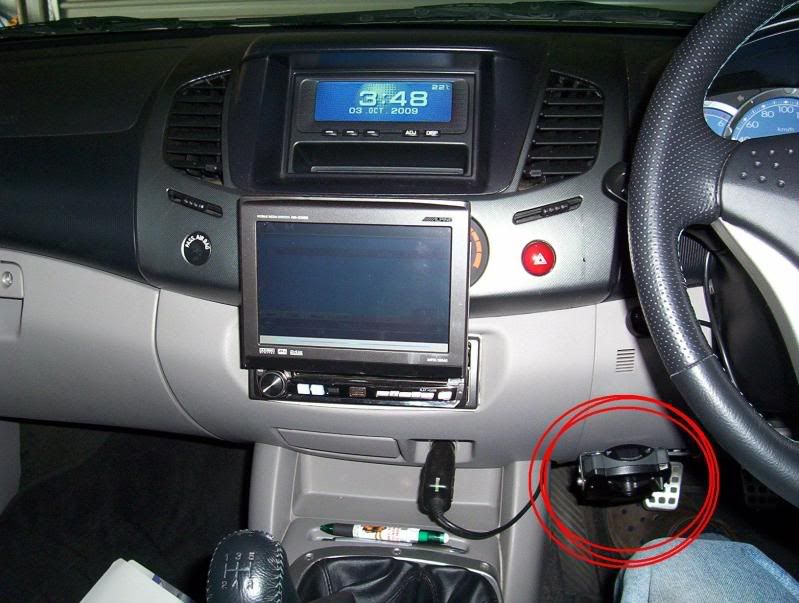
The Tow bar was already there all I had to do was get another neck so that I could put the fitting on for the off road “Treg” system.
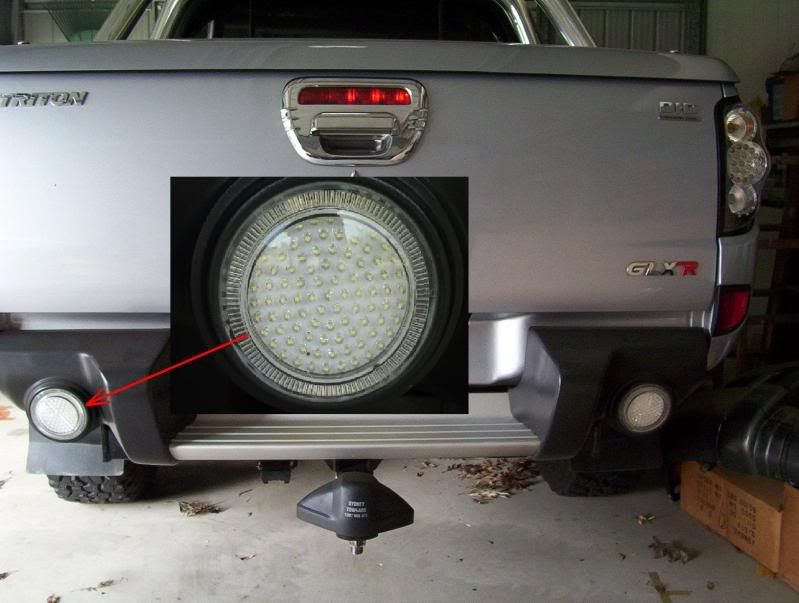
Reversing lights came next; these would come in handy for unhooking the van at night.
These were 2 LED style consisting of 92 leds each, not much power drainage but nice and bright.
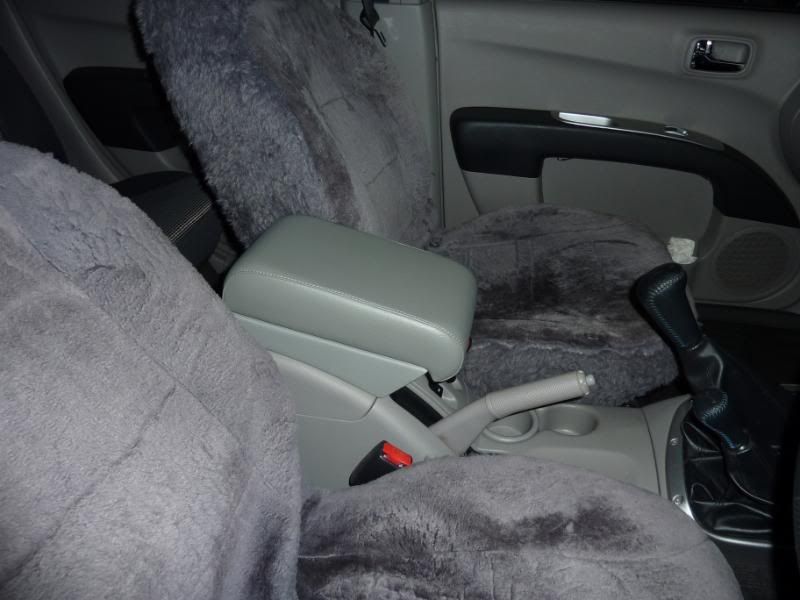
One small thing that annoyed me about the Triton was …..the seats!
A few others have mentioned that they are not happy with the seats in the Triton.
After a long trip I noticed that I was not getting out of the seat real easy (it doesn’t help having artificial bits in your back!!) so I fixed it the easy way by buying 2 air operated lumbar supports.
I installed these under the seat covers and you just pump them up to suit.
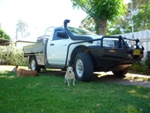
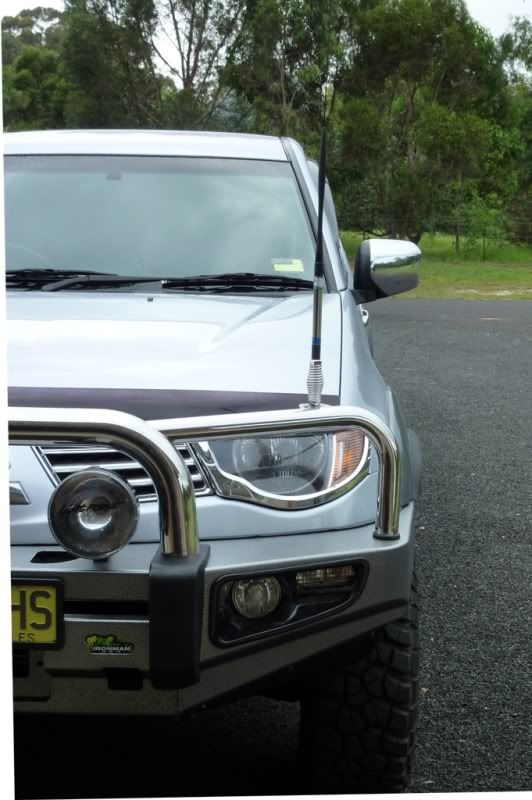
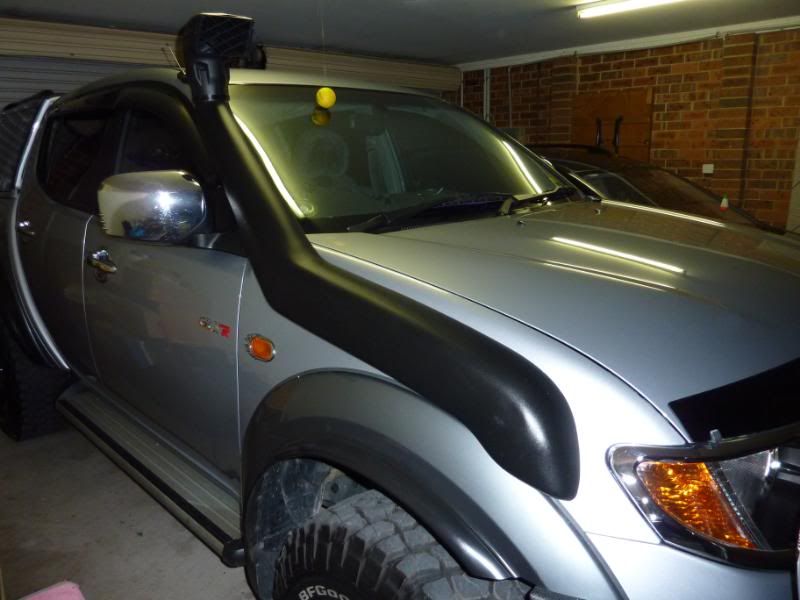
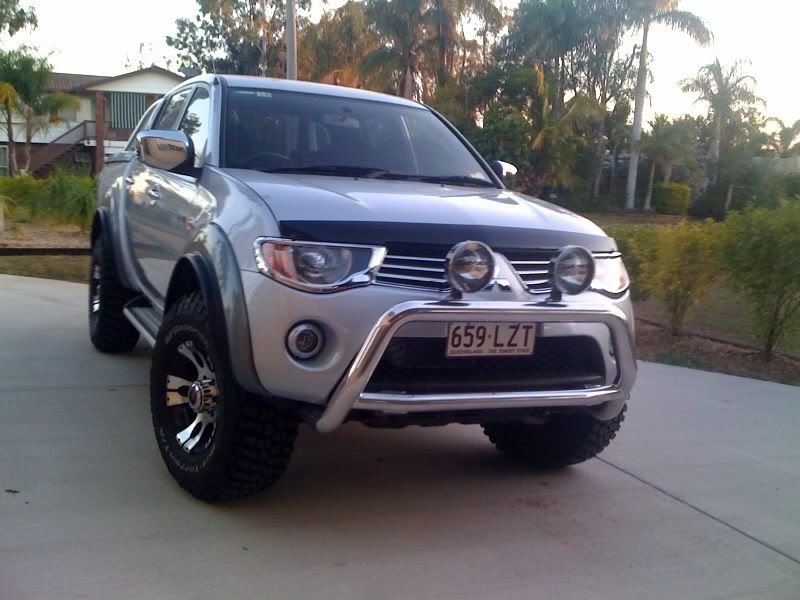
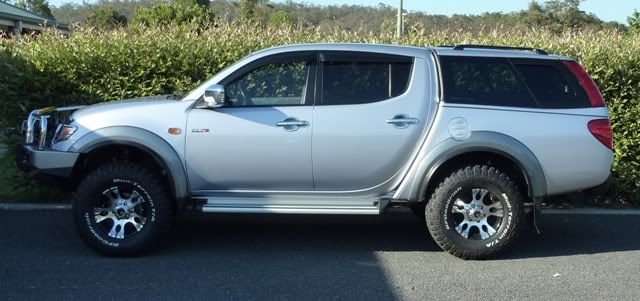
Next on the list was a bull bar, this was not an easy choice.
I was not intending for it to be used as something to do some major bush bashing with, but at the same time I wanted it to look nice, be practical and blend in with the rest of the vehicle.
After looking at what everyone else had on their Triton I decided to go with the Ironman Protector after traveling to Canberra to see “now for the fifth’s” on his Triton.
I was able to purchase it locally through my auto one dealer at a good price with no freight costs, which was a big surprise.
After talking to a few of you on this site I decided to have a go at fitting it myself, a saving of $400.
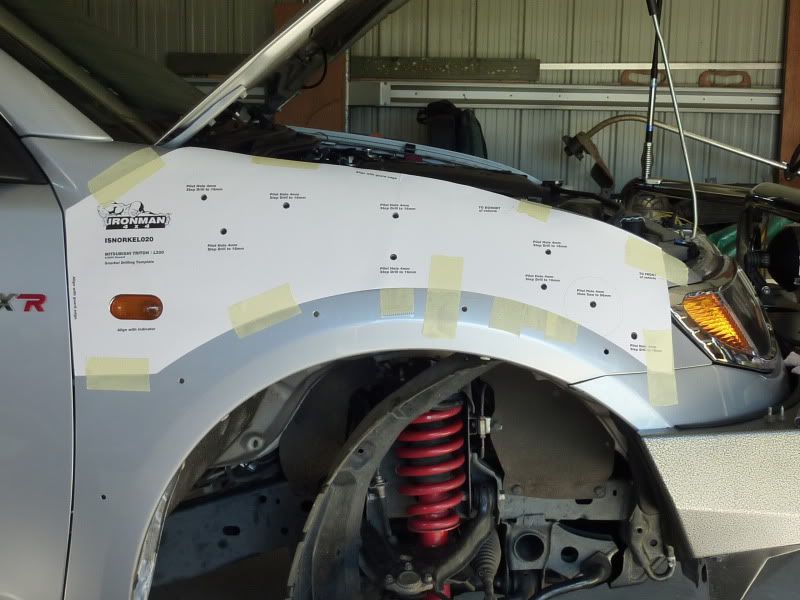
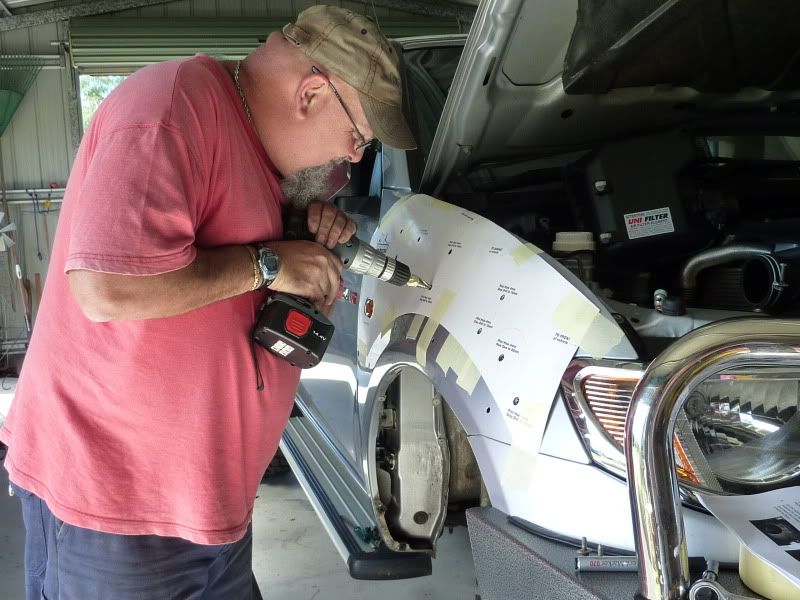
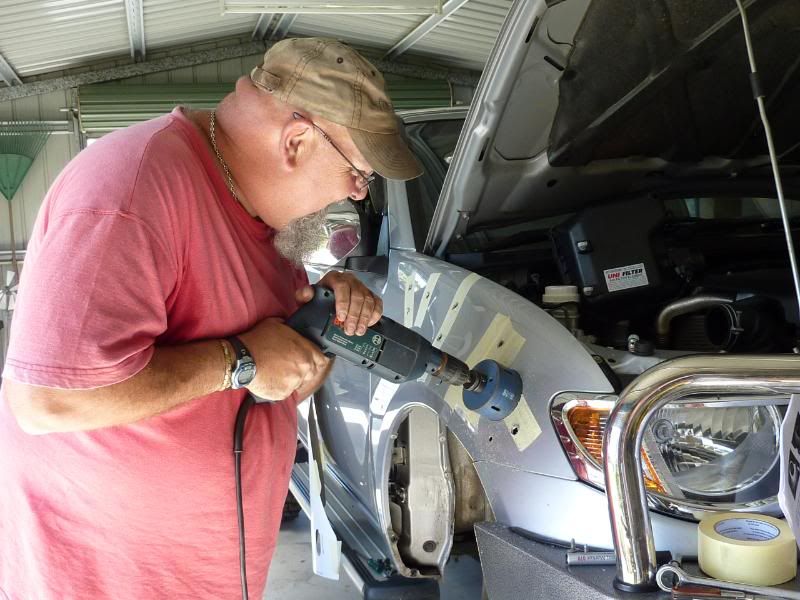
The worst bit was going to be cutting some of the plastics, the grill and the flairs.
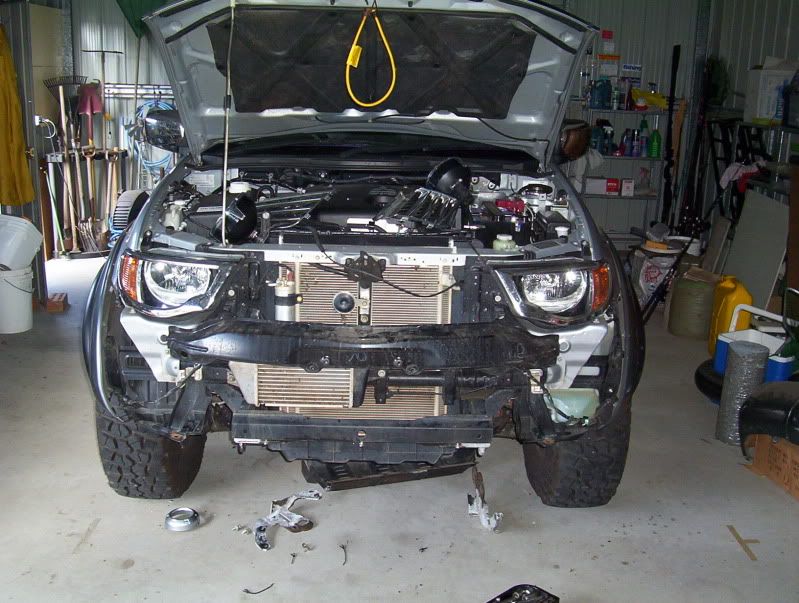
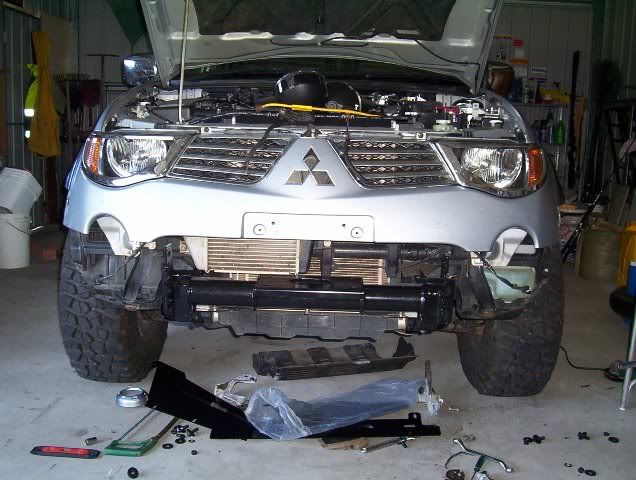
It turned into a 2 day project because I was taking my time and measuring twice before I cut!!
With help from the better half to hold it while I did up the bolts, it was soon fitted and bolted into place.
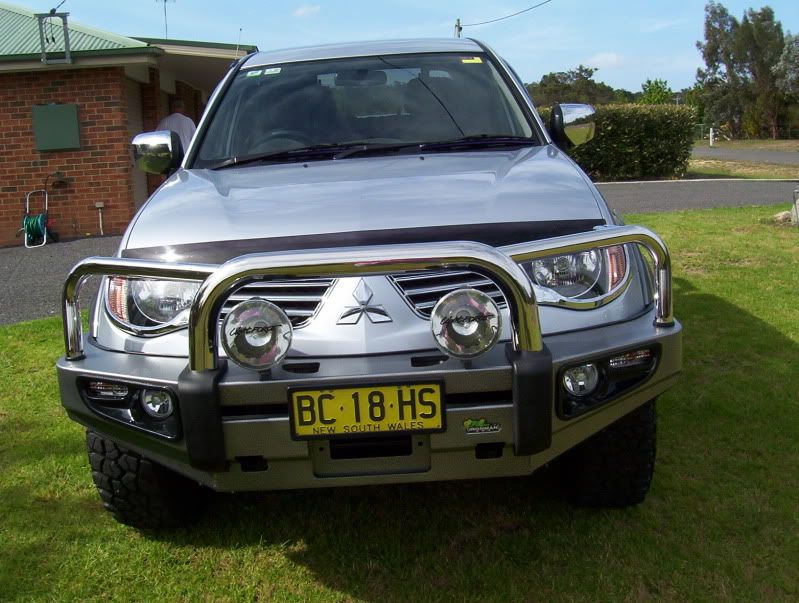
With the bull bar now in place I noticed that the front end had dropped a bit and I noticed that the tires were now rubbing when I was at full lock!
I purchased a set of 35mm strut spacers from snake racing and this fixed up the tire rubbing.
So for so good!! I was starting to get it looking the way I wanted it to.
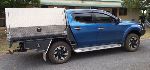
The next thing was going to be another biggie, a canopy.
It was annoying me having to lock the hard lid all the time and I was going to need a bit more room to store a few things in the tub when I was traveling.
So where to start looking???
I did a lot of research on the site and looked at a lot of “shed sites” to compare what was available and what others had installed.
There seamed to be 3 main types, fiberglass, plastic and steel.
They all have their good points and their bad points, I leaned towards the razorback steel canopy. It was a bit more expensive but for me it was the right choice.
The next dilemma was to fit it myself or to pay someone else to do the job!!
After some consideration I chose the latter. After reading on the site about the fitting dramas that others have had with the razorbacks I thought it would be to my advantage if there turned out to be a problem with the fitting, all I needed to do was return it to the fitters to have it corrected (well I hope that will be the case!!)
I opted for the auto locking for the rear door and for the reflectors to have actual working lights in them.
It took a while to get used to the overall look with the canopy on it, but it now looks like it should be there.
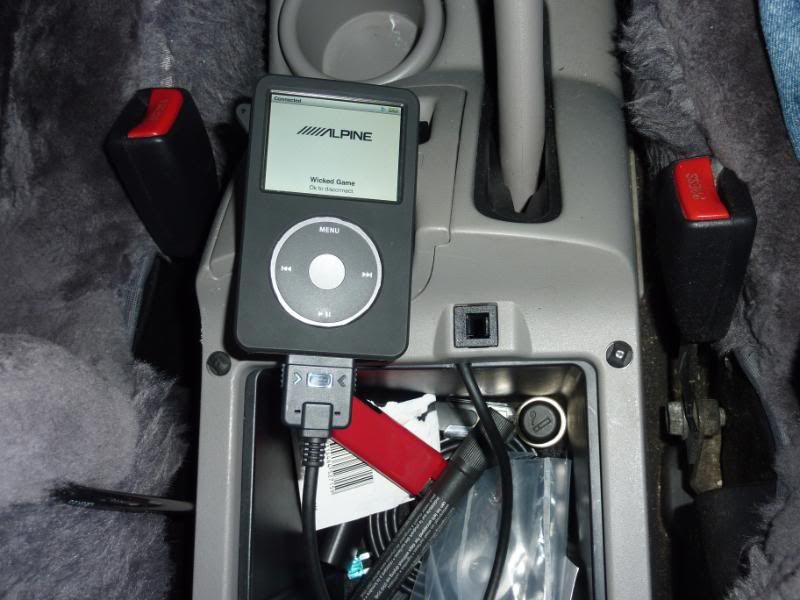
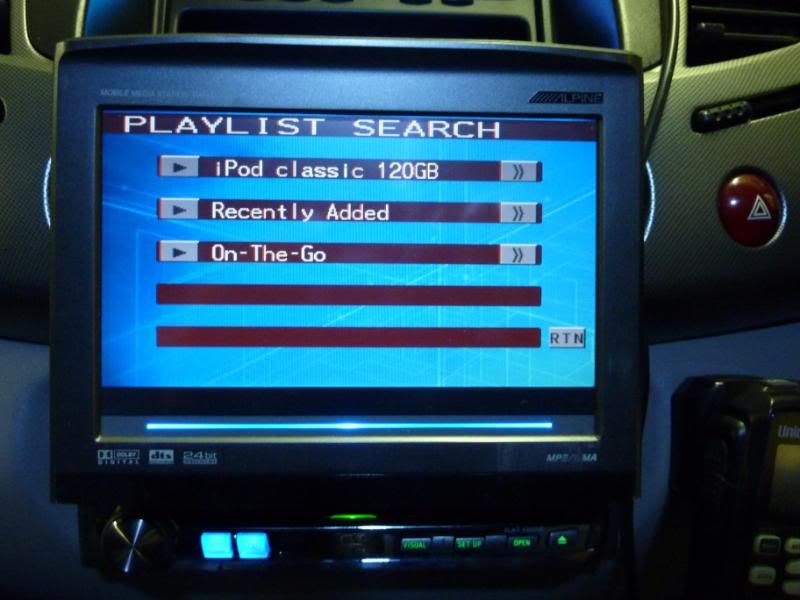
Next was an easy little fix but a luxury. The Triton had already had the radio changed to an alpine unit, but there was nowhere to plug in an Ipod so it was relatively easy to just fit an extra lead into the rear of the radio.
I ran the lead under the centre console and up into the storage hole (out of sight!)
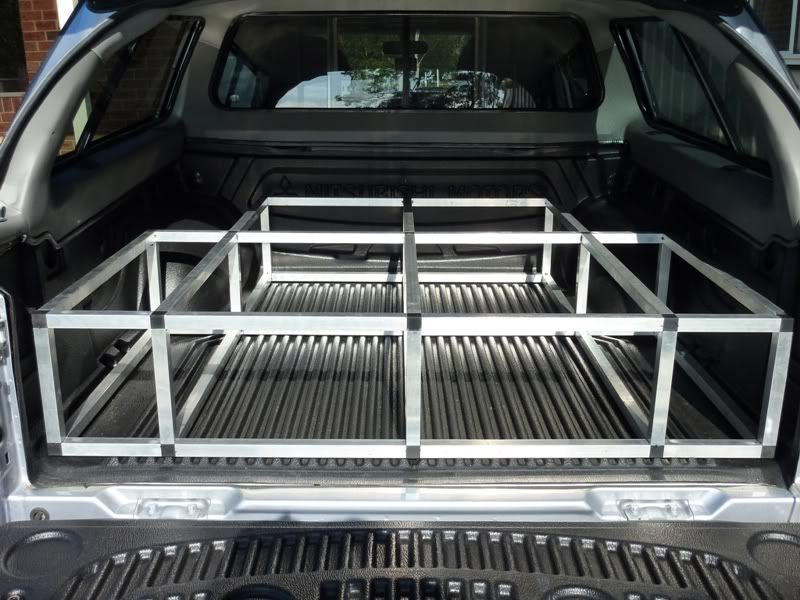
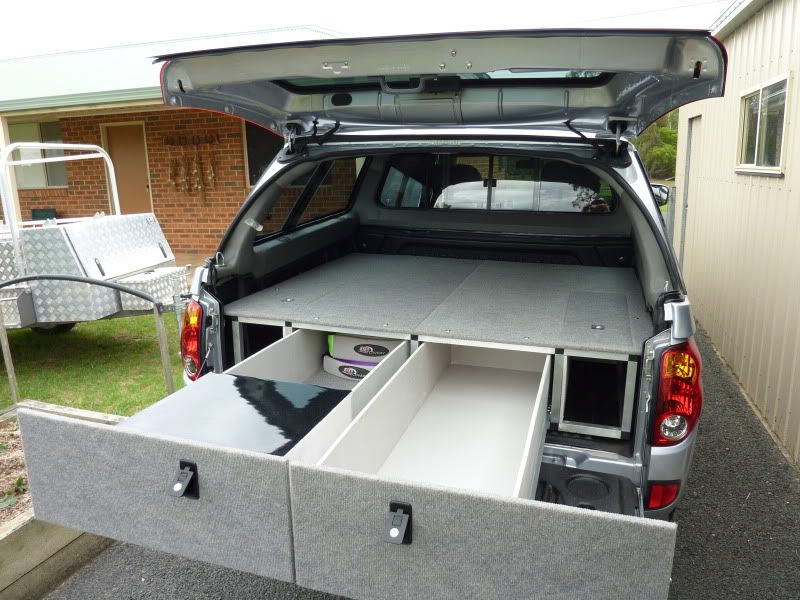
After viewing “ratstriton’s” storage draws in the rear of his Triton, I thought that this was a good idea and thought that I would try and do something the same in the back of mine.
I contacted “rats” and he gave me the details of how he constructed his.
After some research on the net to find out where I could obtain what I needed to do the job, I started to gather the bits, easyjoiners from Wauchope ,draw runners from Hobart, locks from Batemans Bay……
Not much was purchased locally (too expensive or just too hard for them to get!)
When all my goodies arrived, I with my trusty “gofa” (the misses!) set about constructing a set of draws for the rear.
I wanted 2 sliding draws, and a small covered area each side for nic nac’s.
A few days in the shed and it was nearly done, just a few bits of fine tuning left to do.
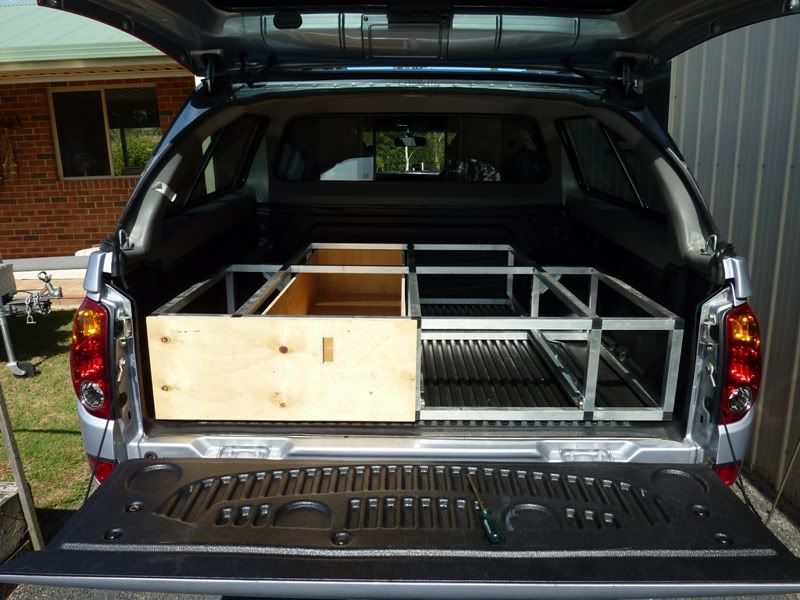
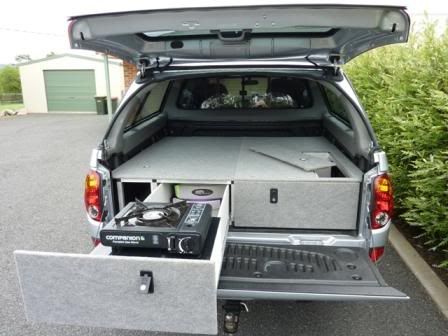
What’s a 4wd with out a fridge??? I should have thought about this one before I made the draws!!
Most of the time we are away we tow our caravan (Jayco outback hawk) with us, so we have the fridge in there of coarse.
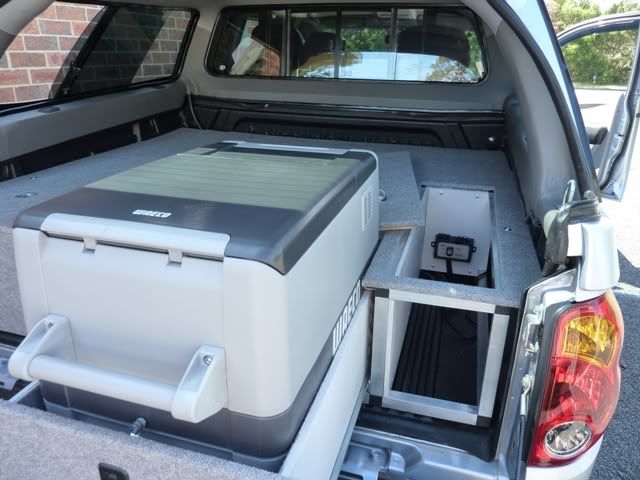
But, sometimes you need a cold drink when you’re away from the van, so I decided to modify the draws and put in a fridge.
A lot of thought was given to the make, size and model to be installed.
As there is only the 2 of us we were not going to need a large fridge, and I was hoping that I would be able to get one that would not require too much modification to the existing draws that were there already.
I opted for a Waeco CF-32UP fridge/freezer with its own internal battery.
The internal size of 32lt was enough for what we needed, and the external size was just right for sitting inside the existing draws.
A few quick cuts to modify the frame of the draws and it was done.
If the fridge was not with me I could replace the top piece to give me a full floor again.
While I was at it I installed a Waeco universal fast power charge kit (RAPS12R-U) that supplies constant power from the battery or flick a switch and it is only supplied when the ignition is on.(so as not to flatten the battery!)
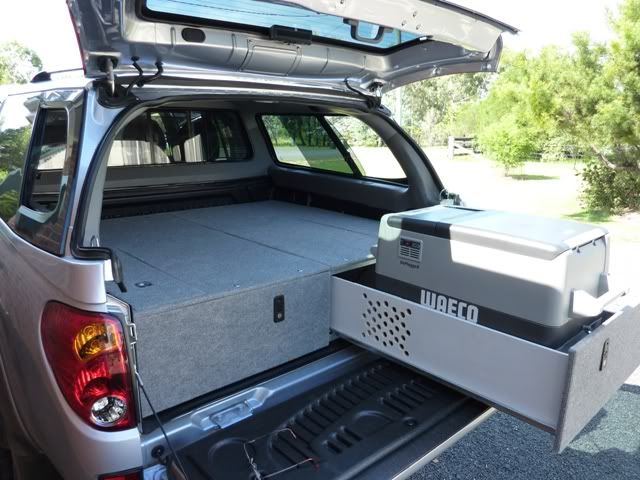
With the extra bit of weight in the rear, and thinking of the extras that I would be putting in to go away, I needed to lift the rear a bit.
I had my local ARB dealer install a new pair of rear springs with new shackles that can be greased; it would have taken me forever to get them done in the garage.
So to date that's it (2/4/10) just a few more things to do...........
to be continued.............
Cheers Johno