Timmys Tourer, The BT. Toolangi trip pics

Want to show off what you've done to your rig? or have a custom project to show? Post it up here!

Re: Timmys tourer, Tray Started!!!

Postby ratstriton on Wed Mar 16, 2011 4:34 pm

UAV wrote:Wednesday night i should have it. So i will update then. :D

It's Wednesday Tim were's the pic's.
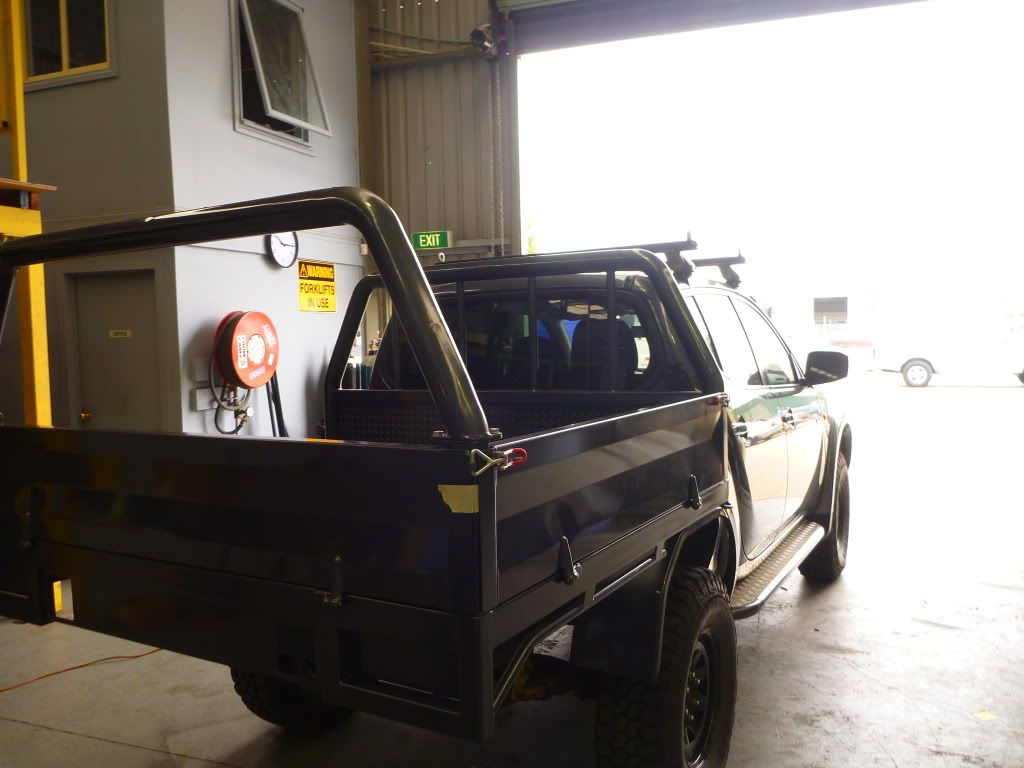
 :D :D :D
User avatar
ratstriton
Platinum Subscriber
 
Posts: 1525
Joined: Sun Nov 18, 2007 3:00 pm
Location: wantirna, VIC


Re: Timmys tourer, Tray Started!!!

Postby al coholic on Wed Mar 16, 2011 4:40 pm
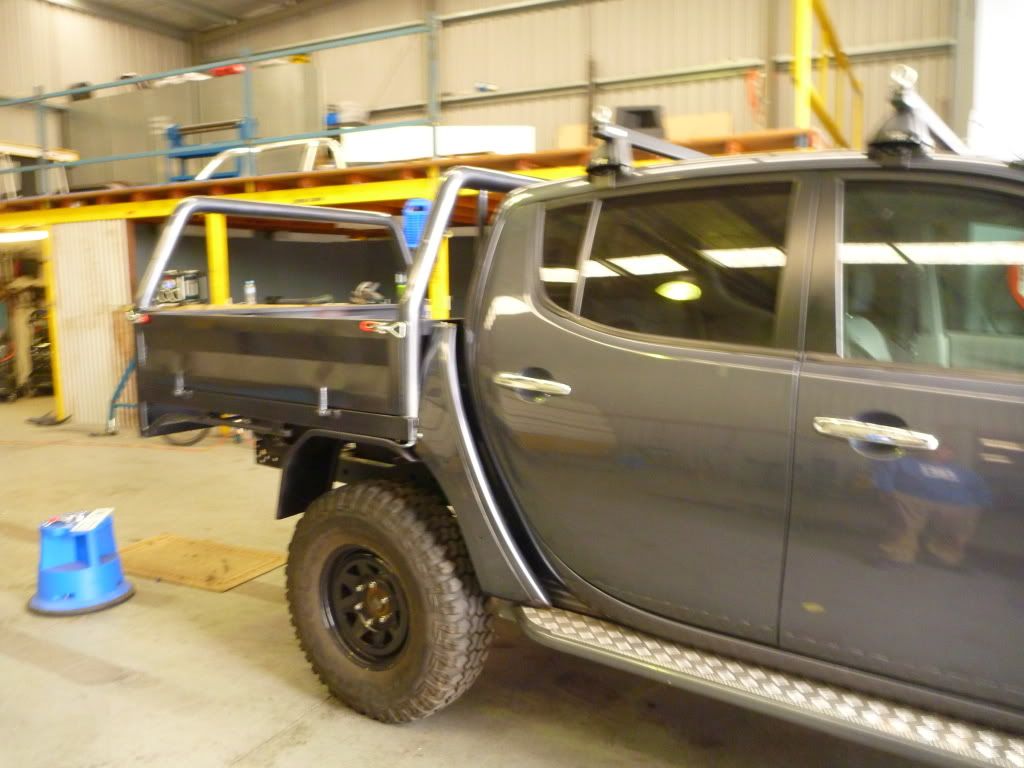
X2 :twisted:

Click to view larger picture
The funniest thing about this particular signature is that by the time you realise it doesn't say anything important, it's too late to stop reading it.
User avatar
al coholic
 
Posts: 7823
Joined: Tue Jun 23, 2009 9:04 pm
Location: NSW

Re: Timmys tourer, Tray Started!!!

Postby UAV on Wed Mar 16, 2011 4:50 pm
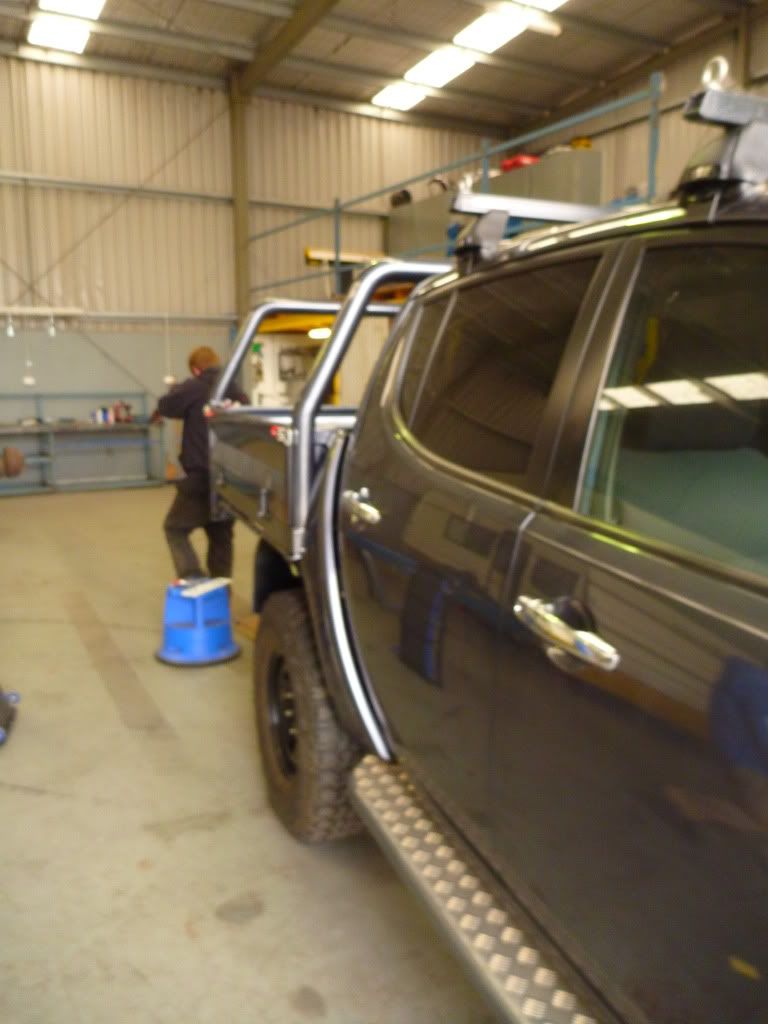
he just rang me to tell me the reverse lights i had were too powerful :lol: and his auto elecy didnt have the right part or something. So i am getting it at 10am tomorrow. :cry:

First post updated with mods
User avatar
UAV
 
Posts: 971
Joined: Sun Mar 01, 2009 4:07 pm
Location: vic

Re: Timmys tourer, Tray Done!!! Almost!

Postby UAV on Thu Mar 17, 2011 10:29 am

Well i went to pick it up this morning but the guy building wanted to send it back to the painters cause the painter did a shit job, runs everywhere and not filled ect. I said thats fine as i would rather wait a few extra days and have it spot on.

Anyway at i got a few pics. ;)

I ended up cutting my "sideburns" off the tub and fitting them to the front of the tray as this was what looked the best after a heap of mucking around. I figured the tubs are only worth like $400 so we cut it up.

The factory flares still to be fitted but will be colour coded. The front flares i will do later to match.

Click to view larger picture

What you see here is a 3 stage rear bar, i can have either the bar on, or the top of the bar off and the tray sides on or tray sides and bar removed completely.

Click to view larger picture


Here is the new fuel filler location, still using all factory parts just re-located (not fitted just sitting there atm). Also you can see a little u shaped steel rod here, due the the placement of tray/wheels on the triton there is no room for a rope rail in front on the guards so i had him put this on so a can hook my ratchet straps on.

Click to view larger picture

in this pic you can just make out the protected section for the tail lights and the recessed panel for the number plate and cutouts for the spot reverse lights

Click to view larger picture

and some more

Click to view larger picture
User avatar
UAV
 
Posts: 971
Joined: Sun Mar 01, 2009 4:07 pm
Location: vic

Re: Timmys tourer, Tray Done!!! Almost!

Postby 4wd26 on Thu Mar 17, 2011 10:35 am
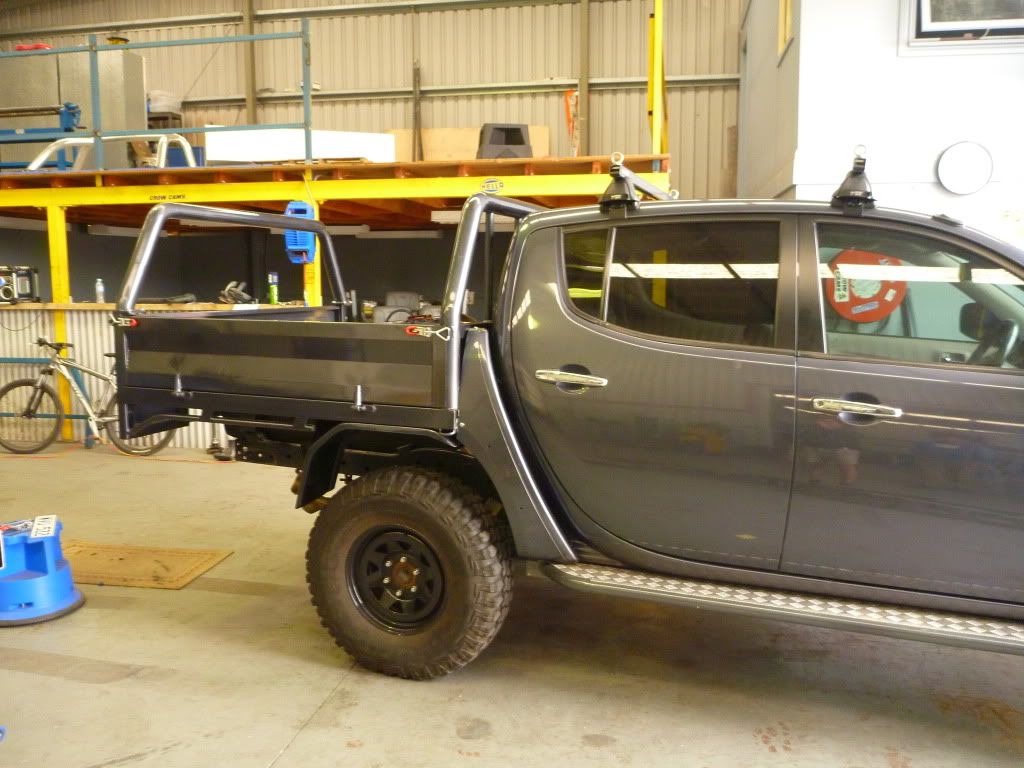
nice- could you maybe post up some dimensions?

Width and length, and how you came up with the height of the tray (as you run 33" tyres)
Getting Out There
Sucks to be you, glad I bought a 3.2 :o
User avatar
4wd26
Moderator
 
Posts: 8299
Joined: Tue Dec 18, 2007 3:00 pm
Location: Bayside Bundy and Monto

Re: Timmys tourer, Tray Done!!! Almost!

Postby UAV on Thu Mar 17, 2011 10:38 am

Tray Specs;
1780 wide, this is the actual width of the sliders/existing guards from side to side
1600 long, the length of this is approximately just at the end of the towbar
(so overall the car is no longer or wider)
300mm sides (not sure exactly on the height of the bars but will update later)
75mm mandrel bent tube front and rear
Rear bar is a 3 stage removable bar, it can be removed completely and have no tray sides, or i can remove the top bit of tube and have the sides on without the rear bar.
Has top bars for canvas canopy later on
Led tail lights
Led spot reverse lights
85lt water tank and 85lt diesel tank mounted to underside of tray. Bolted to brackets welded to tray.
Towbar raised by approx 200mm and moved back by about 50mm to fit spare

The height was worked out by a combination of;
33" tyre clearance
existing guard height (to make flares work)
rear window (basically 300 sides from underside of back window)
fitting the 2 85lt tanks and
clearance from the tanks to the exhaust.
User avatar
UAV
 
Posts: 971
Joined: Sun Mar 01, 2009 4:07 pm
Location: vic

Re: Timmys tourer, Tray Done!!! Almost!

Postby ML-VR08 on Thu Mar 17, 2011 10:46 am

Looks pretty good mate - nearly the same size as mine - mines a bit wider, i went 1860 wide and 1600 long. My sides are the same height etc and same size rollbars etc. It looks good with the front of the tub cut. I reckon you should have welded it onto the front of the headboard thou.
ML-VR08
 

Re: Timmys tourer, Tray Done!!! Almost!

Postby UAV on Thu Mar 17, 2011 10:48 am

i thought of that but i would never be able to get the tray off. So they are bolted in 3 places. The factory bracket to the chassis, and the top and bottom of the tray.
User avatar
UAV
 
Posts: 971
Joined: Sun Mar 01, 2009 4:07 pm
Location: vic

Re: Timmys tourer, Tray Done!!! Almost!

Postby ag9111 on Thu Mar 17, 2011 10:49 am

Great use of the sideburns from the tray. That is always the area that looks dicky on a triton tray back. You've nailed it there Congrats.
How did you attach them.
Edit: Answered before I posted :oops:
I love cats, but I couldn't eat a full one!

Mud is like unprotected sex
30 secs of fun for a lifetime of grief
User avatar
ag9111
Platinum Subscriber
 
Posts: 4858
Joined: Sun Mar 30, 2008 2:00 pm
Location: Wollongong, NSW

Re: Timmys tourer, Tray Done!!! Almost!

Postby ML-VR08 on Thu Mar 17, 2011 10:51 am

Yeah i like it mate - very nice. my height was 800 aswel. yours looks to be around the same. How did you go with working out where the tyre will sit when flexed up? I used 100x50mm Gal box ontop of the 65mm box so around 165mm above the mounts. If ya get what i mean?
ML-VR08
 

Re: Timmys tourer, Tray Done!!! Almost!

Postby Steane on Thu Mar 17, 2011 11:19 am

Looks really really good Tim, and that puts you in a small but elite group of Triton owners with decent looking trays. ML-VR08's looks great, and that dude in your other thread with the 1300 long tray on the Gunmetal Triton is also a winner.

It's obvious a lot of thought went into it, well done ;)

Now, if I can sell the Razorback canopy and work out where to securely house tools, a fridge, dual batteries and luggage when travelling I could be up for one of these. :?
Steane
Platinum Subscriber
 
Posts: 3979
Joined: Sun Jan 27, 2008 3:00 pm
Location: Adelaide Hills

Re: Timmys tourer, Tray Done!!! Almost!

Postby Joe on Thu Mar 17, 2011 11:34 am

Great job Timmy. I like it and great use of the sideburns too. :mrgreen:
Dad
----
Never take life seriously. Nobody gets out alive anyway.
User avatar
Joe
Moderator
 
Posts: 6335
Joined: Thu Nov 12, 2009 7:56 am
Location: Queensland

Timmys tourer, Tray Done!!! Almost!

Postby ratstriton on Thu Mar 17, 2011 11:41 am

Well done Tim looks great now I know who's building my tray when it's time get mine.
I have to say it look's like you have put a fair bit of thought in to how you wanted it to look and I think it has turned out great.
User avatar
ratstriton
Platinum Subscriber
 
Posts: 1525
Joined: Sun Nov 18, 2007 3:00 pm
Location: wantirna, VIC

Re: Timmys tourer, Tray Done!!! Almost!

Postby reeldreamer on Thu Mar 17, 2011 11:46 am

Mate i normally hate the tray look on the tri's but yours and MLVR-08's look by far the best most just look like smoko trucks! :lol: You have really put some thought into it and the rewards are there for all to see! Well done!
Bash plates and other cool gear from Prestige Offroad Accessories

http://www.newtriton.net/phpbb/viewforum.php?f=80
User avatar
reeldreamer
 
Posts: 1191
Joined: Mon Nov 10, 2008 11:21 am
Location: Richlands Brisbane

Re: Timmys tourer, Tray Done!!! Almost!

Postby VALERIO on Thu Mar 17, 2011 11:59 am

Great job Timmy, just can say you solve the problem of the "not match look" between the square shape of the steel tray and the round shape of the triton's cabin adapting that small part of the original ute tray. Congrats! it's the firts triton with steel tray that i like. ;)
User avatar
VALERIO
 
Posts: 251
Joined: Tue Apr 07, 2009 4:02 am
Location: venezuela

Timmys tourer, Tray Done!!! Almost!

Postby UAV on Thu Mar 17, 2011 1:31 pm

Thanks for the comments guys. I'm really happy with how it's turned out. Will post some better photos next week.

Ml, I didn't really bother checking the flex as we had other governing factors as mentioned. I figured the guards are almost the same as before but if it rubs I'll either extend the bump stops or lift the tray.
User avatar
UAV
 
Posts: 971
Joined: Sun Mar 01, 2009 4:07 pm
Location: vic

Re: Timmys tourer, Tray Done!!! Almost!

Postby SEJ GLX-R on Thu Mar 17, 2011 2:15 pm

Great work Tim,

I have to say, it looks way better in real life than in the pics :D
See my build thread ... HERE
See my shed ............. HERE
User avatar
SEJ GLX-R
 
Posts: 1616
Joined: Sun May 16, 2010 7:04 am
Location: Melbourne, (outer west)

Timmys tourer, Tray Done!!! Almost!

Postby UAV on Thu Mar 17, 2011 2:23 pm

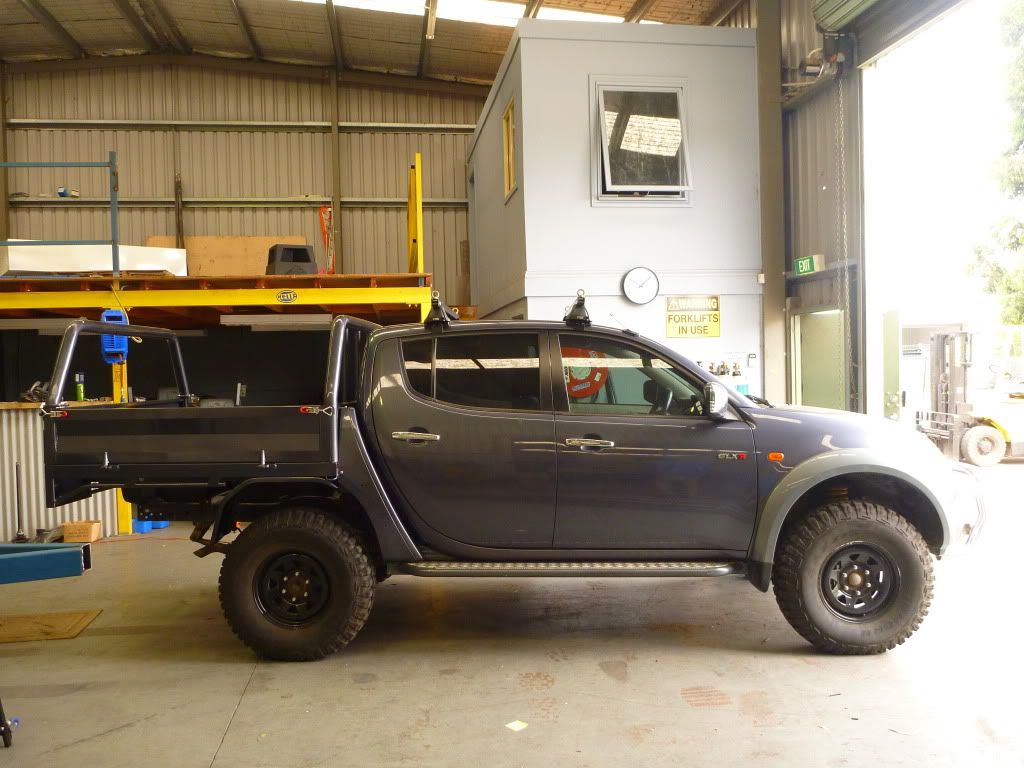
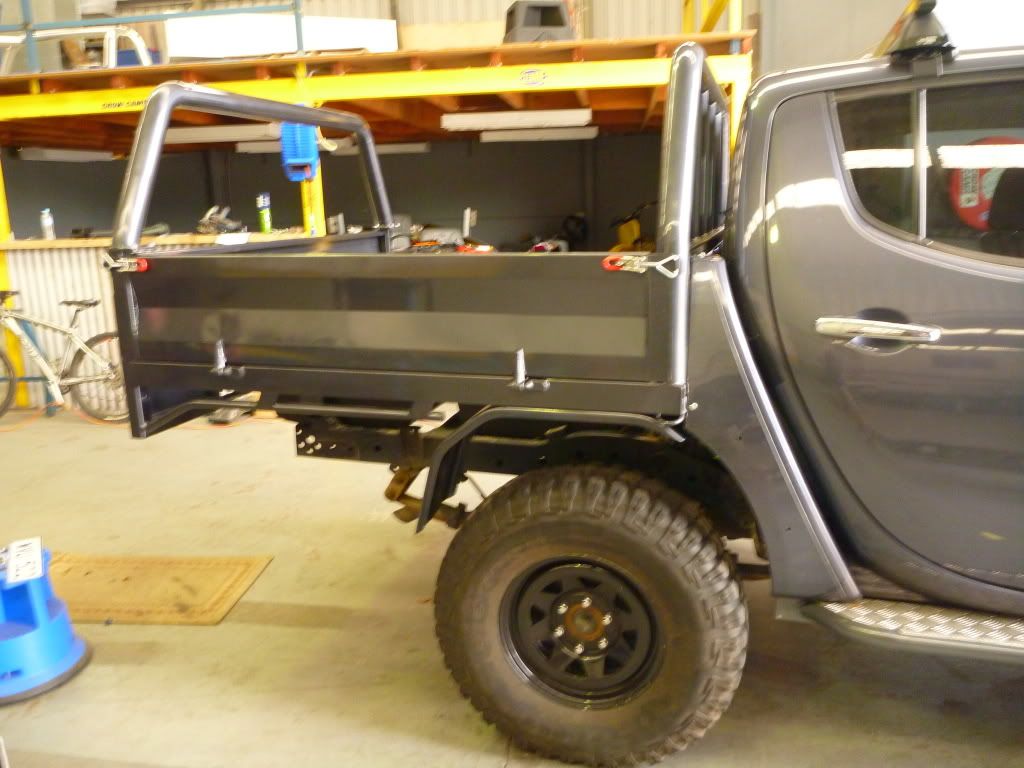
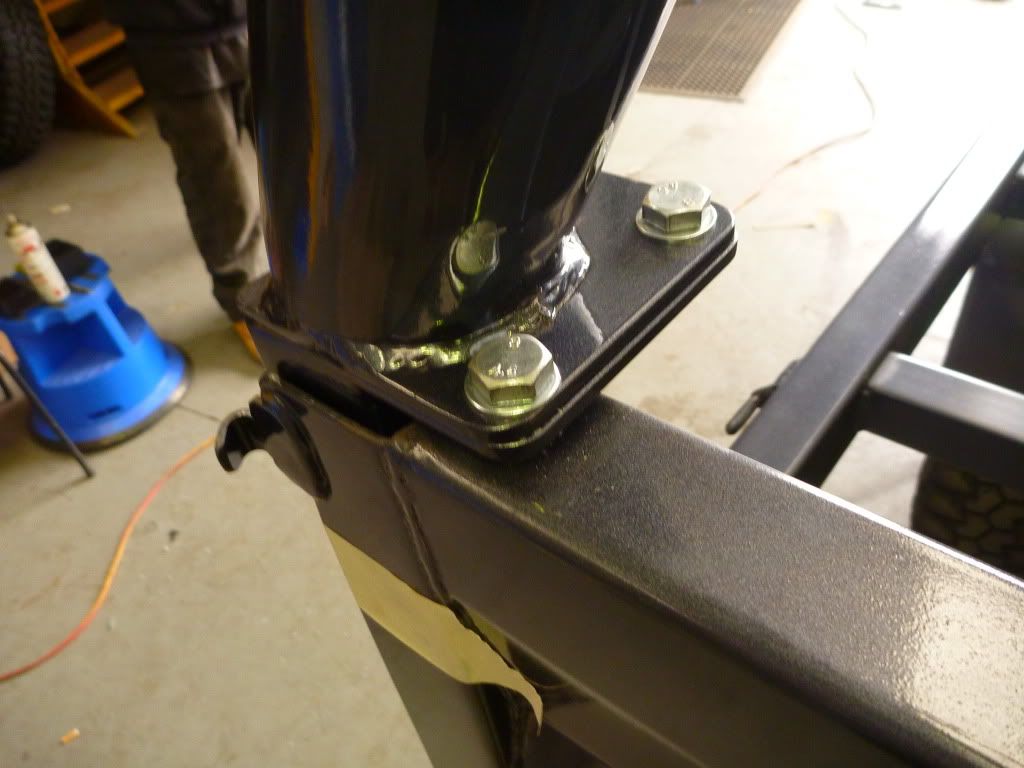
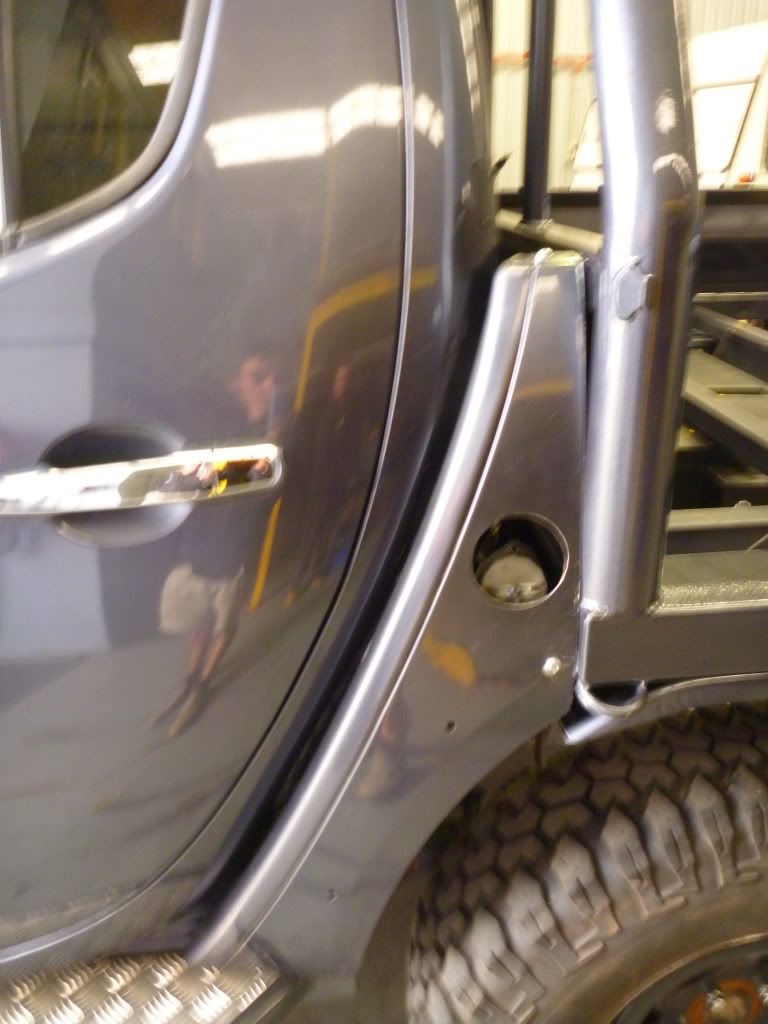
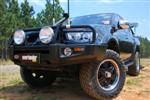
SEJ GLX-R wrote:Great work Tim,

I have to say, it looks way better in real life than in the pics :D


Yes it definitely looks better in real life! Haha, did you go down and check it out?

And so much for having a custom tray, the bloke has 3 other triton's that want trays similar to mine. Haha.
User avatar
UAV
 
Posts: 971
Joined: Sun Mar 01, 2009 4:07 pm
Location: vic

Re: Timmys tourer, Tray Done!!! Almost!

Postby SEJ GLX-R on Thu Mar 17, 2011 2:26 pm

UAV wrote:Yes it definitely looks better in real life! Haha, did you go down and check it out?


Yep, I went to see him about my roll bar so I had to have a look over it :lol:
See my build thread ... HERE
See my shed ............. HERE
User avatar
SEJ GLX-R
 
Posts: 1616
Joined: Sun May 16, 2010 7:04 am
Location: Melbourne, (outer west)

Re: Timmys tourer, Tray Done!!! Almost!

Postby snowman on Thu Mar 17, 2011 2:31 pm

i like it. a lot. 8-) 8-)
This car is like a bad drug habit. It is taking all my money and time, my family are concerned, but new mods just feel sooooooo good.
User avatar
snowman
Platinum Subscriber
 
Posts: 12031
Joined: Sat Feb 07, 2009 10:59 pm
Location: Toongabbie, NSW

Timmys tourer, Tray Done!!! Almost!

Postby UAV on Thu Mar 17, 2011 2:37 pm

What time? I was there at about 10am and told him you were coming down.
User avatar
UAV
 
Posts: 971
Joined: Sun Mar 01, 2009 4:07 pm
Location: vic

Timmys tourer, Tray Done!!! Almost!

Postby SEJ GLX-R on Thu Mar 17, 2011 3:18 pm

I got there at about 4pm.
I just took the Triton back down there so he could get some measurements from it.
See my build thread ... HERE
See my shed ............. HERE
User avatar
SEJ GLX-R
 
Posts: 1616
Joined: Sun May 16, 2010 7:04 am
Location: Melbourne, (outer west)

Re: Timmys tourer, Tray Done!!! Almost!

Postby UAV on Thu Mar 17, 2011 3:24 pm

Forgot to mention 2 things;

The floor is 3mm checkerplate but is not welded in it is one sheet fitted, painted and screwed in so it can be removed easily for any reason.

Also i had him drill a few 12mm holes in the tray floor and weld some 10mm nuts to the underside of it so i can mount toolboxes and stuff or put some eyelet tiedowns in without having to put my arm under the tray all the time and do nuts and bolts up. ;)

I am looking at mounting some removable spacecases to the tray. ARB charge a fortune for theirs but i found these ones that i will probably get when i can (in grey or blue). :D

http://www.techniice.com/2011/jungle_reef/toolbox.asp
User avatar
UAV
 
Posts: 971
Joined: Sun Mar 01, 2009 4:07 pm
Location: vic

Re: Timmys tourer, Tray Done!!! Almost!

Postby tezza08 on Thu Mar 17, 2011 6:00 pm

thats a top idea with the sideburns mate your on to a winner ;)
Growing old is mandatory, Growing up is optional! :twisted:
User avatar
tezza08
 
Posts: 652
Joined: Tue Aug 31, 2010 10:20 am
Location: Caloundra QLD

Re: Timmys tourer, Tray Done!!! Almost!

Postby BEN115 on Thu Mar 17, 2011 6:21 pm

mate that looks awsum! i think if i had of seen that before i bought my ute i would deffinatly have put more thought into a 4dr. nice work.
User avatar
BEN115
 
Posts: 207
Joined: Sat Dec 11, 2010 2:17 pm

PreviousNext

Return to Member Build Ups

Who is online

Users browsing this forum: No registered users and 22 guests