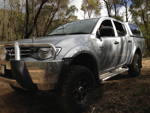
Dan.Batto's Build
Dan.Batto's Build
Trust me, it will be easier to do from the top as you will be removing and then I stalling then removing again the putting back in again.... Im so over adding an removing the draws ....
Find my build thread here: viewtopic.php?f=51&t=8930
My Shed Here: http://www.newtriton.net/myshed.php?vie ... =dan.batto[/b]
My Shed Here: http://www.newtriton.net/myshed.php?vie ... =dan.batto[/b]
-

dan.batto - Posts: 3269
- Joined: Wed Apr 06, 2011 10:34 pm
- Location: Rowville, Melbourne
Dan.Batto's Build
Looking good Mate. Gotta love all the extra room
-

timbo - Posts: 289
- Joined: Mon Aug 30, 2010 6:22 pm
- Location: bundoora vic
Dan.Batto's Build
Haha, cheers. Will have to have another look at it. Wasn't too keen to drill them on anyway but must b done I guess. Where did u get the carpet from? Anywhere nice and cheap?
I feel sorry for people who don't drink...
When they wake up in the morning, that's the best they're going to feel all day.
When they wake up in the morning, that's the best they're going to feel all day.
-

big_bob_thefirst - Platinum Subscriber
- Posts: 995
- Joined: Thu Oct 06, 2011 9:18 pm
- Location: Adelaide, South Australia
Dan.Batto's Build
Carpet was already on mine, but bunnings do it for about $37 for 1m x 2m. Prob need about 2m x 2m. Then just use some contact adhesive to glue it on. Are you familiar with how to use contact adhesive?
Find my build thread here: viewtopic.php?f=51&t=8930
My Shed Here: http://www.newtriton.net/myshed.php?vie ... =dan.batto[/b]
My Shed Here: http://www.newtriton.net/myshed.php?vie ... =dan.batto[/b]
-

dan.batto - Posts: 3269
- Joined: Wed Apr 06, 2011 10:34 pm
- Location: Rowville, Melbourne
Dan.Batto's Build
Not yet... If there's a picture of me glued to my ute.... Well, I hope there's a solvent that cancels it out. Will have to have a look around.
I feel sorry for people who don't drink...
When they wake up in the morning, that's the best they're going to feel all day.
When they wake up in the morning, that's the best they're going to feel all day.
-

big_bob_thefirst - Platinum Subscriber
- Posts: 995
- Joined: Thu Oct 06, 2011 9:18 pm
- Location: Adelaide, South Australia
Dan.Batto's Build
Ok, well at bunnings buy the Sika brand, it's a yellow container. It's good! Get an old paintbrush. Basically paint it onto the surface the carpet is going onto, then paint the back of the carpet. WAIT (important to do this) til they are no longer tacky, then put the two together and it sticks like s**t to a blanket! Make sure u smooth it out as you go as you won't easily get it back up again if you have bubbles! Worth doing a small practice run first on some off cuts or rubbish!!! Easy once you know how it all works!
Find my build thread here: viewtopic.php?f=51&t=8930
My Shed Here: http://www.newtriton.net/myshed.php?vie ... =dan.batto[/b]
My Shed Here: http://www.newtriton.net/myshed.php?vie ... =dan.batto[/b]
-

dan.batto - Posts: 3269
- Joined: Wed Apr 06, 2011 10:34 pm
- Location: Rowville, Melbourne
Dan.Batto's Build
Excellent. Cheers mate. Will have a look for that. Gonna have to figure it all out.
I feel sorry for people who don't drink...
When they wake up in the morning, that's the best they're going to feel all day.
When they wake up in the morning, that's the best they're going to feel all day.
-

big_bob_thefirst - Platinum Subscriber
- Posts: 995
- Joined: Thu Oct 06, 2011 9:18 pm
- Location: Adelaide, South Australia
Dan.Batto's Build
Feel free to shoot me a MSG or call if you need some explaining. Pm me if you don't have or want my number! Happy to help!
I've considered going into business building these draws! Would be awesome!!
I've considered going into business building these draws! Would be awesome!!
Find my build thread here: viewtopic.php?f=51&t=8930
My Shed Here: http://www.newtriton.net/myshed.php?vie ... =dan.batto[/b]
My Shed Here: http://www.newtriton.net/myshed.php?vie ... =dan.batto[/b]
-

dan.batto - Posts: 3269
- Joined: Wed Apr 06, 2011 10:34 pm
- Location: Rowville, Melbourne
Dan.Batto's Build
U could defo make money. They charge a fortune for a set. It's unreal all things considering. I'll get the frame done tomorrow and then mayb go shopping for the rest after my holiday. Will have to see...
Cheers tho, I'll b in touch.
Cheers tho, I'll b in touch.
I feel sorry for people who don't drink...
When they wake up in the morning, that's the best they're going to feel all day.
When they wake up in the morning, that's the best they're going to feel all day.
-

big_bob_thefirst - Platinum Subscriber
- Posts: 995
- Joined: Thu Oct 06, 2011 9:18 pm
- Location: Adelaide, South Australia
Dan.Batto's Build
No worries! Like I said, feel free to get in touch if you have any questions!
Find my build thread here: viewtopic.php?f=51&t=8930
My Shed Here: http://www.newtriton.net/myshed.php?vie ... =dan.batto[/b]
My Shed Here: http://www.newtriton.net/myshed.php?vie ... =dan.batto[/b]
-

dan.batto - Posts: 3269
- Joined: Wed Apr 06, 2011 10:34 pm
- Location: Rowville, Melbourne
Re: Dan.Batto's Build
They are looking good mate, how did you go getting the nutserts in with the tub liner in and how did you stuff one up.
-

ratstriton - Platinum Subscriber
- Posts: 1525
- Joined: Sun Nov 18, 2007 3:00 pm
- Location: wantirna, VIC
Re: Dan.Batto's Build
Sorry double post
-

ratstriton - Platinum Subscriber
- Posts: 1525
- Joined: Sun Nov 18, 2007 3:00 pm
- Location: wantirna, VIC
Dan.Batto's Build
I drilled the liner holes bigger than the tub holes, nutsert gun fits. The one that's stuffed up spins in one place, got to drill it out and re do it!
Find my build thread here: viewtopic.php?f=51&t=8930
My Shed Here: http://www.newtriton.net/myshed.php?vie ... =dan.batto[/b]
My Shed Here: http://www.newtriton.net/myshed.php?vie ... =dan.batto[/b]
-

dan.batto - Posts: 3269
- Joined: Wed Apr 06, 2011 10:34 pm
- Location: Rowville, Melbourne
Re: Dan.Batto's Build
dan.batto wrote:I drilled the liner holes bigger than the tub holes, nutsert gun fits. The one that's stuffed up spins in one place, got to drill it out and re do it!
That sucks mate will you have to pull the draws out again.
-

ratstriton - Platinum Subscriber
- Posts: 1525
- Joined: Sun Nov 18, 2007 3:00 pm
- Location: wantirna, VIC
Dan.Batto's Build
Nar not fully which is good! Can rest the on the tailgate.
Find my build thread here: viewtopic.php?f=51&t=8930
My Shed Here: http://www.newtriton.net/myshed.php?vie ... =dan.batto[/b]
My Shed Here: http://www.newtriton.net/myshed.php?vie ... =dan.batto[/b]
-

dan.batto - Posts: 3269
- Joined: Wed Apr 06, 2011 10:34 pm
- Location: Rowville, Melbourne
Re: Dan.Batto's Build
Mate I know what you mean pulling them out and then putting them back, I'm nearly 95% done on my drawers. I don't know about you but my labour costs alone would have paid for a shop bought set  But Im intergrating the second battery and fridge slide with anderson and cig plugs as well and you can't buy ones that fit my needs. Keep it up looks the goods.
-

SmithyXRT - Posts: 27
- Joined: Mon Jul 19, 2010 1:38 pm
- Location: Baldivis W.A.
Re: Dan.Batto's Build
dan.batto wrote:I drilled the liner holes bigger than the tub holes, nutsert gun fits. The one that's stuffed up spins in one place, got to drill it out and re do it!
How did you go about drilling the holes in the tub liner, without damaging the tub itself? I'm about to do this in the next week or so. My intention is to access the existing points in the tub, so don't want to drill right the way through
the truth will set you free
My build thread:
http://www.newtriton.net/phpbb/viewtopic.php?f=51&t=11704
My build thread:
http://www.newtriton.net/phpbb/viewtopic.php?f=51&t=11704
-

odie602r - Platinum Subscriber
- Posts: 730
- Joined: Wed Feb 15, 2012 7:08 pm
- Location: Country SA
Dan.Batto's Build
You can lift the liner up to drill it. Lift it, stick a brick or something in to hold it up, then drill away. Best to mark it first I guess.
-

Cowboy Dave - Moderator
- Posts: 18098
- Joined: Tue Dec 29, 2009 9:46 am
- Location: Sydney
Dan.Batto's Build
As CD said^^^
I drilled straight through the whole lot, then lifted the liner and over sized the wholes in the liner. I recommend over sizing them a little so as you can easy locate the screws you are after when you do it. Also as cd said, mark out the holes on the liner before drilling!
I drilled straight through the whole lot, then lifted the liner and over sized the wholes in the liner. I recommend over sizing them a little so as you can easy locate the screws you are after when you do it. Also as cd said, mark out the holes on the liner before drilling!
Find my build thread here: viewtopic.php?f=51&t=8930
My Shed Here: http://www.newtriton.net/myshed.php?vie ... =dan.batto[/b]
My Shed Here: http://www.newtriton.net/myshed.php?vie ... =dan.batto[/b]
-

dan.batto - Posts: 3269
- Joined: Wed Apr 06, 2011 10:34 pm
- Location: Rowville, Melbourne
Re: Dan.Batto's Build
Okay - yeah I can't do that as the way they mounted my ARB canopy over the top and around the tailgate basically means I can only lift it at the tailgate about a max of 1cm....
Might have to try a Dremel type tool perhaps, rather than a drill and drill bit
Might have to try a Dremel type tool perhaps, rather than a drill and drill bit
Last edited by odie602r on Sun Jul 29, 2012 7:48 am, edited 1 time in total.
the truth will set you free
My build thread:
http://www.newtriton.net/phpbb/viewtopic.php?f=51&t=11704
My build thread:
http://www.newtriton.net/phpbb/viewtopic.php?f=51&t=11704
-

odie602r - Platinum Subscriber
- Posts: 730
- Joined: Wed Feb 15, 2012 7:08 pm
- Location: Country SA
Dan.Batto's Build
Maybe use a hole saw and just go real steady?
-

Cowboy Dave - Moderator
- Posts: 18098
- Joined: Tue Dec 29, 2009 9:46 am
- Location: Sydney
Re: Dan.Batto's Build
So I am looking at doing a small mod to my reverse camera:
Here is a "wiring diagram" of what I currently have. I'm a chippy not a sparky it's the best I could draw


Now what I want to do:
Basically all I want to be able to do is turn the camera on whenever I want by flicking a switch. What I think I need to do is somehow run a positive wire to the camera with a relay or something like that in there. What currently happens (like most reverse cameras) is that when you put it in reverse the lights come on which then powers the camera and then turns the screen on. I have the reverse led's I added also connected to the same point.
From my understanding is I need a relay after the reverse lights I added, so as that when I flick a switch wired positively it doesn't turn the reverse lights on also???
Anyone got some insight to this and am I making a small easy job technical?
Thanks!!
Here is a "wiring diagram" of what I currently have. I'm a chippy not a sparky it's the best I could draw

Now what I want to do:
Basically all I want to be able to do is turn the camera on whenever I want by flicking a switch. What I think I need to do is somehow run a positive wire to the camera with a relay or something like that in there. What currently happens (like most reverse cameras) is that when you put it in reverse the lights come on which then powers the camera and then turns the screen on. I have the reverse led's I added also connected to the same point.
From my understanding is I need a relay after the reverse lights I added, so as that when I flick a switch wired positively it doesn't turn the reverse lights on also???
Anyone got some insight to this and am I making a small easy job technical?
Thanks!!
Find my build thread here: viewtopic.php?f=51&t=8930
My Shed Here: http://www.newtriton.net/myshed.php?vie ... =dan.batto[/b]
My Shed Here: http://www.newtriton.net/myshed.php?vie ... =dan.batto[/b]
-

dan.batto - Posts: 3269
- Joined: Wed Apr 06, 2011 10:34 pm
- Location: Rowville, Melbourne
Re: Dan.Batto's Build
Find my build thread here: viewtopic.php?f=51&t=8930
My Shed Here: http://www.newtriton.net/myshed.php?vie ... =dan.batto[/b]
My Shed Here: http://www.newtriton.net/myshed.php?vie ... =dan.batto[/b]
-

dan.batto - Posts: 3269
- Joined: Wed Apr 06, 2011 10:34 pm
- Location: Rowville, Melbourne
Re: Dan.Batto's Build
I would just install a diode inline with the wiring going to the camera, thus will stop the current flowing backwards allowing you to add a switch without pushing power back to the lights
No point over complicating it, haha, same theory works for solar panels
No point over complicating it, haha, same theory works for solar panels
-

irwazza - Posts: 615
- Joined: Sun Jul 10, 2011 9:07 pm
Re: Dan.Batto's Build
Ah awesome as mate! Im going to have to shoot up to super crap an see what I can get  thanks!
Find my build thread here: viewtopic.php?f=51&t=8930
My Shed Here: http://www.newtriton.net/myshed.php?vie ... =dan.batto[/b]
My Shed Here: http://www.newtriton.net/myshed.php?vie ... =dan.batto[/b]
-

dan.batto - Posts: 3269
- Joined: Wed Apr 06, 2011 10:34 pm
- Location: Rowville, Melbourne
Who is online
Users browsing this forum: No registered users and 42 guests


