I thought I would write a quick guide on how to install it into an MN, the ML should be very similar.
It is a fairly easy install and anyone who knows their way around tools will be able to do this with ease.
All up it took me about 5 hours to complete with the help of a mate. I would not suggest doing this on your own as an extra pair of hand and eyes are needed.
Tools:
Hole Saws 92mm and 102mm (I think these are the right sizes, correct me if I am wrong) I used the ones that are in the Hole Saw Rental Thread viewtopic.php?f=18&t=6748
Rachet Spanner 13mm
Open ended Spanner 13mm
Philips number 2 Screwdriver
Flat Head screwdriver
Step Drill
Electric drill or powerfull Battery Drill
Socket Set
Small half round File or deburing tool
Drill bits 2.5mm, 5mm, 10mm
SikaFlex-227
Tap set for making a thread on the adapter plate
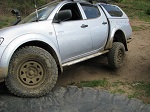
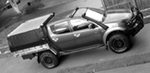
Here is the car before I started

Remove the Flare and wheel arch covers. I bought some spare christmas tree plugs from Super Cheap as I knew some may break.
Mask up the guard and Pillar, this will stop the paint chipping away when you drill the holes

Attach the template.
NOTE!! I only used the template to locate where to dril lthe 92mm hole. The template is almost worthless, as you will see later on.
Do not go and drill all the holes at once.

Remove the Airbox and Over flow bottle.
Also remove the indicator bulb and the plug for the headlight and tape out of the way. You will also need to move the wiring loom up out of the way.

Here is the first big hole. This was the scary part for me as once this is done there is no turning back

Then drill the 102mm Hole on the inside of the engine bay. Use the forward bolt hole for the overflow bottle as the locator for the hole.
Beware of the bonnet release cable on the other side.
I then lined up the snorkel with only one of the threads inserted and marked it's location once I was happy.
I used the 5mm drill to make the hole, then opened it up with the 10mm bit.
I repeated this step for all the threads until I had all the holes drilled. Take your time, double check, then check again.
Make sure you paint the holes with rust guard!!!


The airbox adapter does not fit out of the box and does need modifying.
All I did was get a rats tail file and file away the inside of the adapter until it fit over the airbox intake. Takes a bit of time, however does make it look nice.

I then drilled the holes in the adapter and the airbox.
Using a tap I made a thread so I could bolt it on from within the airbox.
Sikaflex sealed it up very nicely.

Here is the Snorkel attached.
Doing up the nuts on the inside of the guard is fairly straight forward. It's a fairly tight fit and a bit fiddly. Needs some paitence, and maybe a beer or two
Snorkel attached

Airbox installed.
Remember to put the indicator bulb and wiring loom back in place before putting the air pipe on.

For the bracket on the pillar. I drill 3 2.5mm holes and used Stainless steel screws 8G x 15mm.
You do need to cut the screws a bit shorter as they are just slightly too long. If you can find 10mm screws that should be fine.
I used sikaflex to seal and glue it as well.

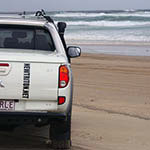
And here is the finished job.
I was happy with the result

For the overflow bottle, I forgot to take a pic, however I have just cable tied it between the battery and the firewall untill I source myself a Safari or Ironman one.
I hope this has helped. I enjoyed doing it myself and saved enough cash doing it myself to buy some more bolt on's for my beloved Truck / Ute / Car
Bogor