Custom Xrox install

Bull bars, sliders, wheel carriers etc!

Custom Xrox install

Postby BillMcQuade on Sat Sep 02, 2017 4:46 pm

I have been looking to install a winch on my rig for some time. The catch is, for various reasons, I don't really want a full bullbar. I have looked at fabricating a mount for the front that would tuck behind the bumper, but there is the whole airbag compliance thing that I don't want to mess with.

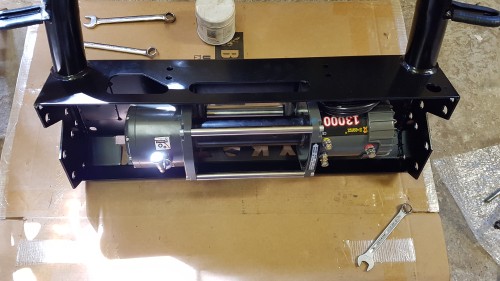
The winch was a fairly easy choice, and had to be steel wire, not Dyneema. I'm not opening the steel vs Dyneema argument, it's just a personal choice. I have had some bad experiences with Warn, so was looking at the current Runva range. A friend of mine suggested taking a look at the 13000lb I-Max winch. It's a Chinese made unit, which seems to be getting some good reviews. They're priced at the same point that Runva were priced at when they entered the market. I picked one up for $328 :shock: It's a big, solid unit, no cheaping out on the castings here! When I got it home, I opened the thing up and found that it was properly packed with grease, and both the motor and the gearbox have a decent set of seals. They come with the usual hand control and wireless remotes. For the plastic fans, They also come in a Dyneema equipped model.

As for what to bolt it on to, I decided to go with the Xrox, but with a twist; I decided to fit it without the wings (only the centre section). I bought one from my local Xrox agent, and merrily scooted home to start the install. And that's where the fun started :lol:

Pro-tip #1; the Xrox isn't really designed to take a roller fairlead. I had to make some 20mm spacers up to clear the fairlead mounting bolts.

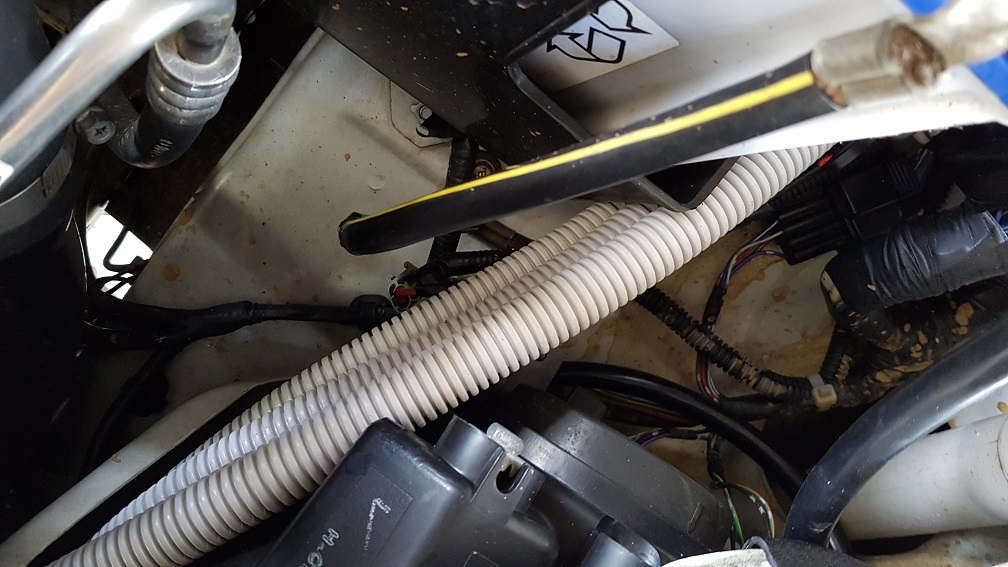
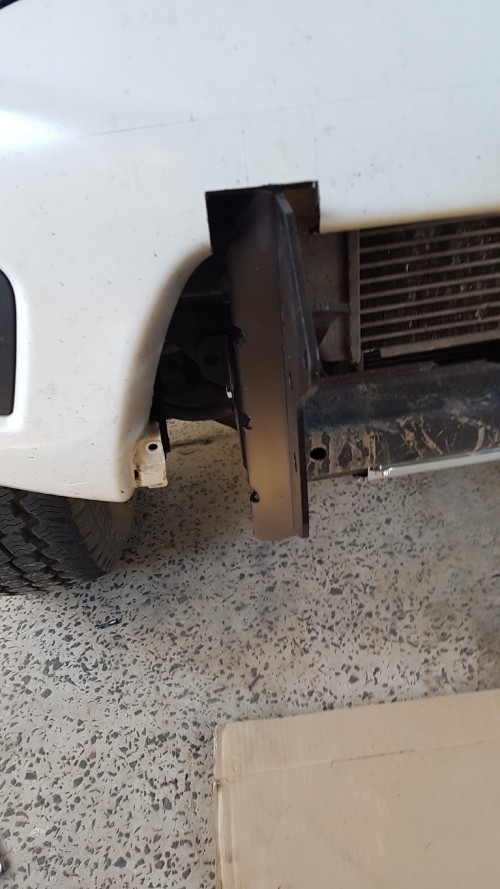
Pro-tip #2; the I-Max is about the largest winch you can fit in an Xrox. The gearbox is a big mother of a thing, and I can't rotate the housing to a position where the clutch lever is readily accessible through the hole in the Xrox (the access hole is way too small for my hand, and I will be taking this up with Xrox). The front collision bar of the Triton also fouls the winch (details further down). The current position of the lever requires me to access it from the bottom. For the type of off-roading I do, it will probably be fine, but I'm looking to make a modified clutch lever to make it all proper.

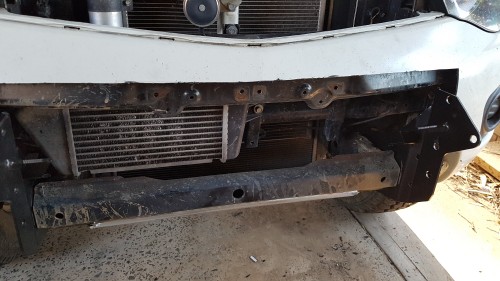
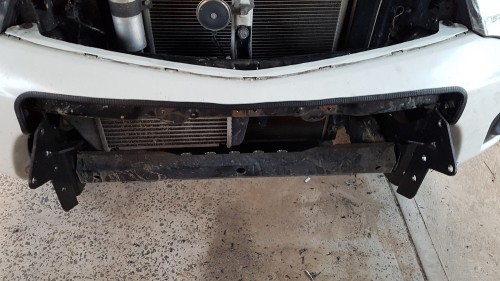
First, I removed the plastic "C"channel at the bottom of the bumper, and the honeycomb part of the grill. Then I started trial fitting the mounting brackets, carefully notching the bumper as I went. As I'm not following the Xrox cutting instructions, I wanted to remove as little material as possible until I was able to work out the entire cut.

Click to view larger picture

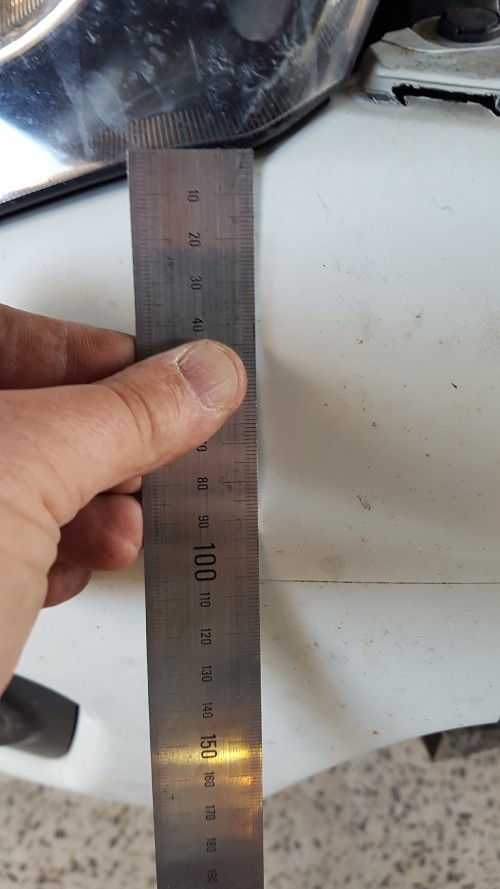
After much measuring, I finally worked out my initial cuts. I started at 105mm from the headlight bottom "peak", though the final cut ended up being 90mm to allow for the pinchweld.

Click to view larger picture

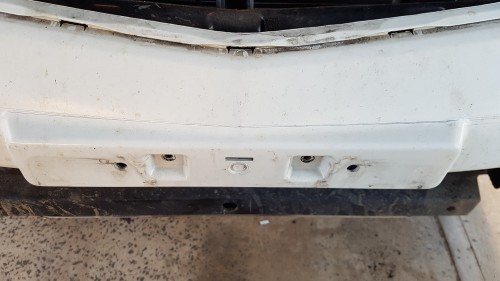
I then drew the initial cut across the bar, which pretty much matched the number plate mount.

Click to view larger picture

Out came the grinder, and the point of no return was passed. My thumb was reminded of how much it hurts to get molten plastic in the wrong spot. :lol:

Click to view larger picture

Cleaned up all the burrs and fitted the pinchweld. It looks wonky in the pic, but I hadn't fully seated part of it due to a piece of offcut stuck in there. I pulled it off and re-did it. You also need drill out the spot welds that hold the number plate bracket. Don't throw it away, it'll be useful later ;)

Click to view larger picture

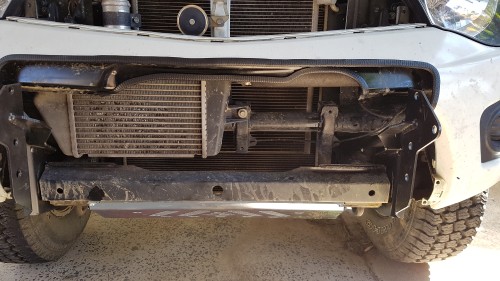
Now, as I mentioned, I had to cut part of the front intrusion bar to clear the winch. As the Xrox is a much better intrusion bar than the tinfoil OEM thing, I had no problem doing this. Nicely shaped cut, epoxy blacked and then some pinchweld.

Click to view larger picture

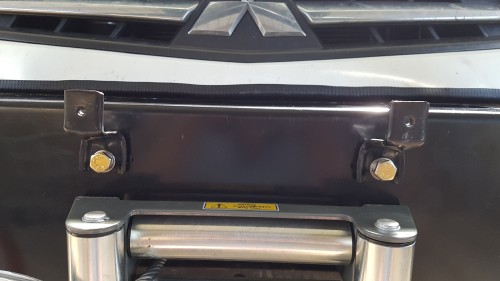
The whole time I had been lifting the non-winch equipped Xrox for the fitting, so it was time to bolt on the fairlead rollers and the winch. This required some modification to the fairlead, and some 20mm stainless spacers, plus some additional length high-tensile bolts. I couldn't get the exact bolts (fully threaded) that I wanted, so they are on order, and I used some temporary ones. They do the job, but have washers packed under the heads, which is unsightly.

Click to view larger picture

Click to view larger picture

Then it was time to lift it into position and finger tighten all the bolts. After that, level it up and tighten. Then wind on the cable, which is always a dog of a job :evil:

Click to view larger picture

Next up the number plate. It's always an issue to find somewhere to put it on an Xrox bar. I cut and modified the OEM brackets that I took off the intrusion panel, and used the winch bolts to hold them.

Click to view larger picture

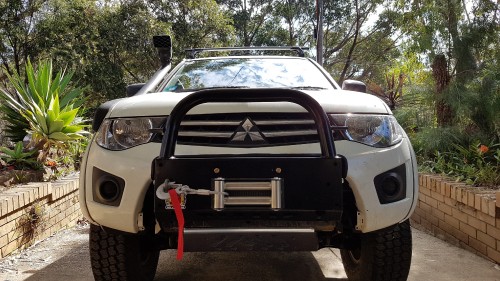
Then fitted the plate.

Click to view larger picture

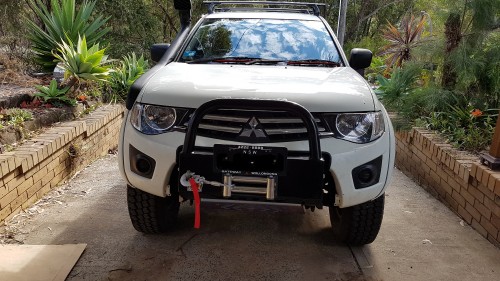
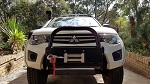
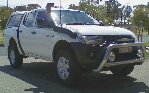
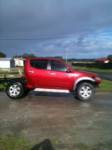
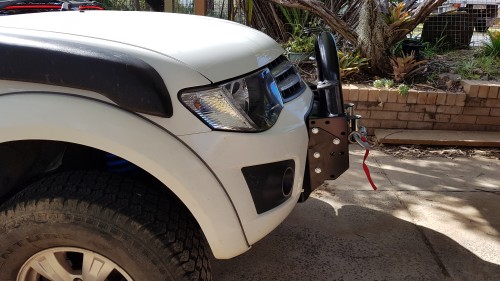
Side view. It's pretty compact, and IMHO, it keeps the sensuous curves of the Triton intact.

Click to view larger picture

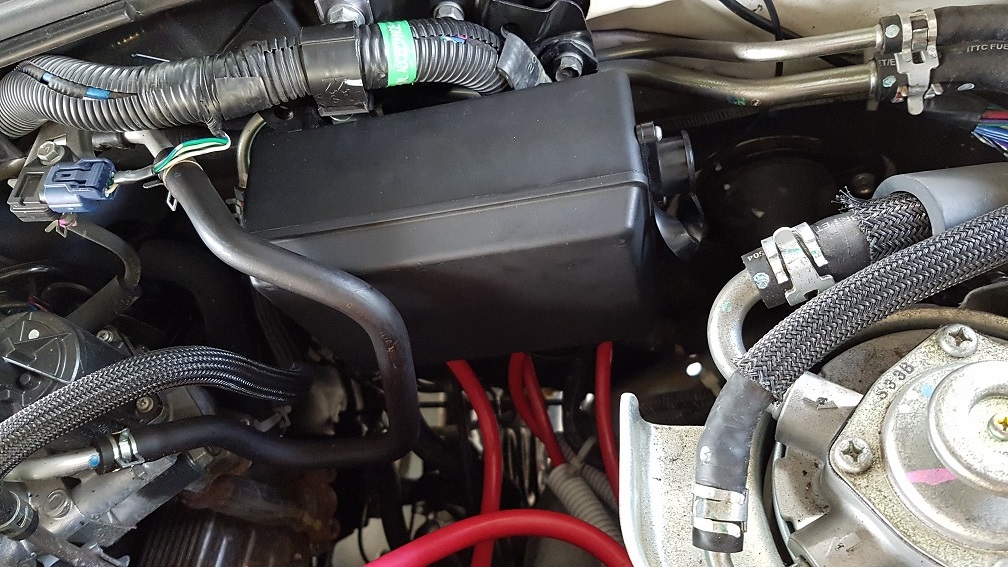
The last jobs will be to remote mount the control box, and fabricate an infill panel between the BushSkinz and the Xrox. I'm going to make this from perforated stainless to keep the airflow up to things. I wired the solenoid temporarily to wind the cable onto the drum, and have ordered some longer cable to complete the install. I will add this to the post when they get here.
White 2013 MN GLX+ manual

"Tuned by Doctor Diesel"
User avatar
BillMcQuade
Platinum Subscriber
 
Posts: 2007
Joined: Sun Jun 23, 2013 12:20 pm
Location: The 'Gong


Re: Custom Xrox install

Postby TheSheepKed on Sat Sep 02, 2017 4:57 pm

Great work on the custom fit. Looks like a pro job - definitely a unique Triton.

Just out of curiosity, did you consider a black nudge bar with the winch cradle?
Not the look you were going for or something?

Thanks for the post and pics, mate.
User avatar
TheSheepKed
 
Posts: 226
Joined: Thu Jul 06, 2017 9:58 am
Location: Victoria

Re: Custom Xrox install

Postby dieselweasel on Sat Sep 02, 2017 5:18 pm

Looks great bill, a good idea that materialised into something that looks good too.
Proud owner of 'Wheelbarrow'
User avatar
dieselweasel
 
Posts: 1120
Joined: Sat Dec 06, 2014 3:25 pm
Location: Bunbury WA

Re: Custom Xrox install

Postby BillMcQuade on Sat Sep 02, 2017 5:25 pm

TheSheepKed wrote:Great work on the custom fit. Looks like a pro job - definitely a unique Triton.

Just out of curiosity, did you consider a black nudge bar with the winch cradle?
Not the look you were going for or something?

Thanks for the post and pics, mate.


Yeah, I had a look at that. I really like that the Xrox doesn't cut into the ground clearance, and has a high mounting point for a light bar, that will keep it out of the dirt.
White 2013 MN GLX+ manual

"Tuned by Doctor Diesel"
User avatar
BillMcQuade
Platinum Subscriber
 
Posts: 2007
Joined: Sun Jun 23, 2013 12:20 pm
Location: The 'Gong

Re: Custom Xrox install

Postby Ray57MQ on Sat Sep 02, 2017 6:06 pm

Yes, neat job Bill !
And like the fact your happy with " it keeps the sensuous curves of the Triton intact " :lol:
Don’t take life so seriously, it isn’t permanent
Ray57MQ
 
Posts: 832
Joined: Sun Sep 18, 2016 2:19 pm
Location: Mid Nth Coast NSW

Re: Custom Xrox install

Postby Joel on Sat Sep 02, 2017 6:22 pm

Looks sweet Bill, nice job. Had you considered the rhino bull bar for the look factor while still being able to fit the winch?
I only drink on days starting with T... Today and Tomorrow
Joel
 
Posts: 835
Joined: Wed Feb 19, 2014 4:56 am
Location: canberra

Re: Custom Xrox install

Postby BillMcQuade on Sat Sep 02, 2017 7:45 pm

Joel wrote:Looks sweet Bill, nice job. Had you considered the rhino bull bar for the look factor while still being able to fit the winch?


Price for the Rhino (without a winch) was $2500+ :shock:
I did the whole job for less than $1500.

The Rhino doesn't have a high mounting point for a light bar.
White 2013 MN GLX+ manual

"Tuned by Doctor Diesel"
User avatar
BillMcQuade
Platinum Subscriber
 
Posts: 2007
Joined: Sun Jun 23, 2013 12:20 pm
Location: The 'Gong

Re: Custom Xrox install

Postby BillMcQuade on Sat Sep 02, 2017 7:47 pm

Ray57MQ wrote:Yes, neat job Bill !
And like the fact your happy with " it keeps the sensuous curves of the Triton intact " :lol:


That will become a new theme in the "6 letter word" thread. :lol:
White 2013 MN GLX+ manual

"Tuned by Doctor Diesel"
User avatar
BillMcQuade
Platinum Subscriber
 
Posts: 2007
Joined: Sun Jun 23, 2013 12:20 pm
Location: The 'Gong

Re: Custom Xrox install

Postby RHKTriton on Sat Sep 02, 2017 9:05 pm

Nice job there Bill.

I'd like to build my own bar however all the new regulation has killed that prospect.

I tried the hypothetical with ARB a few years ago to use their mounting brackets to support my bar work, but they didn't want to play. :(

My reasoning is that everything on the front side of the mounting kit is irrelevant as you could impact a mini minor or Mac truck and the bar isn't going to change the deformation rate of the brackets,etc.

I think you've achieved a good compromise in supporting a winch without having a whole 'balcony' out front.
Don't let the b'strds get you down!!
RHKTriton
Platinum Subscriber
 
Posts: 4732
Joined: Wed Jun 10, 2009 10:05 pm
Location: La trobe Valley - Gippsland

Re: Custom Xrox install

Postby Probz on Sun Sep 03, 2017 9:09 am

Thats some good ingenuity i like the install. Not meaning to be a Debbie downer but i used to be a risk assessor for mobile plant so it kind of sticks out to me that cutting the intrusion bar and drilling spot welds may have the same effect of changing airbag and adr compliance as fitting a tucked in winch cradle?

Sent from my SM-G930F using Tapatalk
Probz
 
Posts: 73
Joined: Sun Jun 28, 2015 7:52 am
Location: Newcastle

Re: Custom Xrox install

Postby BillMcQuade on Sun Sep 03, 2017 10:06 am

Probz wrote:Thats some good ingenuity i like the install. Not meaning to be a Debbie downer but i used to be a risk assessor for mobile plant so it kind of sticks out to me that cutting the intrusion bar and drilling spot welds may have the same effect of changing airbag and adr compliance as fitting a tucked in winch cradle?

Sent from my SM-G930F using Tapatalk


The intrusion bar is taken out of play by the Xrox. You would need a massive hit to even touch it. The shock sensor for the airbag will work regardless.
White 2013 MN GLX+ manual

"Tuned by Doctor Diesel"
User avatar
BillMcQuade
Platinum Subscriber
 
Posts: 2007
Joined: Sun Jun 23, 2013 12:20 pm
Location: The 'Gong

Re: Custom Xrox install

Postby RHKTriton on Sun Sep 03, 2017 11:08 am

I would think the front end engineering will be based on the majority types of impact, you can't cover every possible case.

The critical area is not to bridge any designed crumple zones in the body work or chassis rails, like some of the recovery eyes out there seem to have done.

The original intrusion bar is there because there is no substantial material ahead of it normally. Bill's now got a new member across the front, albeit further forward.
Don't let the b'strds get you down!!
RHKTriton
Platinum Subscriber
 
Posts: 4732
Joined: Wed Jun 10, 2009 10:05 pm
Location: La trobe Valley - Gippsland

Re: Custom Xrox install

Postby Probz on Sun Sep 03, 2017 2:42 pm

Makes perfect sense i wouldn't think it would be a structural issue more a compliance technicality similar to that of bracing the chassis with a winch mount. I was more curious as it is still a deviation from the factory occupant protection structure and unless xrox stated to cut that and took on the liability it would open up the owner to liability if the worst was to occur

Sent from my SM-G930F using Tapatalk
Probz
 
Posts: 73
Joined: Sun Jun 28, 2015 7:52 am
Location: Newcastle

Re: Custom Xrox install

Postby BillMcQuade on Sun Sep 03, 2017 3:46 pm

Probz wrote:Makes perfect sense i wouldn't think it would be a structural issue more a compliance technicality similar to that of bracing the chassis with a winch mount. I was more curious as it is still a deviation from the factory occupant protection structure and unless xrox stated to cut that and took on the liability it would open up the owner to liability if the worst was to occur

Sent from my SM-G930F using Tapatalk


It's not an occupant protection structure, that duty is taken care of by the structure of the cabin, and various deformation points in the chassis (plus the plethora of airbags). The front intrusion panel is there to provide some bracing for the front bumper so that it doesn't deform when it gets a light hit. "Intrusion" is probably the wrong word, "support" would be more accurate.

From a compliance point of view, it's still light years in front of the monster truck 90's era Patrols that you regularly see on the road, usually driven by P platers, and don't get me started on some of those massive, plough-type bullbars that you see on utes with RM Williams stickers.

The bottom line is that from a liability point of view, they would have me on tyre size for starters. The long list goes on from there..........
White 2013 MN GLX+ manual

"Tuned by Doctor Diesel"
User avatar
BillMcQuade
Platinum Subscriber
 
Posts: 2007
Joined: Sun Jun 23, 2013 12:20 pm
Location: The 'Gong

Re: Custom Xrox install

Postby Intruder on Wed Sep 06, 2017 3:21 pm

Great job on the install. Been pondering installing an xrox without the wings for some time, so good to see it's been done. Nice write up too. Have a few questions for you if I may.

In my case the tug is more of a tourer/tow vehicle than than serious off-road beast so probably don't need a winch, and don't want the weight of a full bull bar. Looking at the photos I'm guessing the only reason you had to cut the intrusion bar was due to clearance for the winch, so if no winch installed no need to cut intrusion bar?

Side on photo shows it sits pretty snug to front bar so also guessing that bar would need to be cut as you've done, ie not just cut slots for mounting points in a no winch install?

Finally, were you able to buy the bar without the side wings? I have enough useless stuff stored in the garage now, can always add more if I have to though.

Looks like I'll have to get this off the "to do" list and actually do it I think.

Cheers and thanks,

Andrew
Yes... I'll have another beer.
Intruder
Platinum Subscriber
 
Posts: 47
Joined: Thu Jan 10, 2013 5:29 am
Location: Hobart, Tasmania

Re: Custom Xrox install

Postby BillMcQuade on Wed Sep 06, 2017 5:26 pm

Hi Andrew,

Yes, you have to cut the plastic bar, as the Xrox sits in close. I only cut notches initially, as I didn't want to take off a lot of material until I had worked out the cut.

If you were fitting a smaller bodied winch, you would not have to cut the bumper support.

No, you can't buy it without the wings, however, they would probably be fairly easy to sell.

Cheers,

BM
White 2013 MN GLX+ manual

"Tuned by Doctor Diesel"
User avatar
BillMcQuade
Platinum Subscriber
 
Posts: 2007
Joined: Sun Jun 23, 2013 12:20 pm
Location: The 'Gong

Re: Custom Xrox install

Postby Intruder on Wed Sep 06, 2017 7:16 pm

Thanks mate.

A
Yes... I'll have another beer.
Intruder
Platinum Subscriber
 
Posts: 47
Joined: Thu Jan 10, 2013 5:29 am
Location: Hobart, Tasmania

Re: Custom Xrox install

Postby BillMcQuade on Sat Sep 16, 2017 3:59 pm

So, I finally got around to sorting out the control box for the winch. I wanted to remote mount the unit, and as we all know, there is SFA room in the Triton engine bay. I ended up mounting it on the passenger side firewall, next to the battery box. I fabricated some mounts, and used the bolt holes that mount the fuel pipe.

Click to view larger picture

I wanted to have the ability to isolate the +ve supply, in case things went tits-up, so I mounted an isolation switch next to the battery. It's not carrying any mechanical load, so the battery tray was a plenty strong enough location.

Click to view larger picture

I had to make cables for it, and I had a roll of red 35mm*2 cable laying around. It's a very high quality, multi-strand braided battery cable. I only had red, but you work with what you have :lol: I am also fortunate to have a hex lug crimper to fit this size cable, and used good quality 35-8 lugs. This required the removal of the factory cable, and fitting in my (much heavier duty) cables. It took a looooong time. There isn't much room in the control box, and I had to make rubber spacers to ensure that nothing was touching anything else. I ran the cables through some anaconda, so that they don't chafe on any of the many sharp edges in the Triton engine bay.

Click to view larger picture

I ran the cables into a poly elbow that I had in the shed. It collects them nicely and keeps the airflow around the cables. They can get quite hot when winching, so I didn't want to enclose them. The rest of the cable will have spiral wrap from the elbow to the winch. This will keep them bunched, but let the air flow around them. The elbow looks a bit crap, but I have done this on every winch install, and it works well. I ran them past the radiator center support, which has pinchweld on the edges to stop chafing. I have temporarily secured them until my spiral wrap arrives.

Click to view larger picture

Next they radius over the top of the intercooler. They don't actually touch the intercooler, but I put a bit of pinchweld over the leading edge, just to be sure. The winch motor connections are right in front of the intercooler.

Click to view larger picture

Last job will be the infill panel between the Bushskinz bash plate and the Xrox. I am trying to scrounge some stainless expanded diamond mesh, which I will weld a frame for, otherwise, I will do it in mild steel and powdercoat it. Update to follow.
White 2013 MN GLX+ manual

"Tuned by Doctor Diesel"
User avatar
BillMcQuade
Platinum Subscriber
 
Posts: 2007
Joined: Sun Jun 23, 2013 12:20 pm
Location: The 'Gong

Re: Custom Xrox install

Postby snakesoup on Sun Sep 17, 2017 8:44 pm

I like it! Going to buy a dominator soon so might pinch some of your ideas!

Sent from my SM-G900I using Tapatalk
User avatar
snakesoup
 
Posts: 1115
Joined: Sun Feb 02, 2014 2:24 pm

Re: Custom Xrox install

Postby RHKTriton on Mon Sep 18, 2017 8:41 am

Busy boy Bill! :lol:
Don't let the b'strds get you down!!
RHKTriton
Platinum Subscriber
 
Posts: 4732
Joined: Wed Jun 10, 2009 10:05 pm
Location: La trobe Valley - Gippsland


Return to Exterior Mods

Who is online

Users browsing this forum: No registered users and 5 guests