Godzilla Rising's Build Up
-
smouch1975 - Posts: 614
- Joined: Wed Jun 16, 2010 1:38 pm
- Location: Rockingham WA
Re: Godzilla Rising's Build Up
![]() by trumpy955 on Sat May 19, 2012 8:39 am
by trumpy955 on Sat May 19, 2012 8:39 am
-

trumpy955 - Posts: 2073
- Joined: Thu Feb 17, 2011 2:41 pm
- Location: Gladstone , central coast QLD
Re: Godzilla Rising's Build Up
![]() by godzilla_rising on Sat May 19, 2012 8:08 pm
by godzilla_rising on Sat May 19, 2012 8:08 pm
"Kate's Dirty Sister" click here
2007 3.2 DiD GLX-R
There are two kinds of people in this world, those that can extrapolate from incomplete data.
-
godzilla_rising - Posts: 1027
- Joined: Tue Dec 13, 2011 3:39 pm
- Location: Brisbane, Queensland
Re: Godzilla Rising's Build Up
![]() by godzilla_rising on Mon May 21, 2012 5:19 pm
by godzilla_rising on Mon May 21, 2012 5:19 pm
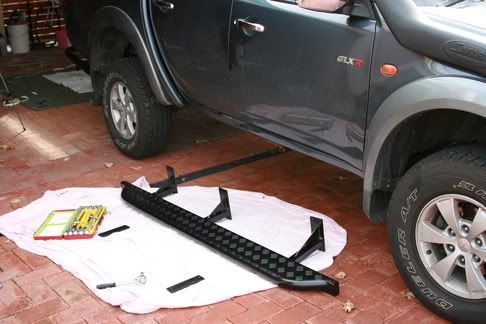
This has come about due to the fact that I picked up my Wasp 4x4/Hazzard Engineering Rocksliders yesterday, and then subsequently fitted them today.
As always, when new things are about to be put on, things have to be removed...so it was off with the original Mitsubishi Side Steps.
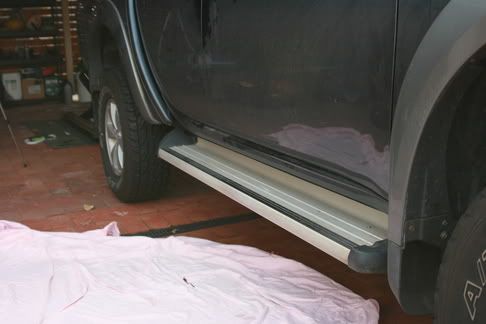
I have always liked the look of the Tritons without the sidesteps, well, to be more precise, I LOVE the look of the Tritons with the Xrox Rocksliders, but bugger paying the grand or so that they are!!!
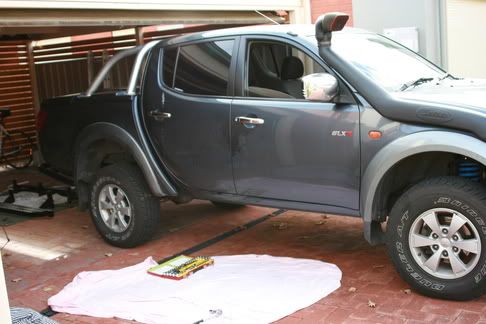
And so I got the new ones into place nearby ready for installation...
And then this is the final product!!!
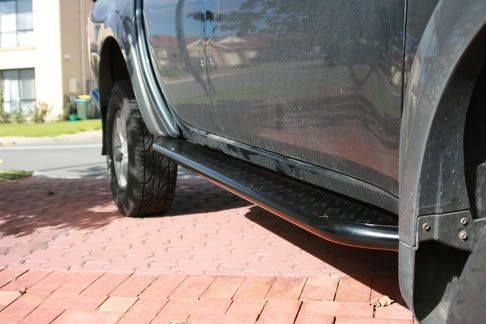
I am so glad that I got all my checkerplate powdercoated, as I think the overall look is
So as I said, thats about it for now. After all the work I have done, there is only really 2 more things that are high priority maybes. One being some roof racks, the other being an LED Lightbar, and then some minor bits and pieces here and there to tidy everything up.
Then again, I have no doubt that things will change...oh, and she needs a bath...she will be clean before I head off to the High Country, though I doubt she will stay that way for long...
"Kate's Dirty Sister" click here
2007 3.2 DiD GLX-R
There are two kinds of people in this world, those that can extrapolate from incomplete data.
-
godzilla_rising - Posts: 1027
- Joined: Tue Dec 13, 2011 3:39 pm
- Location: Brisbane, Queensland
Re: Godzilla Rising's Build Up
![]() by godzilla_rising on Tue May 22, 2012 4:06 pm
by godzilla_rising on Tue May 22, 2012 4:06 pm
Its not really much, just some small little bits and pieces that will hopefully make my car a bit more useful.
Firstly, I think I made mention the other day that I was resealing my tonneau cover due to the dog having a bit of a chew on the rubbers back when he was a puppy. Well, in addition to that I decided to have a look at those little side flappy bits that go around the bottom of the sports bar. You all know what I am talking about...anyway, I noticed that they were quite loose and floppy so I decided to investigate. Also, apart from being loose and floppy, there was quite a significant gap between a significant portion of the tonneau cover and these bits, which was the original catalyst for me wanting to seal everything up again in the first place.
I also knew that a bolt had fallen out of one of the tubes at some stage and I thought that would be a contributing factor. So I had a look and it seemed like these screws were there and not doing anything. Insert a couple of largish washers and a new bolt for one of them, everything nipped up and now, they sit at the angle that they are supposed to. This means that that bloody gap is no longer there!!! Huzzah I said, before promptly looking for any other gaps and light that I could seal up with the leftover foam strip (ie along the forward edge of the tub...where the lid hinges etc).
After doing all the sealing, and being adequately happy, I decided to throw in a bit of chain to tie stuff down with. I had always raged at the apparent lack of tie down points in my ute, and had seen what Snooozy and a few other had done. As I had been looking at Snooozys build recently, it jogged my memory and so off to Bunnings it was for me!
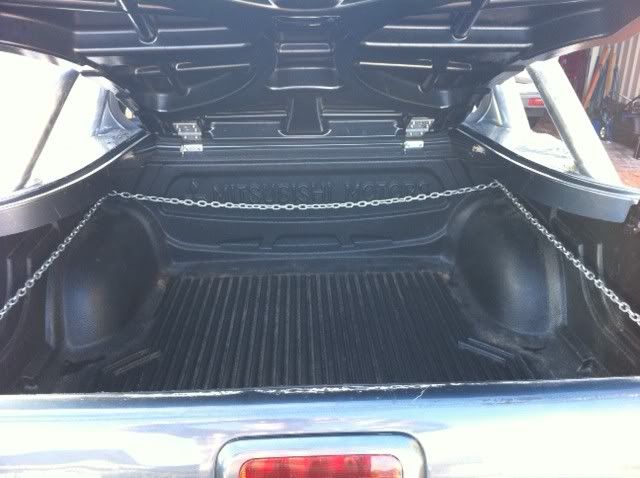
I think this may only be a temporary thing, as later on down the track I might get those rail/track things from ARB or similar. I wonder if the noise of it rattling will get to me, overall its pretty tight, so it might only be the odd bump here and there.
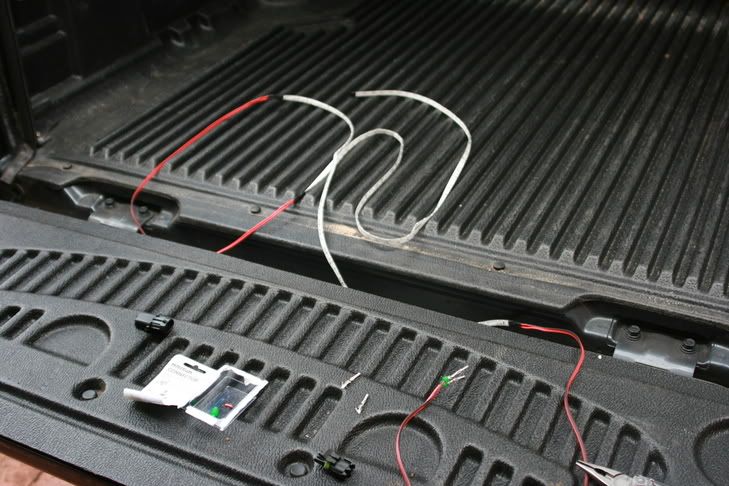
While I was at it, I thought I might also tackle a MAP sensor mod. I had previously purchased the items required for Longrangers Mod, attaching it to the intercooler pipe etc, however as I cant braze it myself, or because I havent pulled the pipe out yet, I have gone for a slightly temporary fix in the meantime.
This photo shows the rest of the stuff for the Longranger Mod
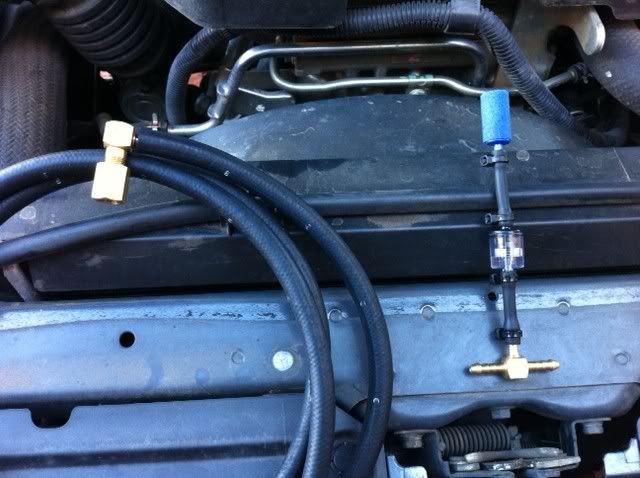
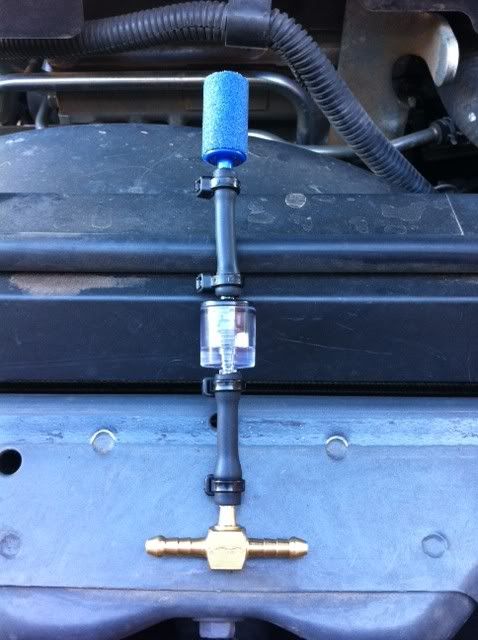
And a closeup view of the "temp" solution...
And then the installed product.
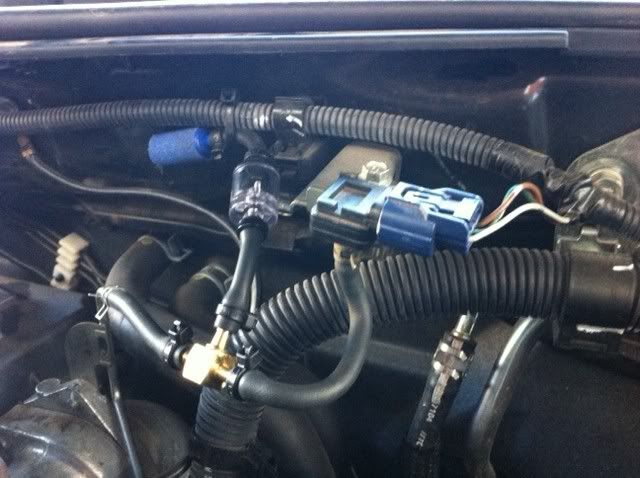
I dont know which is going to perform better or not. Im sure there will be a few tweaks to the setup as well, such as sourcing a better one way valve etc. So until then...
P.S. Apologies for the crappy iPhone pics...it was a spur of the moment modification day, and I didnt want to get my SLR out. Meh...
"Kate's Dirty Sister" click here
2007 3.2 DiD GLX-R
There are two kinds of people in this world, those that can extrapolate from incomplete data.
-
godzilla_rising - Posts: 1027
- Joined: Tue Dec 13, 2011 3:39 pm
- Location: Brisbane, Queensland
Re: Godzilla Rising's Build Up
![]() by godzilla_rising on Fri Jun 15, 2012 7:10 pm
by godzilla_rising on Fri Jun 15, 2012 7:10 pm
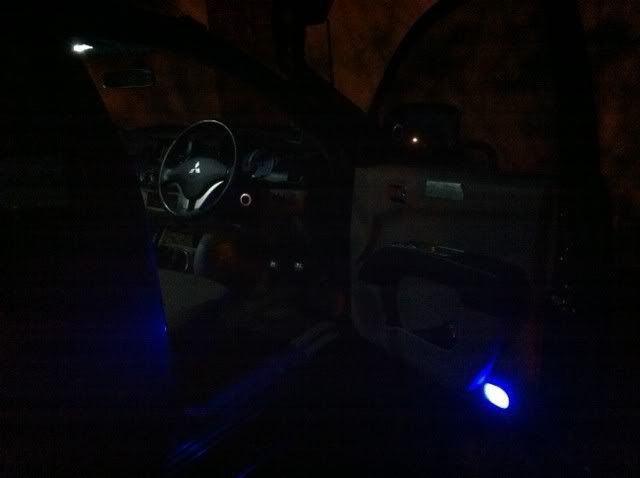
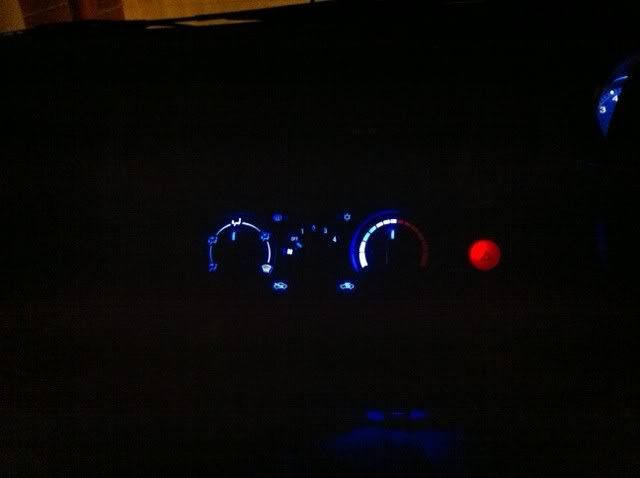
The LED's were ordered before I left, but they didnt arrive in time for the trip so I got to fit them now. All up, I did the Cabin Lights, all four door lights and then the air con lights. The doors and air con lights were done in blue to match everything else (including the UHF). So here are a few pics...
I really Pulled everything apart here...
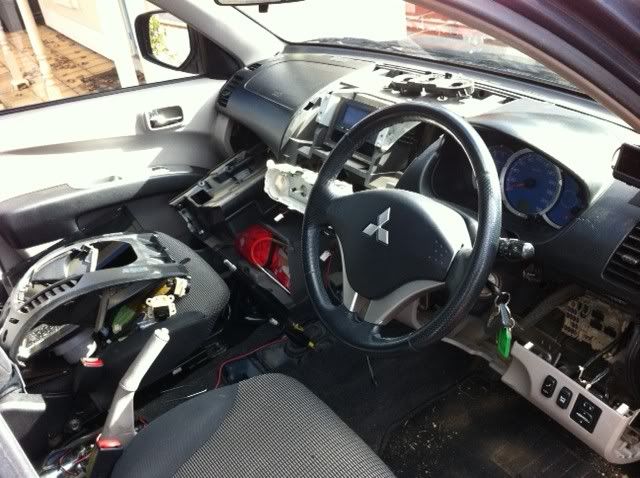
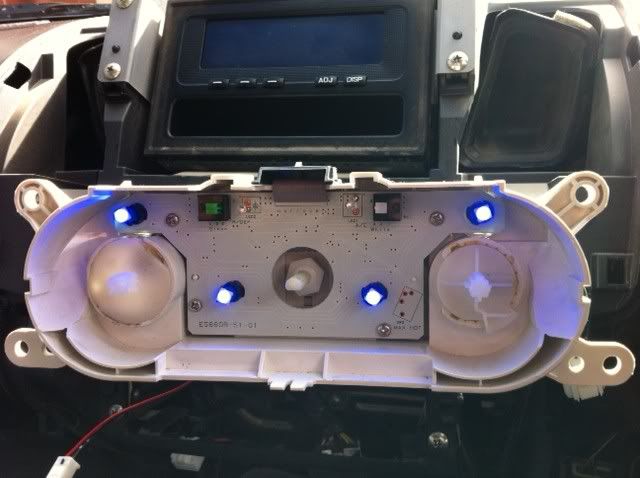
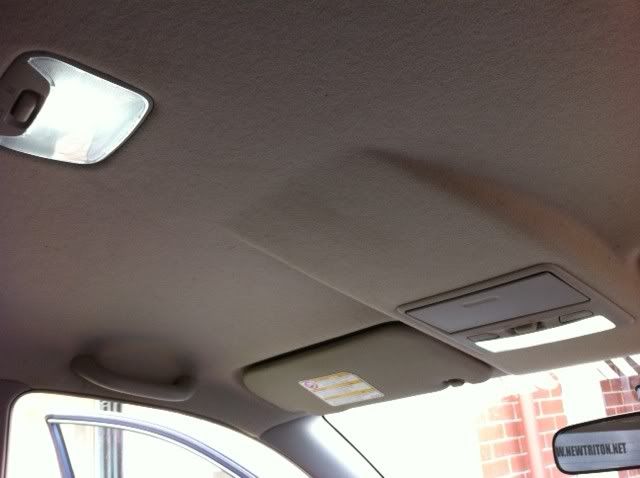
Finished product...
And I might need to get a different LED for the top left, just to fill in the rest of the left dial a bit better
More to come soon!!!
"Kate's Dirty Sister" click here
2007 3.2 DiD GLX-R
There are two kinds of people in this world, those that can extrapolate from incomplete data.
-
godzilla_rising - Posts: 1027
- Joined: Tue Dec 13, 2011 3:39 pm
- Location: Brisbane, Queensland
Godzilla Rising's Build Up
![]() by timbo on Fri Jun 15, 2012 7:22 pm
by timbo on Fri Jun 15, 2012 7:22 pm
-
timbo - Posts: 289
- Joined: Mon Aug 30, 2010 6:22 pm
- Location: bundoora vic
Re: Godzilla Rising's Build Up
![]() by godzilla_rising on Fri Jun 15, 2012 7:30 pm
by godzilla_rising on Fri Jun 15, 2012 7:30 pm
timbo wrote:LED's look awesome mate but also looks like a lot of work don't think I could go through taking the dash off again never ends up back together right. Love your work mate
Nah it wasnt too bad, do it once and now I know how to do it...
"Kate's Dirty Sister" click here
2007 3.2 DiD GLX-R
There are two kinds of people in this world, those that can extrapolate from incomplete data.
-
godzilla_rising - Posts: 1027
- Joined: Tue Dec 13, 2011 3:39 pm
- Location: Brisbane, Queensland
Re: Godzilla Rising's Build Up
![]() by har05l on Fri Jun 15, 2012 8:06 pm
by har05l on Fri Jun 15, 2012 8:06 pm
That's very ambitious GD, dash and sh1t everywhere
Very
-
har05l - Platinum Subscriber
- Posts: 5575
- Joined: Wed Sep 08, 2010 5:01 pm
- Location: Cambridge Park
Godzilla Rising's Build Up
![]() by joelzo on Fri Jun 15, 2012 10:22 pm
by joelzo on Fri Jun 15, 2012 10:22 pm
-

joelzo - Posts: 181
- Joined: Wed Mar 16, 2011 6:38 pm
- Location: Northern Suburbs, Melbourne.
Re: Godzilla Rising's Build Up
![]() by godzilla_rising on Sat Jun 16, 2012 7:33 am
by godzilla_rising on Sat Jun 16, 2012 7:33 am
joelzo wrote:Hey looks sweet. Got any more info on the leds used?
Yeah mate, the LED's were just ordered through ebay and they were a selection of T5 and T10 bulbs of the colours that I wanted.
If you go "HERE" you should be able to get a better idea...Kyjibo is the LED master (apparently) and has put up some useful information. Do yourself a favour though and get them off ebay. Autobarn are selling similar products but charging $30 for 2, whereas I bought 24 various LEDs in total and it only cost me $15.
"Kate's Dirty Sister" click here
2007 3.2 DiD GLX-R
There are two kinds of people in this world, those that can extrapolate from incomplete data.
-
godzilla_rising - Posts: 1027
- Joined: Tue Dec 13, 2011 3:39 pm
- Location: Brisbane, Queensland
Re: Godzilla Rising's Build Up
![]() by gls_triton on Sat Jun 16, 2012 8:37 am
by gls_triton on Sat Jun 16, 2012 8:37 am
Looking tops mate!
Kieran
2008 ML GLS "Panther"
ARB Sahara Bar | Safari Snorkel | Warn Winch | Goodyear Wrangler A/T Adventure | IPF 900XS Lights
-
gls_triton - Posts: 931
- Joined: Tue Dec 13, 2011 9:28 am
- Location: Springfield, QLD
Re: Godzilla Rising's Build Up
![]() by godzilla_rising on Sun Jul 01, 2012 4:32 pm
by godzilla_rising on Sun Jul 01, 2012 4:32 pm
The call is going out for another session of drinking beers and doing a little bit of work on "Kates Dirty Sister".
So if you want to come around and drink some beer, eat some snags (I will actually get them on the BBQ this time!) then I am thinking next Sunday the 8th of July. You are more than welcome to use the time to do anything to your cars, and if you have any dogs that would love to run around with Calvin, we can throw them into the back yard as well!!! So let me know if you are keen!!!
"Kate's Dirty Sister" click here
2007 3.2 DiD GLX-R
There are two kinds of people in this world, those that can extrapolate from incomplete data.
-
godzilla_rising - Posts: 1027
- Joined: Tue Dec 13, 2011 3:39 pm
- Location: Brisbane, Queensland
Godzilla Rising's Build Up
![]() by big_bob_thefirst on Sun Jul 01, 2012 5:22 pm
by big_bob_thefirst on Sun Jul 01, 2012 5:22 pm
When they wake up in the morning, that's the best they're going to feel all day.
-
big_bob_thefirst - Platinum Subscriber
- Posts: 995
- Joined: Thu Oct 06, 2011 9:18 pm
- Location: Adelaide, South Australia
Godzilla Rising's Build Up
![]() by motoz on Sun Jul 01, 2012 5:40 pm
by motoz on Sun Jul 01, 2012 5:40 pm
I'll be doing some electrical installs on my rig after work this week if you wanted to do some then.
-

motoz - Platinum Subscriber
- Posts: 3049
- Joined: Sat Jun 26, 2010 9:23 pm
- Location: Adelaide Hills
Re: Godzilla Rising's Build Up
![]() by godzilla_rising on Sun Jul 01, 2012 8:34 pm
by godzilla_rising on Sun Jul 01, 2012 8:34 pm
"Kate's Dirty Sister" click here
2007 3.2 DiD GLX-R
There are two kinds of people in this world, those that can extrapolate from incomplete data.
-
godzilla_rising - Posts: 1027
- Joined: Tue Dec 13, 2011 3:39 pm
- Location: Brisbane, Queensland
Re: Godzilla Rising's Build Up
![]() by godzilla_rising on Sat Jul 07, 2012 6:08 pm
by godzilla_rising on Sat Jul 07, 2012 6:08 pm
"Kate's Dirty Sister" click here
2007 3.2 DiD GLX-R
There are two kinds of people in this world, those that can extrapolate from incomplete data.
-
godzilla_rising - Posts: 1027
- Joined: Tue Dec 13, 2011 3:39 pm
- Location: Brisbane, Queensland
Re: Godzilla Rising's Build Up
![]() by godzilla_rising on Wed Sep 19, 2012 4:36 pm
by godzilla_rising on Wed Sep 19, 2012 4:36 pm
When I last look at when I did somthing to "Kate's Dirty Sister" well it really has been a while. As with probably a lot of you, I came back from the High Country Trip with a list of things that I wanted to do to the car. This list has grown and shrunk, ebbed and flowed, and little bits have been done here and there.
So to try and think back to around July when some of this all started. Looking at the photos sure does help jog the memory, but when you are one camera down (I dont know where it is in the house at the moment) it makes things just a little more difficult.
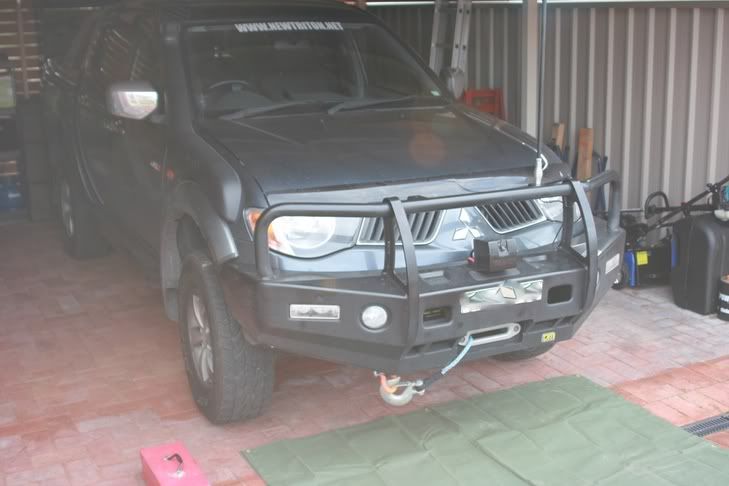
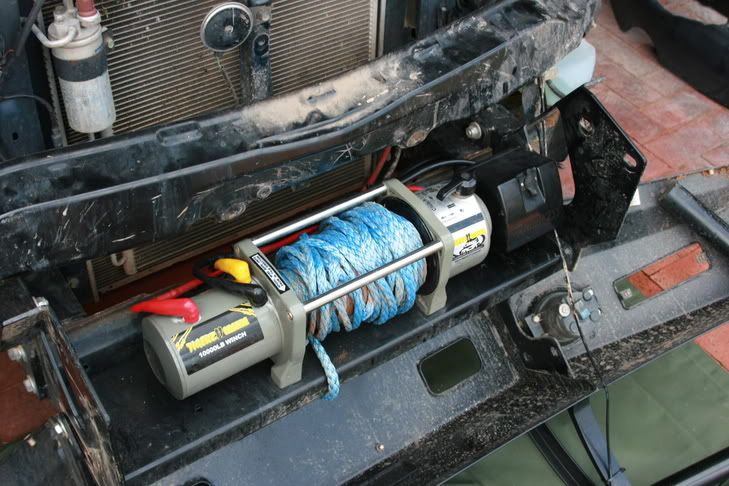
So the last thing that I wrote about/mentioned was that I was going to or had spent the day moving my winch control box to beneath my bullbar to make room for my Red Dog Offroad 22" LED Lightbar. This involved dropping the bullbar to get access to the winch cradle which would be its new home. This wasnt really that big of a job as with the TJM T13 Outback Bar you just have to take out 4 bolts and loosen 2. The whole bar then just hinges forward...as seen here...
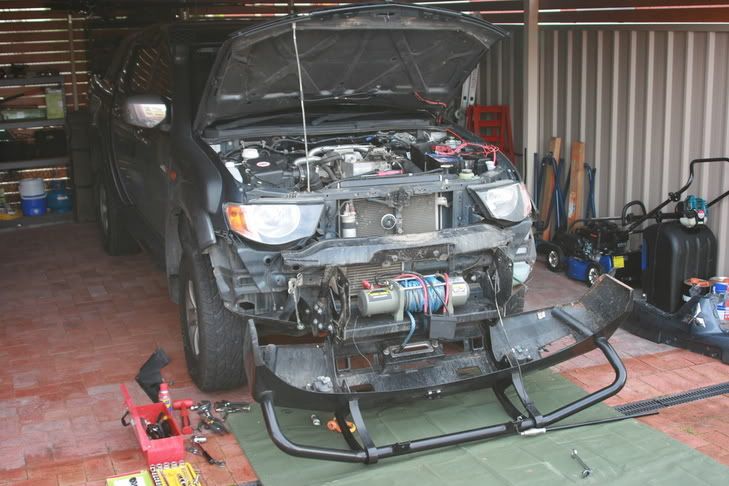
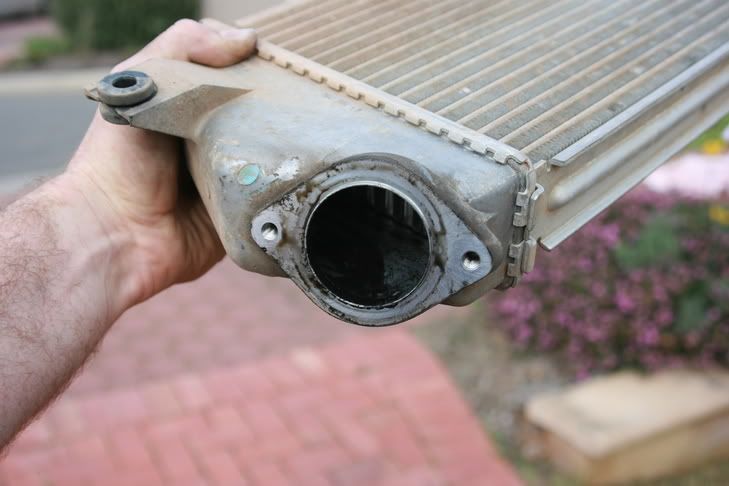
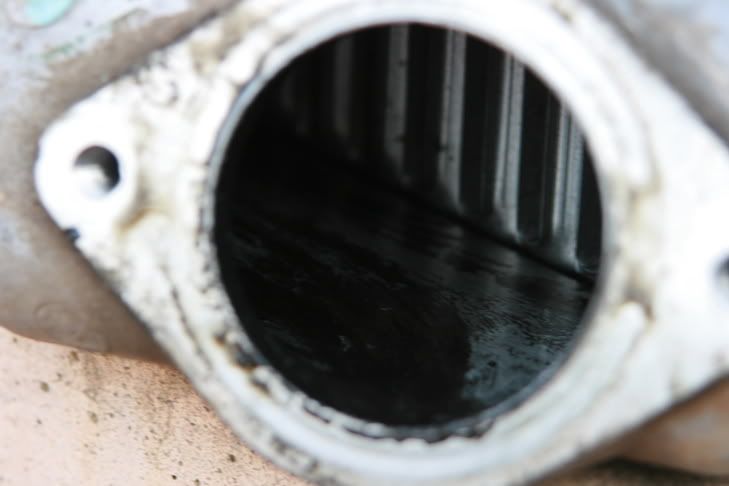
So I thought that this would be an awesome time to pull out the intercooler and give it a bit of a clean. There was a quite a bit of oil in there so it took a bit of time to get it all nice and clean. I was a little bit unsure as to the "not supposed to have residual fumes" left, so I tried to hurry things along a little bit...

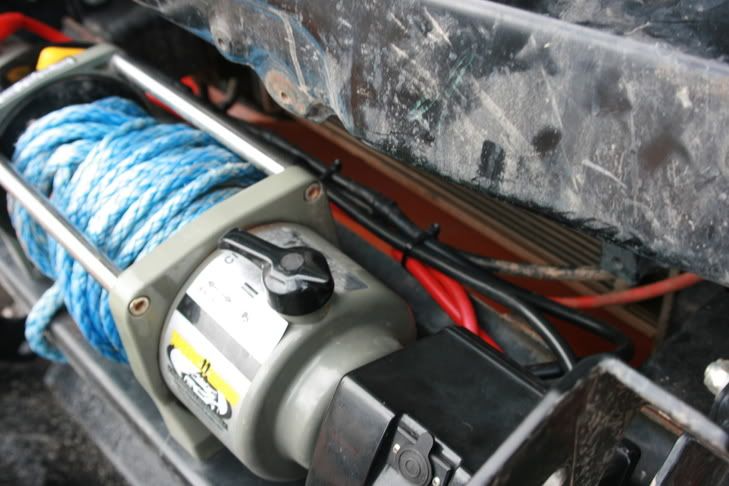
Then it was the control box. I had to extend the cables so that it would sit there, but at least that enabled me to tidy things up a little bit. I did later rewrap the winch. It was just left like that after the High Country. It needed a clean and so again it was a perfect opportunity to.
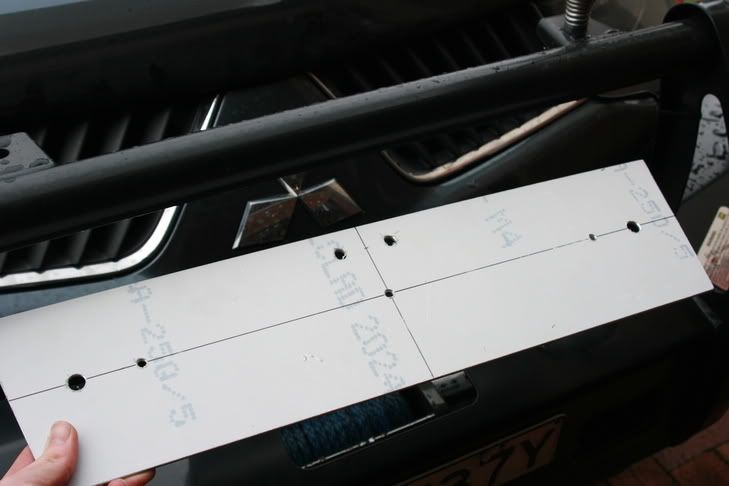
I think by this stage I had received my LED Lightbar from Boycee, and so I set about trying to figure out how to get it all set up. Originally, I was hoping to use the original mounts on the bullbar, but the distance between these holes, and the bolts on the lightbar were too far, so I got to brainstorming how I could go about attaching my lightbar. I ended up getting some aluminium plate from work and after measuring and cutting it up, drilled some holes to make use of the oringinal mount holes and the 2 that I had drilled for the winch control box. I sprayed it black and also got some leftover foam strip to seal up the front and sides of it. Mounted up and it turned out really well.


As some of you helped me out with, I had inadvertantly wired everything up to be powered off the highbeam circuit, instead of drawing all its power from the battery. Not to worry though, as I fixed the problem now and it works fantastically. I even upgraded my switch to a 3 gang bank for future spots. It all looks a little neater now, although I am tempted to source a new lower cover bit and start again to neaten things up a little bit. Its good for now though.

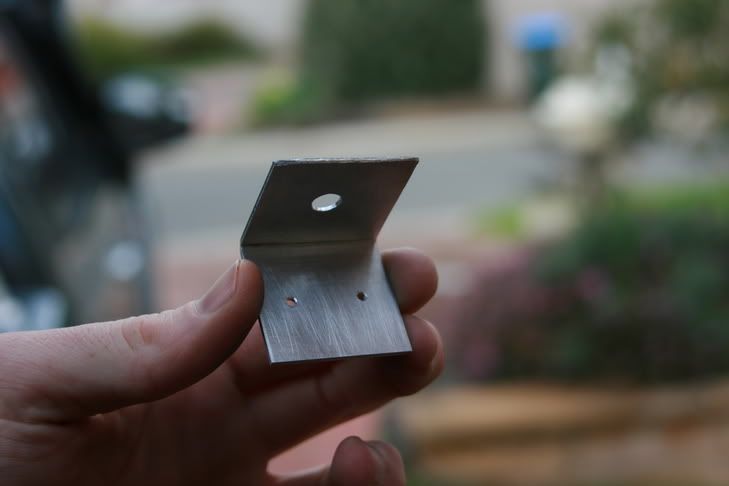
One of the main things I took away from the High Country that I wanted to put in was some LED strip lighting under the bonnet. I had seen this on Motoz's car and it really was a great idea. I pretty well carbon copied Daves setup (as we did it all at his old work) but because I have an ML and he an MN I didnt have anywhere to mount my switch. Another couple of bits of aluminium and I had a bracket made up and mounted to the front of my battery tray. I somehow also jagged the height of the switch so that if I accidently leave it all on, it all switches off when I close the bonnet.


I also decided to expand the idea and light my tray. This now throws out a ridiculous amount of light from the back. Of course, still having the hard tonneau cover meant that it had to be removable as well. So a waterproof plug was included so that I could still take the cover off and everything still work. I have another bracket for the back here as well, and it still needs a bit of tidying up.


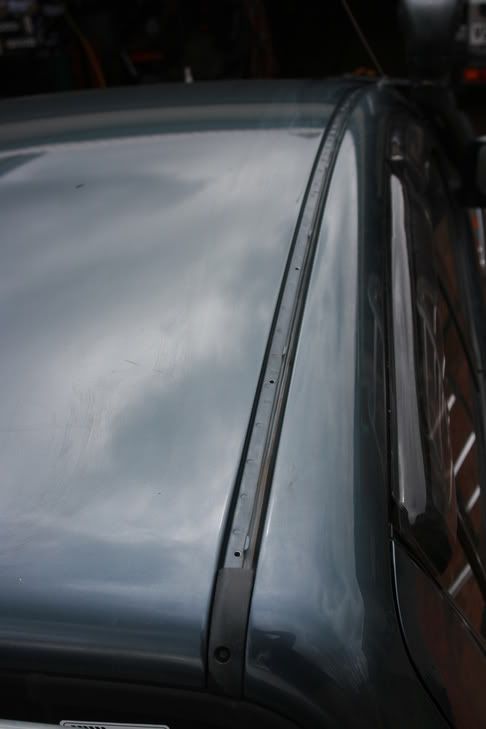
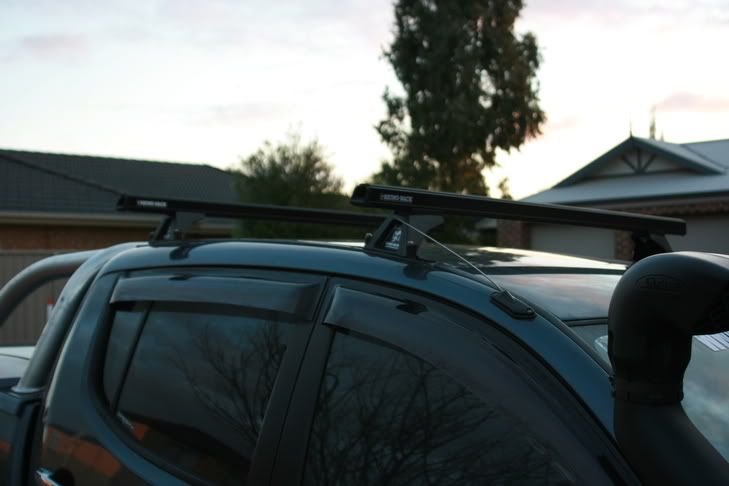
And this brings me on to the roof racks. I had purchased a set of Rhino Racks and Heavy Duty bars through a mate quite cheaply. As with everything I was going to install this myself, but it was not without its dramas. The first major issue that I had was 2 of the rivets decided to shear prematurely leaving half a stem. This meant that I was unable to fully set the rivet, and the point would have been unusable beacuse of the stem sticking up. Not to worry though, because I just tapped it down, drilled the rivets out and started again.
I have noticed with where the front bar is currently, is that I get a lot of wind noise/buffeting from it at speed. I am hoping with a slight adjustment that this may help that, or even if I just get a tray. Now I have to start looking as to the sort of tray that I want to throw on - alloy or steel?

The other main issue was the fact that before I started everything was working, and I didnt perform any work in the cab at all. However when I came to drive it, the trip meter had reset, and the radio and display were not working. I checked all the fuses I thought were related, like computers and radios and everything but did not find what was wrong. It wasnt until I realised that the interior lights were also not working that I thought I would check that fuse. Low and behold it had blown. A quick change and everything was back and working.
So I think that brings us up to date. Just a few small mods done, nothing that major, but all included in one big update. Now the next mod is possibly a battery box/electrical setup of some sort. Though as always, this will probably change at some point. I really must tidy up the electrics just a bit more, but that shouldnt be too hard.
"Kate's Dirty Sister" click here
2007 3.2 DiD GLX-R
There are two kinds of people in this world, those that can extrapolate from incomplete data.
-
godzilla_rising - Posts: 1027
- Joined: Tue Dec 13, 2011 3:39 pm
- Location: Brisbane, Queensland
Re: Godzilla Rising's Build Up
![]() by Crash486 on Wed Sep 19, 2012 6:21 pm
by Crash486 on Wed Sep 19, 2012 6:21 pm
-

Crash486 - Posts: 1591
- Joined: Tue Jan 11, 2011 7:19 pm
- Location: Blue Mountains, NSW
Re: Godzilla Rising's Build Up
![]() by Cowboy Dave on Wed Sep 19, 2012 8:14 pm
by Cowboy Dave on Wed Sep 19, 2012 8:14 pm
-

Cowboy Dave - Moderator
- Posts: 18098
- Joined: Tue Dec 29, 2009 9:46 am
- Location: Sydney
Re: Godzilla Rising's Build Up
![]() by Fruity on Thu Sep 20, 2012 7:37 am
by Fruity on Thu Sep 20, 2012 7:37 am
-
Fruity - Posts: 201
- Joined: Wed Jun 30, 2010 9:43 am
Re: Godzilla Rising's Build Up
![]() by godzilla_rising on Thu Sep 20, 2012 8:08 am
by godzilla_rising on Thu Sep 20, 2012 8:08 am
I might have to look into that rubber idea and try and source some from somewhere. But thanks guys.
"Kate's Dirty Sister" click here
2007 3.2 DiD GLX-R
There are two kinds of people in this world, those that can extrapolate from incomplete data.
-
godzilla_rising - Posts: 1027
- Joined: Tue Dec 13, 2011 3:39 pm
- Location: Brisbane, Queensland
Re: Godzilla Rising's Build Up
![]() by Cowboy Dave on Thu Sep 20, 2012 12:27 pm
by Cowboy Dave on Thu Sep 20, 2012 12:27 pm
-
Cowboy Dave - Moderator
- Posts: 18098
- Joined: Tue Dec 29, 2009 9:46 am
- Location: Sydney
Re: Godzilla Rising's Build Up
![]() by Kingbrown on Thu Sep 20, 2012 12:34 pm
by Kingbrown on Thu Sep 20, 2012 12:34 pm
A huge improvement was gained by fitting a rounded profile to the trailing edge of the bars - to minimise turbulence.
From memory it was some timber moulding (2 pcs of quad ?) glued together and painted and then attached to the bars.
- Kingbrown
- Platinum Subscriber
- Posts: 59
- Joined: Wed Apr 18, 2012 2:31 pm
Re: Godzilla Rising's Build Up
![]() by andyj on Thu Sep 20, 2012 6:34 pm
by andyj on Thu Sep 20, 2012 6:34 pm
-

andyj - Posts: 3245
- Joined: Sat Oct 13, 2007 2:00 pm
- Location: NSW
Who is online
Users browsing this forum: No registered users and 53 guests
![]()