I asked myself what my actual needs were;
- I probably only spend 20% of the time off-road, and it's rarely serious stuff (mainly fire trails).
- I tow a largish van, but don't want to sacrifice on-road manners for the sake of towing.
- I have a canopy on full time, but i don't often carry a lot of weight.
- I like a "spirited" drive, and wanted much better on-road characteristics.
- The vendor must have a local presence for support.
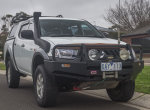
The Ultimate Suspension was a clear fit for these requirements, so I sent Ultimate a PM with an outline of what I wanted to achieve. Brendan was quick to reply, with a detailed quote, and outlined the logic behind the component selection. A couple of PMs later, the deal was struck, and I arranged to pick up the kit from their Ingleburn workshop. I ended up with the Medium load, raised spring kit. In a testament to their service, I ordered the kit on Wednesday night, and it was available for collection in Friday arvo, including the assembled front struts. The kit came with everything you need, including items that other suppliers want to tack on as extras.
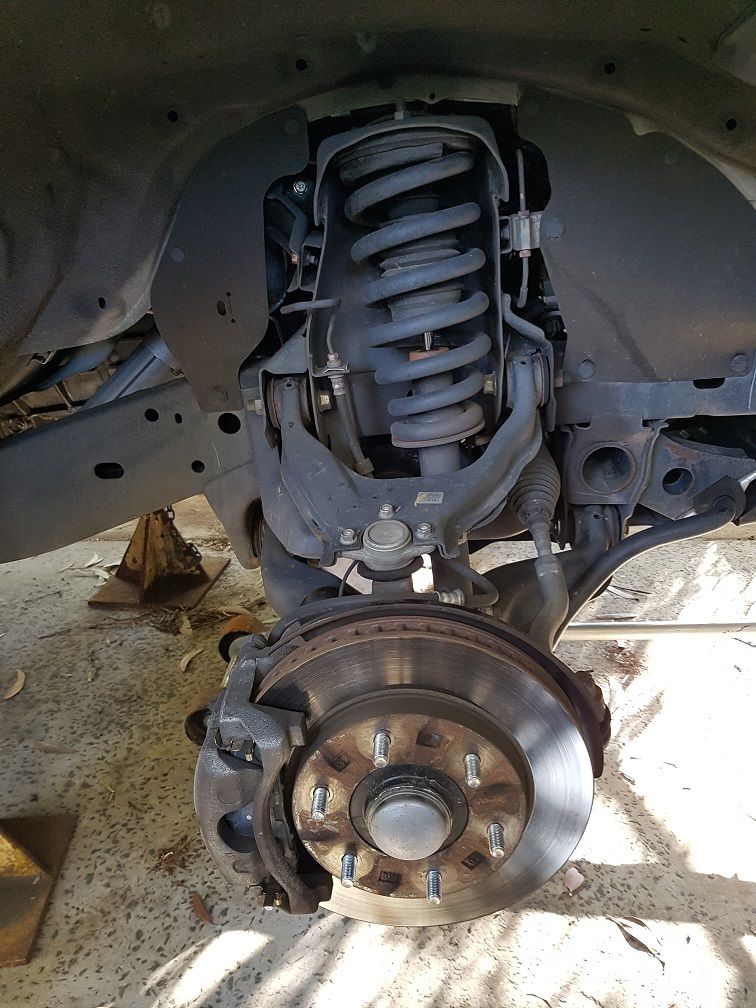
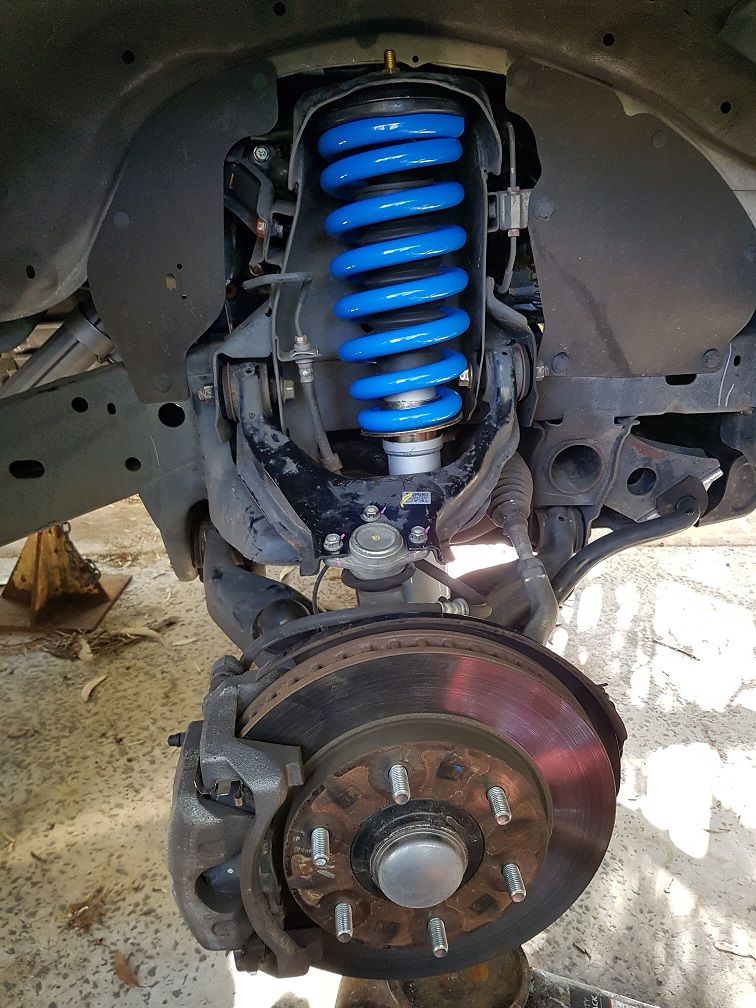
When comparing the OEM gear to the Ultimate gear, you can clearly see the difference;
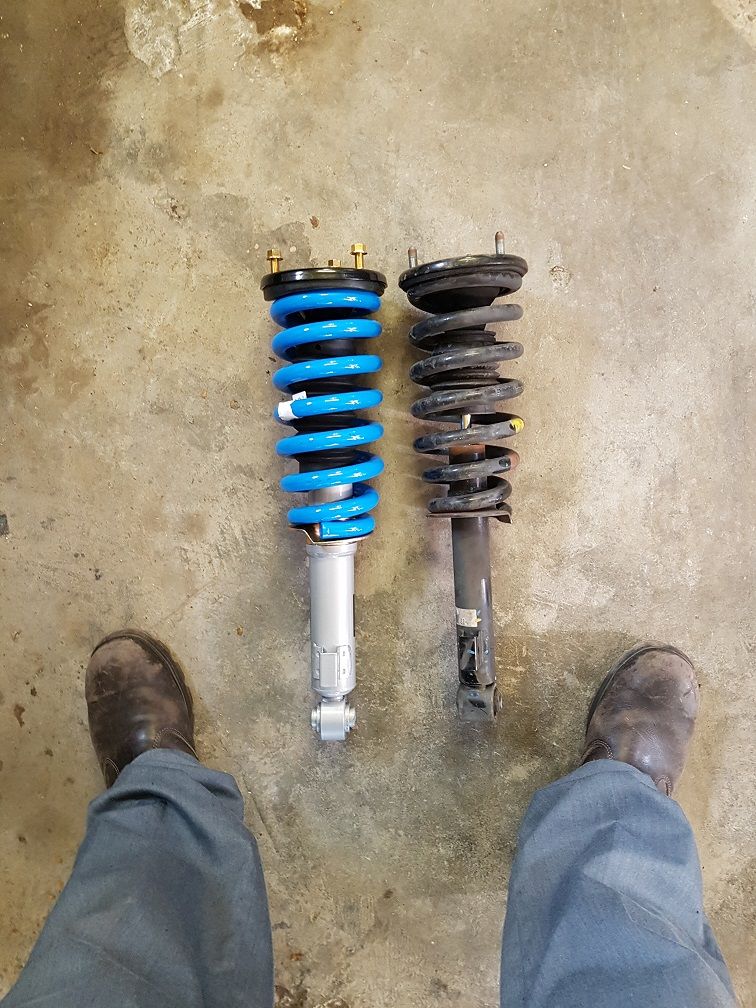
Lovells make these springs to Ultimate's strict specifications.
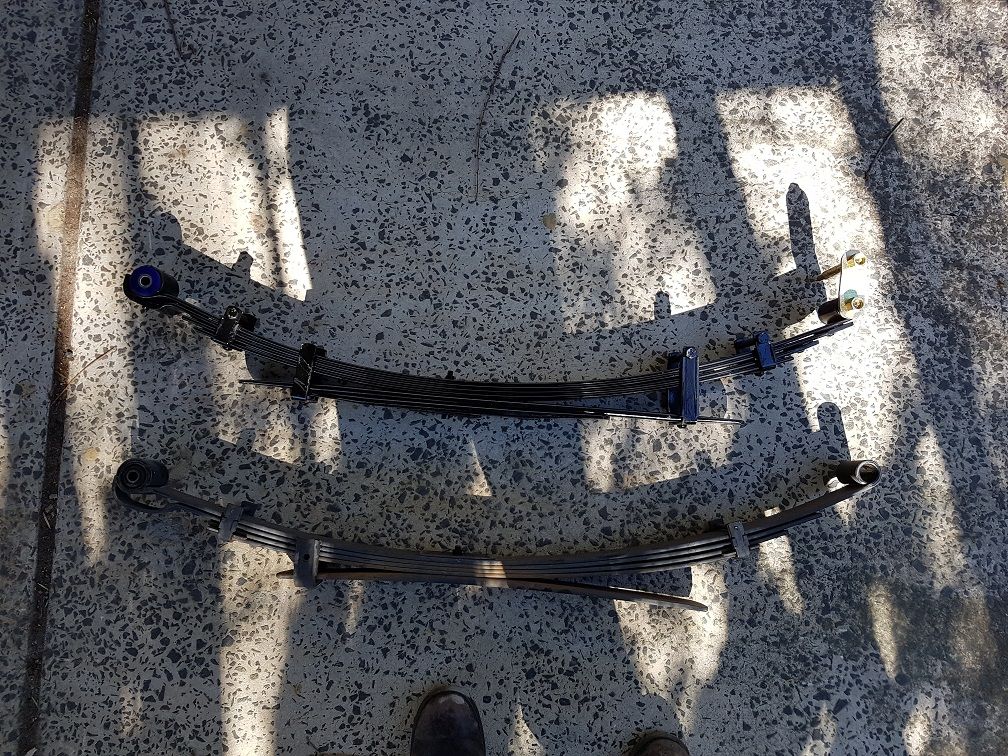
Note the gaps between the leaves of the OEM spring (bottom). Total loss of spring tension.

Good quality, double wall shocks. The valving in the Ultimate shocks is set to complement each suspension package.
Prior to assembly, and after fitting, I took some measurements (Hub centre to flare lip - before/after);
- F/R = 543mm/586mm.
- F/L = 548mm/585mm.
- R/R = 557mm/633mm.
- R/L = 565mm/632mm.
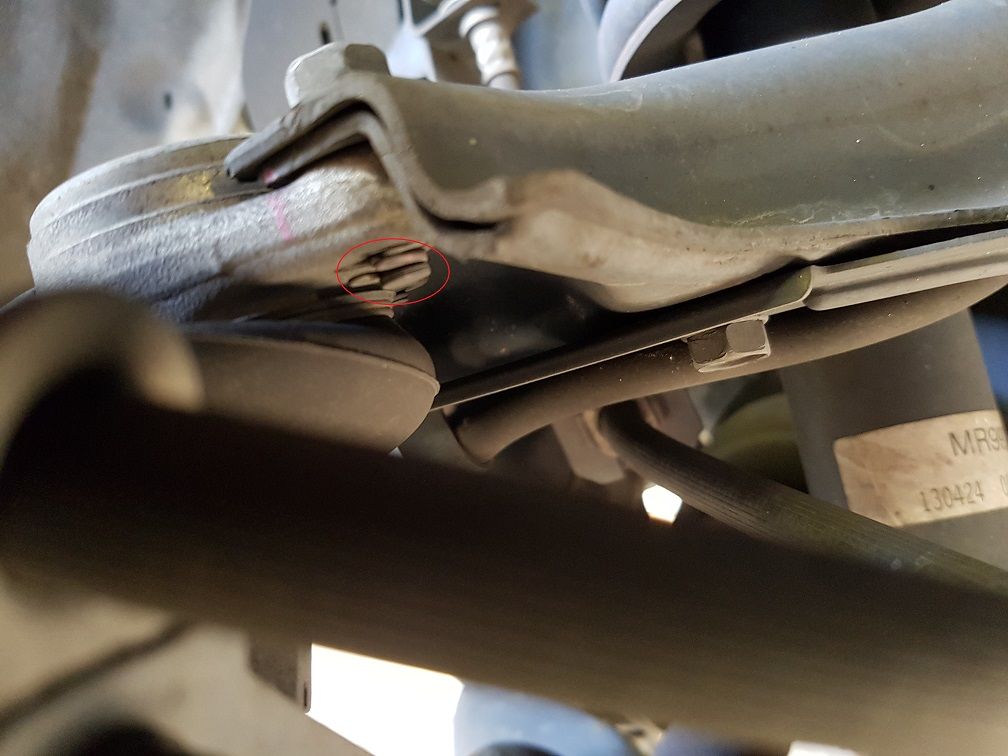
The top balljoint bolts on 2013+ Tritons have a spring clip on the bottom of the 2 side bolts (the one in the middle does not). Don't forget to remove these before unscrewing the bolts!
A couple of tips when fitting;
- SAFETY FIRST
 Use jack stands. Chock wheels. Before you release the top balljoint, make sure the lower arm is correctly supported on a jack.
 - The easiest way to get the struts out and in is by removing the upper control arm. Loosely fit the new top mount of the strut (only by the front of the 3 studs) to give you some wiggle room. Replace the upper control arm bolts prior to refitting the bottom bolt on the struts. You will need a podger/screwdriver to align the bushes. It takes patience.
- Before releasing the top ball joint, retain the hub with an occy strap, you don't want to let the CV joint escape!
- It is necessary to release the front sway bar to get the lower arm, but only the bottom bolt of the link needs to be undone.
- The Superpro greaseable shackle/squeakathane kit is of excellent quality. Be sure to read all the instructions prior to fitting, as there are a number of different length pins and bushes.
- The driveshaft spacer is definitely required, otherwise the takeoff shudder is very annoying. Don't forget to wire brush the mating flanges before fitting the spacer.
- Undoing the OEM propshaft bolts at the diff is absolutely soul destroying. I have never seen bolts this tight. I took the Lord's name in vain many times.
- Leave all the pivot points loose until the vehicle is back on the ground. This allows the bushes to sit in the natural position.
- Loctite the upper arm bolts and the ball joint bolts (don't forget to replace the spring clips).
- Initially, it looks like the brake flexibles on the rear are going to be stretched, once the shocks are installed, the brake lines are in no danger of being stressed.
- Ultimate recommend a 100km shakedown prior to getting the wheel alignment done.
I did the job on in my driveway, by myself and it took 4.5 hours. 45 minutes was spent on the wretched drive shaft
The difference in the ride quality and handling is stunning